# Create and query your first conversational AI
# Create your first AI version
The first thing we will need to do before building the Financial Assistant is to create an AI Version. To do so:
Go to the Create tab and click on + New Version.
Enter your project's name and description for it. In our case, the name would be
financial_assistant, then click Create Version. (opens new window)
When the progress bar shows 100 percent, click Continue.
Click on
financial_assistantto open the AI Version. This is your workspace where you can create new competencies or edit existing ones.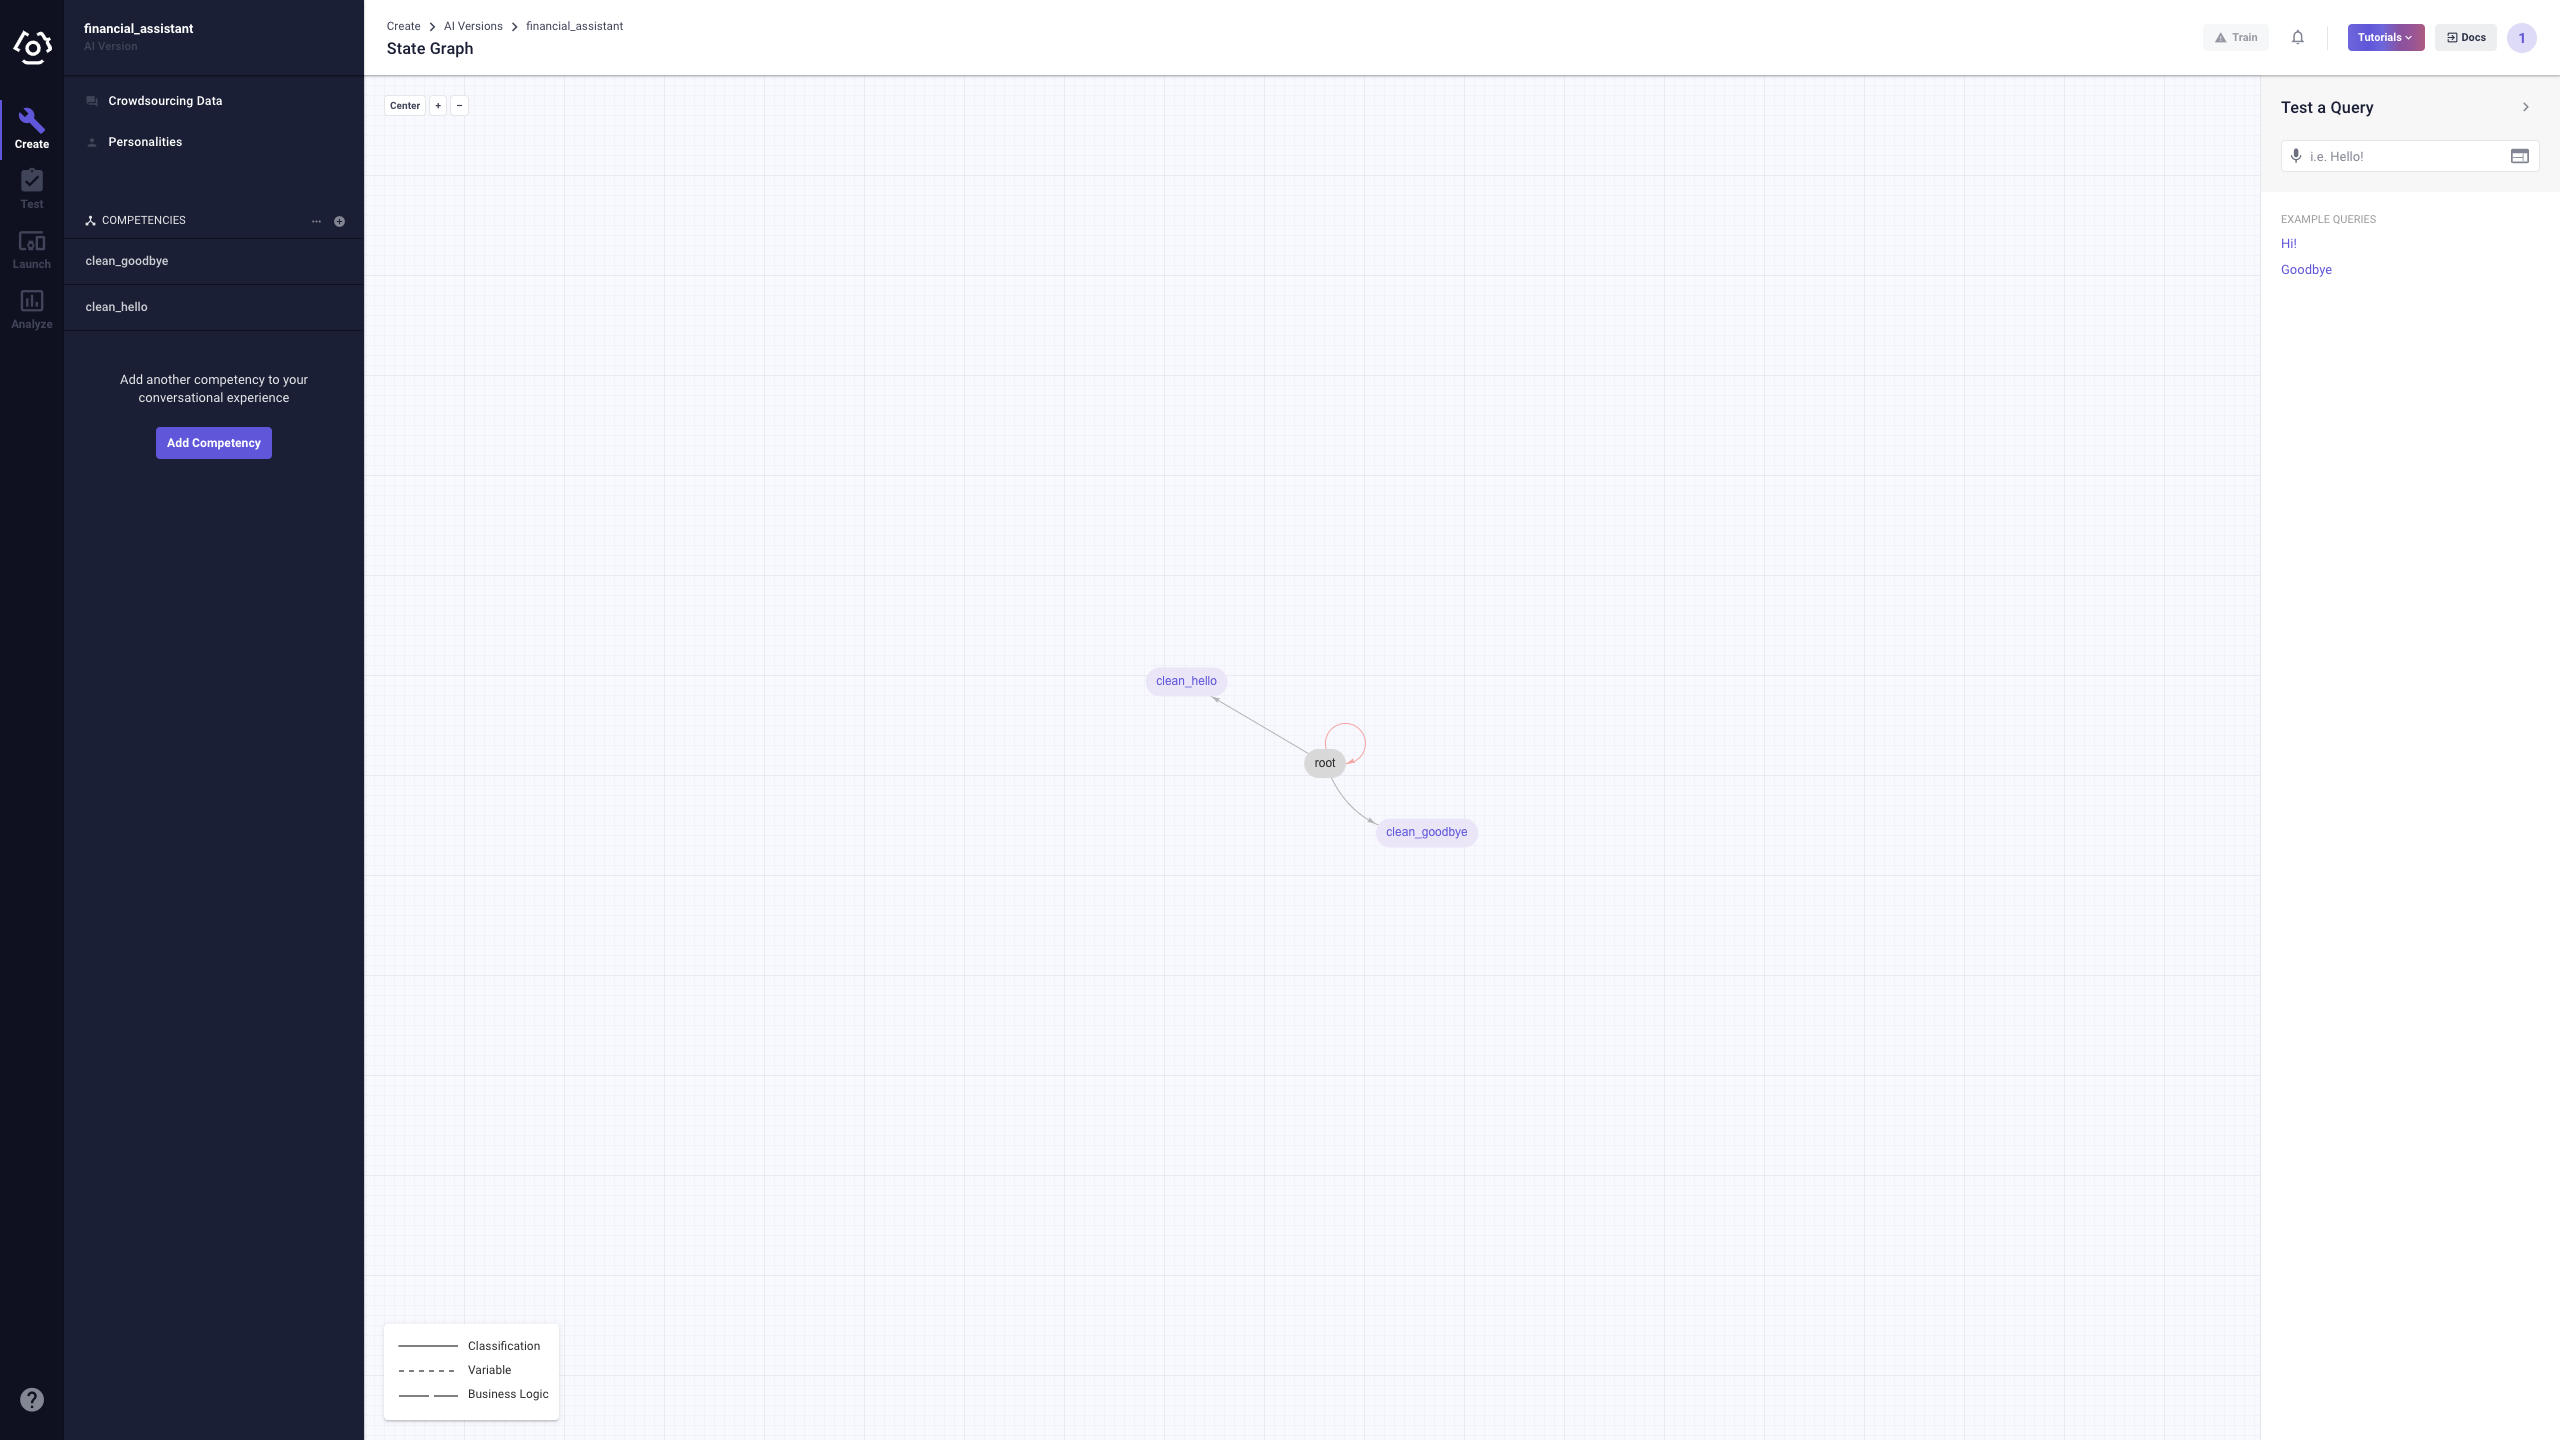
# Query your AI
You can integrate your AI Version with your apps, products, or devices to help you transform user requests in natural language into data that computers can understand. You can think of each AI Version as a separate project.
Let's talk to your AI for the first time! Head over to the query sidebar, type in: Hello! and press Enter.
![]() (opens new window)
(opens new window)
Right now, your AI only responds with Hi, and it doesn't provide any more nuanced responses. Your AI is like a newborn baby who hasn't learned anything yet, and you'll need to provide it with competencies and training data.
Let's go ahead and build our first competency!
# Create your first competency
You can think of a competency as a capability, and an AI project usually consists of several different competencies. For example, asking your conversational AI/virtual assistant about the weather, ordering food, playing your favorite music… etc. these are all achieved through competencies.
A competency is comprised of training data, States, and Transitions. On the Clinc AI Platform, training data are called "utterances," which are things a user might say to your AI.
The first competency we are going to create is an informational competency. You'll create get_balance, which will get the balance for a specified bank account.
Click the "+" symbol next to COMPETENCIES in the competency control bar or click on the
Add Competencybutton to add a new competency.In the modal popping up, name your competency like
get_balance.Put in
source_accountin the slots field.Choose the competency type to be informational.
Click Create Competency.
(opens new window)
Now you can see your get_balance competency and the get_balance state in your workspace. We'll discuss the differences between a competency and a state later, but for now, let's focus on the workspace itself. The workspace consists of the following components:
- Competency Sidebar: A list of your competencies. Selecting a competency from the menu will open the detail sidebar.
- State Graph: An overview of your AI model.
- Detail Sidebar: Where you manage the states, transitions, slots, and responses of each competency. We will have a section dedicated to the functionalities of the State Graph.
(opens new window)
After we create the skeleton, we need to add the "meat" which is data to the AI brain. To add training data:
- Right now you can see the arrow (transition) from root to
get_balanceis red, and there's a indicating that your intent(s) requires training.
 - Click on the
get_balance_startintent label. - On the classification data page, add the following utterances:
- What is the balance for my checking account?
- How much money do I have in my account?
- How much money do I have?
- Can you check my balance?
- I would like to know how much money I have left.
You can also directly import data from a JSON file. Let's try that out. To streamline the process, we provide data for the competencies you are building in this tutorial. Download this zip folder and follow the instructions below.
- Click on the Import button on the toolbar.
- Import the
get_balance_start-classification.jsonfile from the data package and click Save. (opens new window)
Note: The the data must follow the format showing below:
{
    "version": 1,
    "data": {
        "get_balance_start": [
          "Can you tell me the balance for my savings account please",
          "I want my balance",
          "I want the balance for my checking account",
          "I'd like to know how much money is currently in my savings account"
        ]
    }
}
We also need to add slot data, which will train the AI model to identify the account type you are querying about. To do so:
- Copy utterances to SVP.
- Select the
get_balancecompetency from the Competency Sidebar. - Select the
get_balance_startintent from the Details Sidebar. - Select all the utterances and Copy to SVP.
(opens new window)
- Label the slot values.
- Select
unlabeledfrom the Details Sidebar. - For each utterance, highlight the slot values and choose the appropriate slot.
- After you are finished labeling, click Save.
(opens new window)
- Import more labeled slot data.
- Select
all slotsfrom the Details Sidebar. Then click Import. - The labeled slot data is located in
get_balance-svp.json. - After you import the data, click Save.
(opens new window)
Note: We first imported classification data and then imported slot data. To learn about the difference between the two, visit the Classification and Slot Value Pairing page in the platform reference to learn how they work.
# Test competency
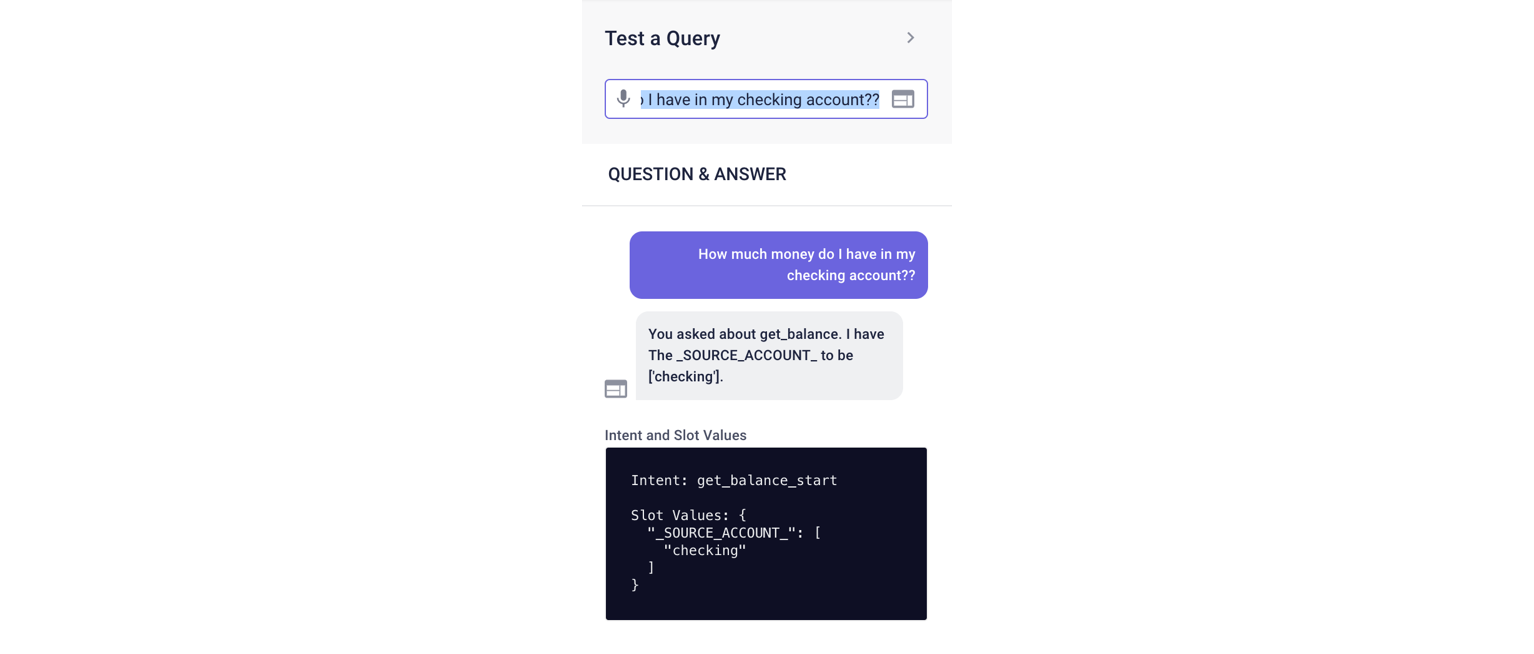
Now try ask your AI How much money do I have in my checking account? in the query sidebar. You should see that your AI successfully classified your utterance into get_balance_start intent and checking extracted as the slot value.
Now let's add a more human-friendly response to your AI.
- Click Edit under the RESPONSES header in the detail sidebar to customize the response template.
- In the response editor, type in
{% if source_account %}
	You have $ 100 in your {{ source_account[0] }} account.
{% else %}
	  Which account?
{% endif %}
- Click Save.
(opens new window)
Talk to your AI again with the same query. You can see now it respond with a more human-readable format.