# Access Management
Access management allows a privledged user to create new users, access roles, access groups, enabled and disable sso, access connectors, access workspaces, and access institutions.
To navigate to the Access Management page, click on the user profile on the upper right corner and choose Access Management in the dropdown menu.
# Access Management Page
On the Access Management page, a user can:
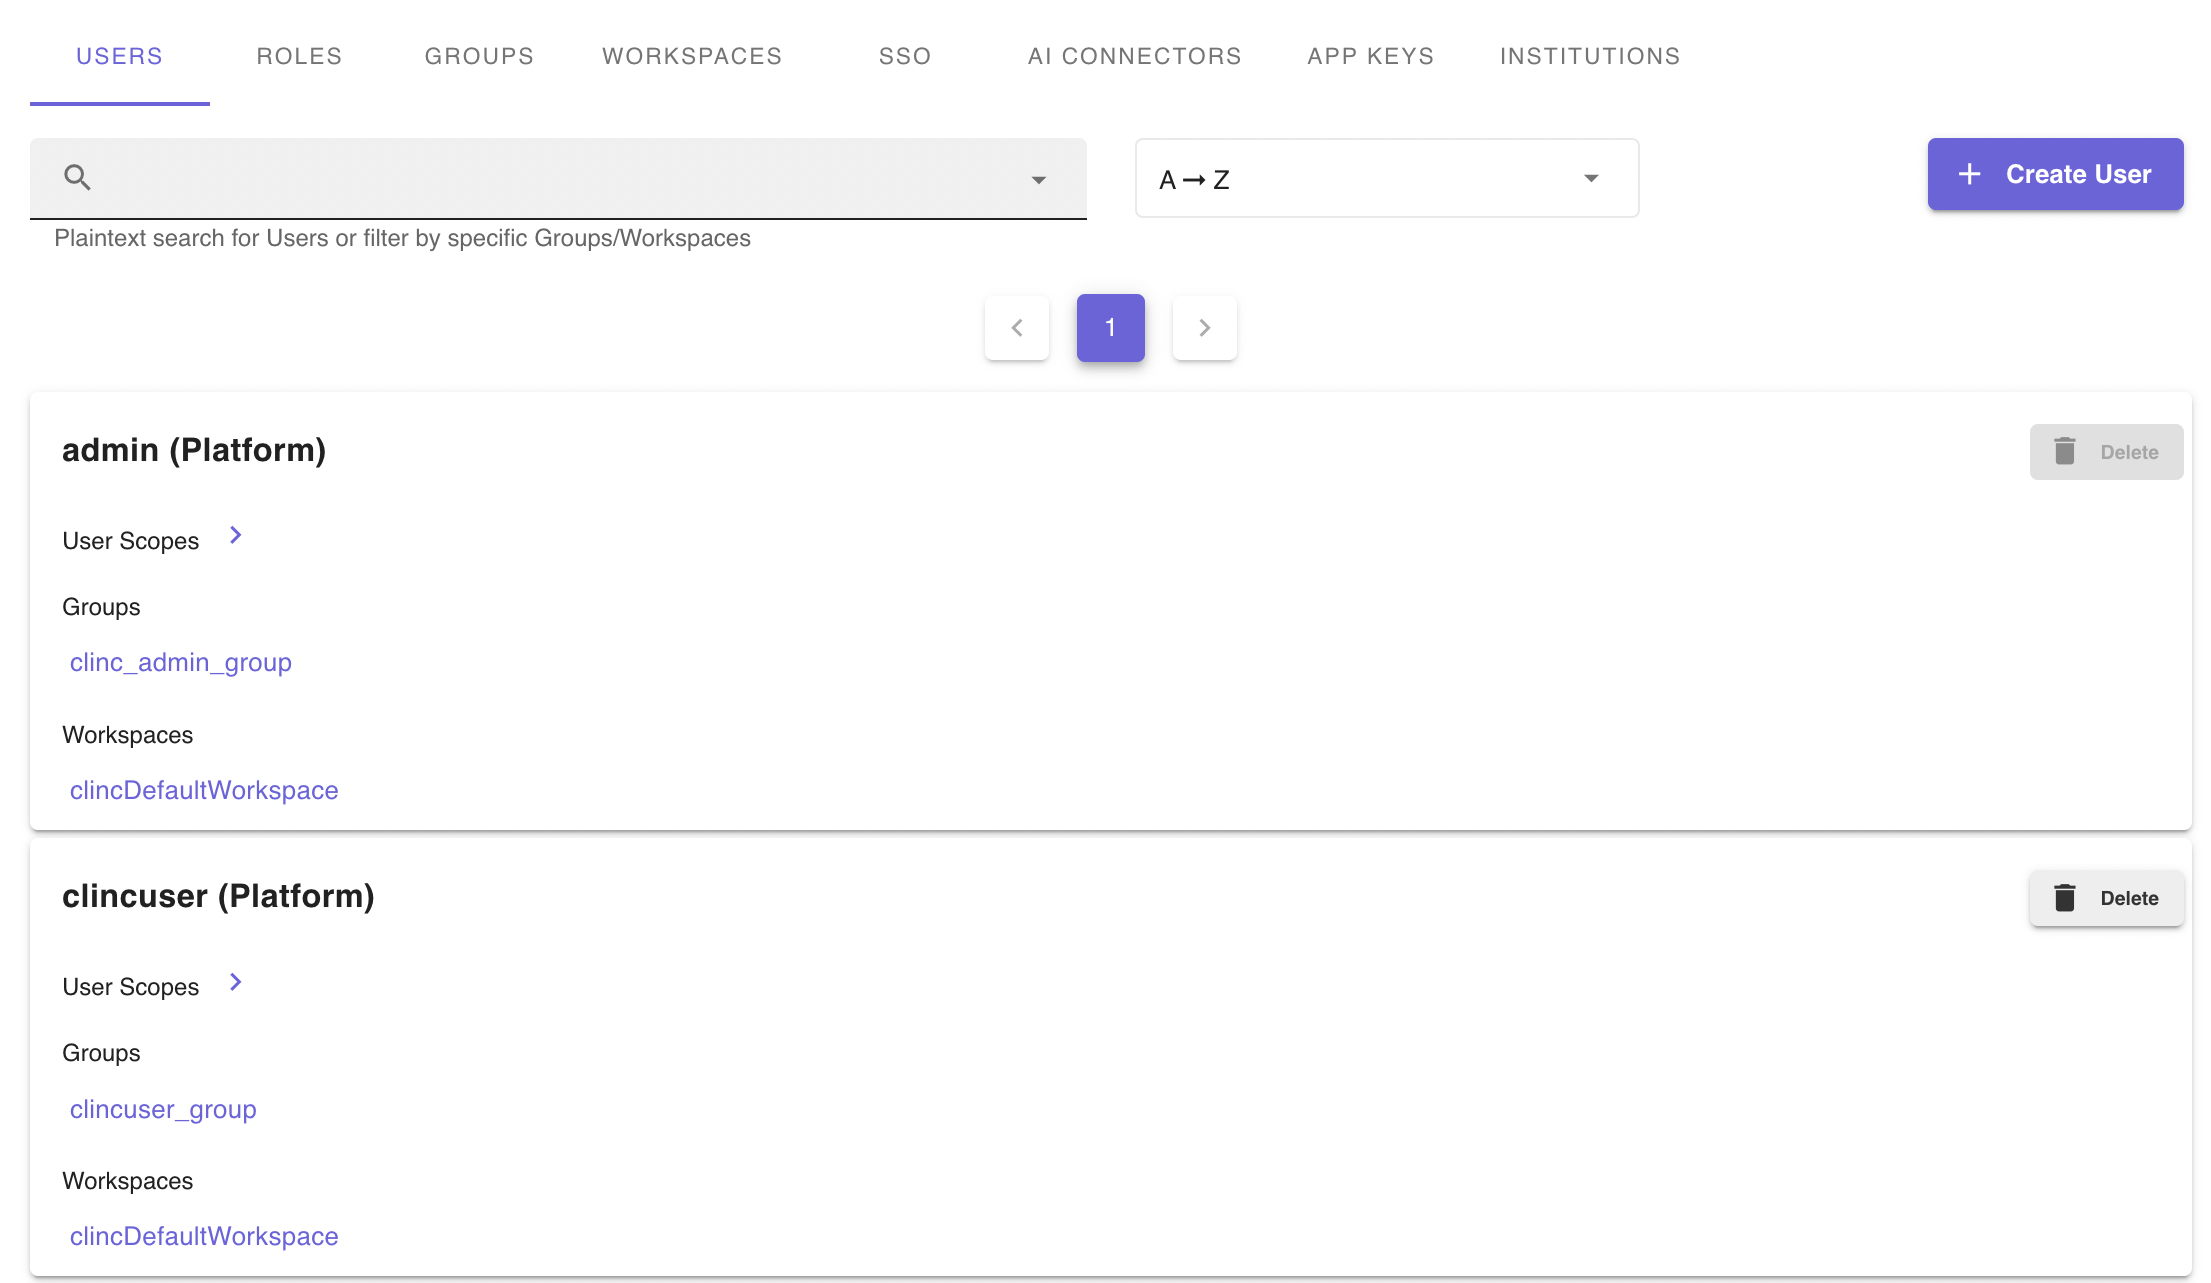
- Create and Delete Users
- Create, Edit, and Delete Roles
- Create, Edit, and Delete Groups
- Create, Edit, and Delete AI Model Connectors
- Create, Edit, and Delete App Keys
- Create, Edit, and Delete Workspaces
- Configure Single Sign On
# Managing Roles within an institution
Roles are a collection of scopes which can be tied to user groups. For example one could create an admin role with all scopes, or an analyst role that can view the Query Log and Activity Log but not edit AI Versions.
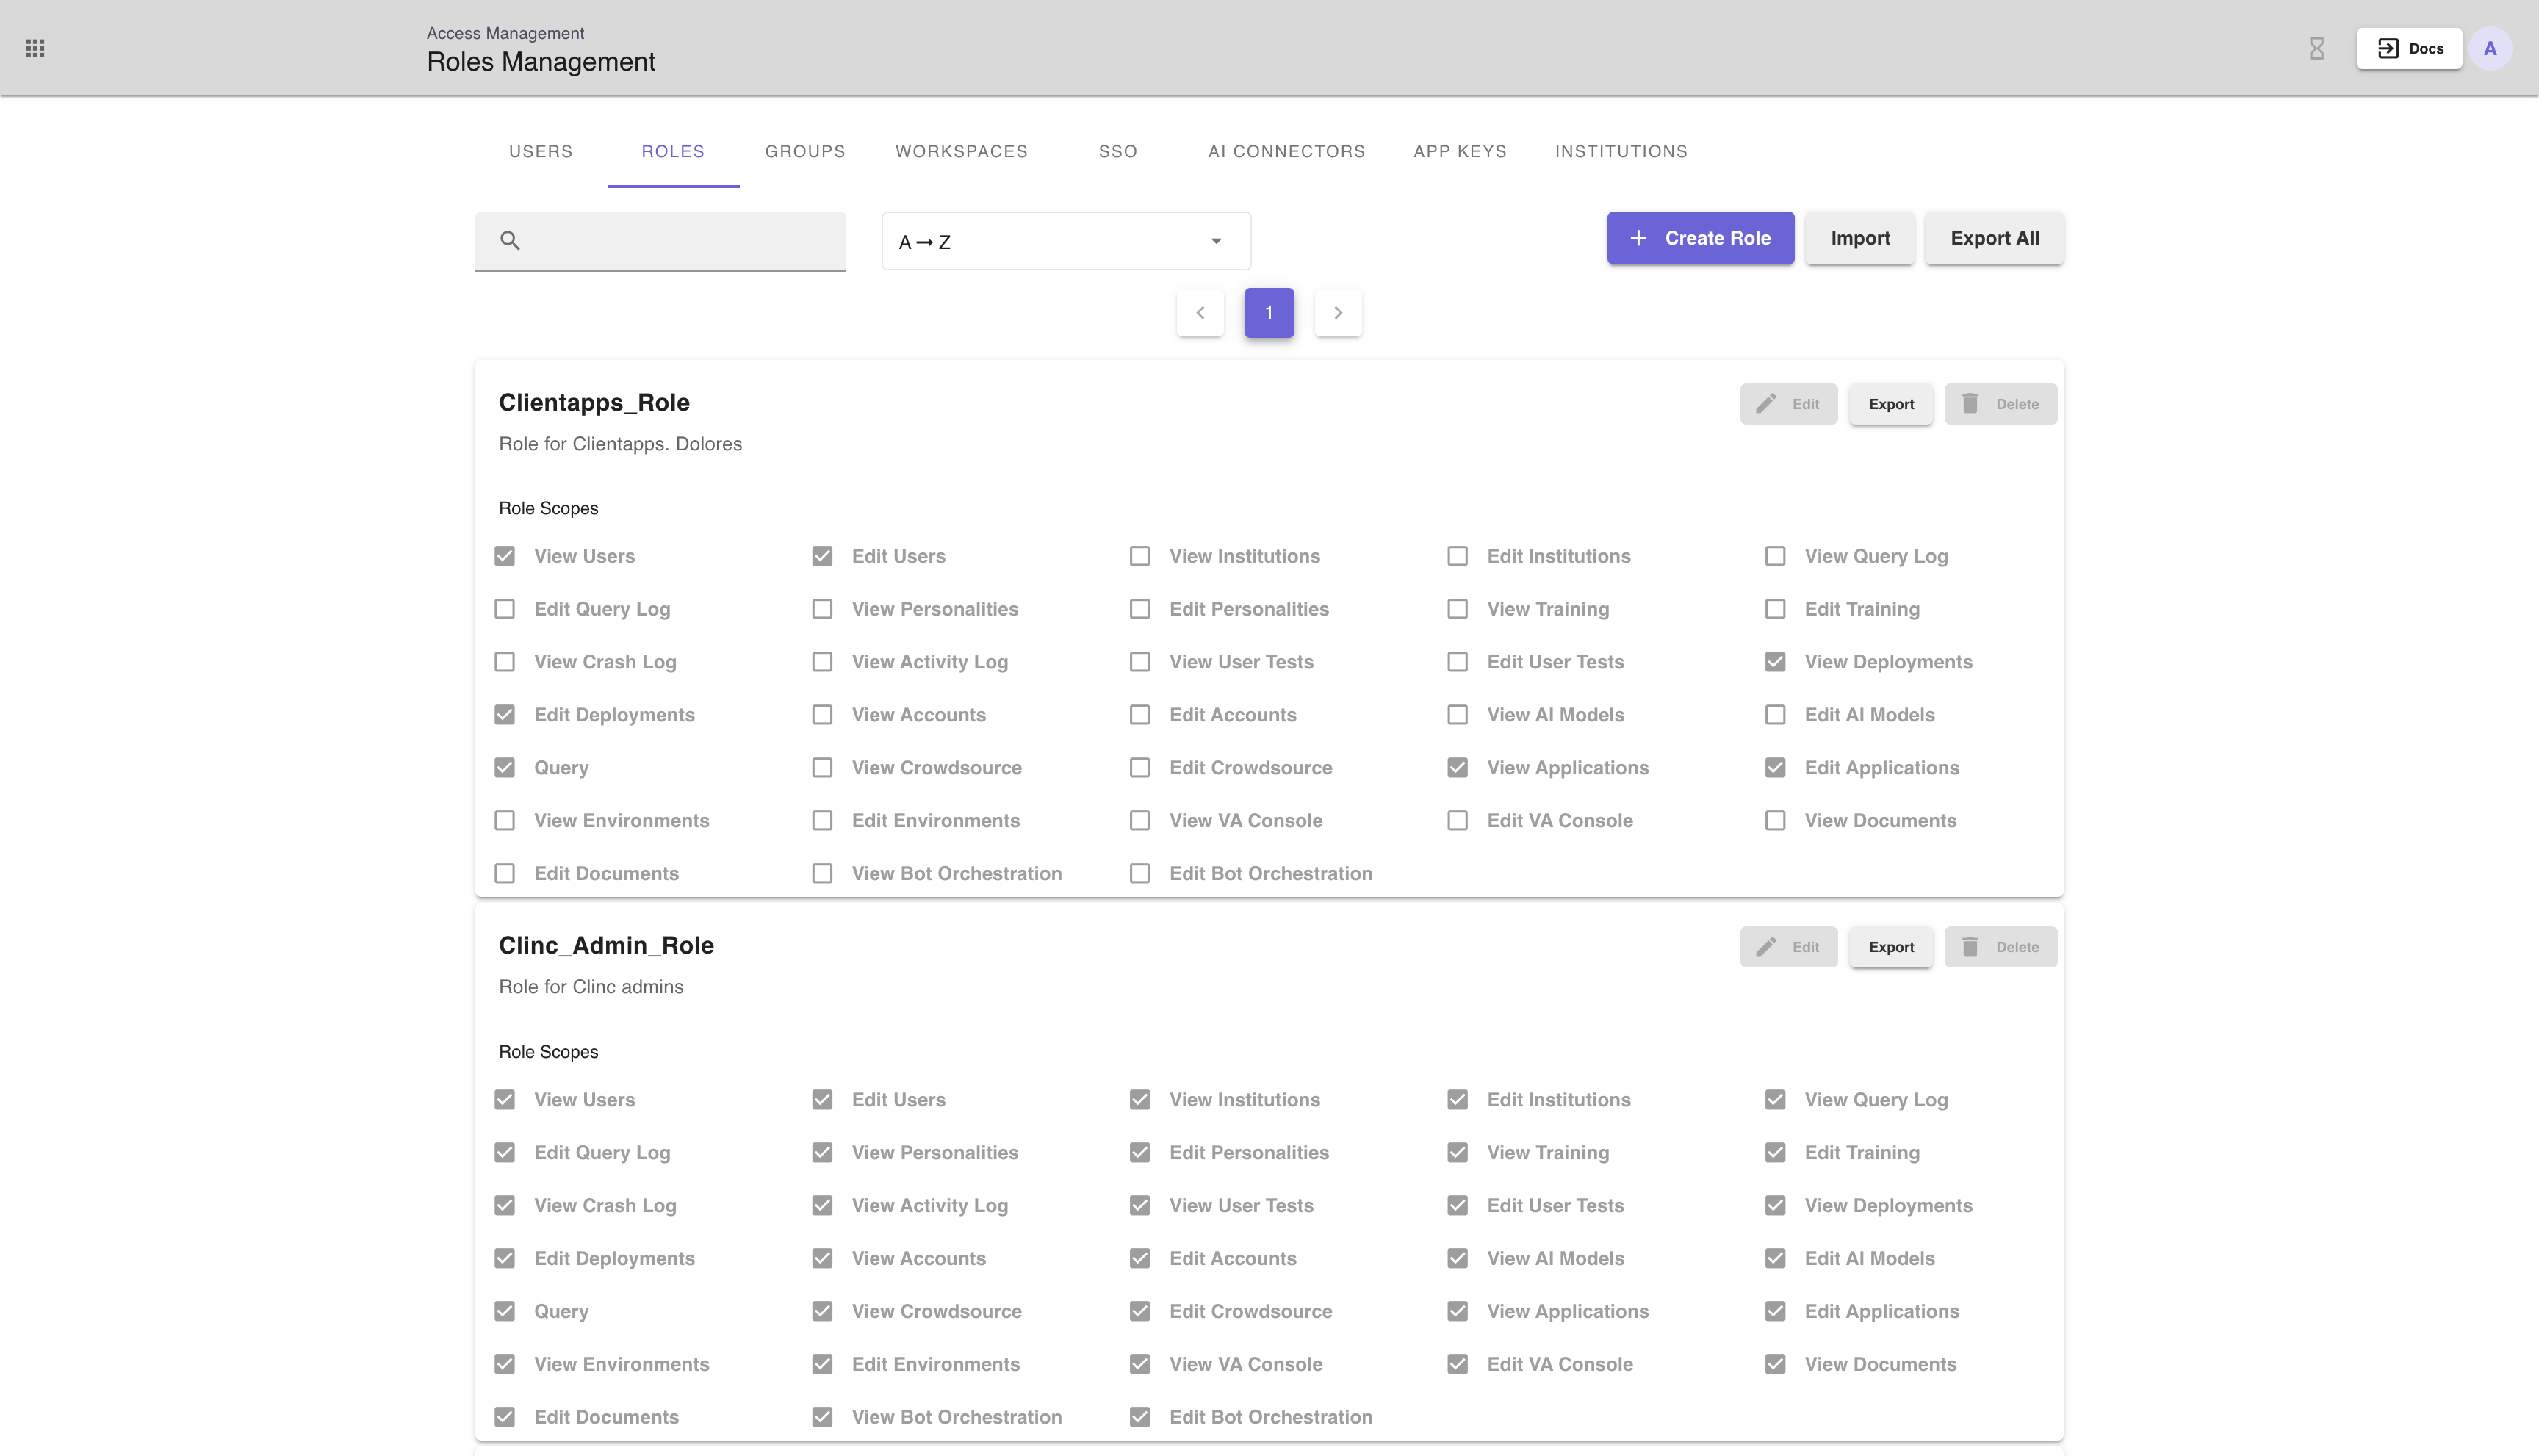
The Roles tab on the Access Management Page (shown above) allows a user to Create, Edit, Delete, Import, and Export Roles. Searching and filtering is enabled as well. Click on the Role Tab on
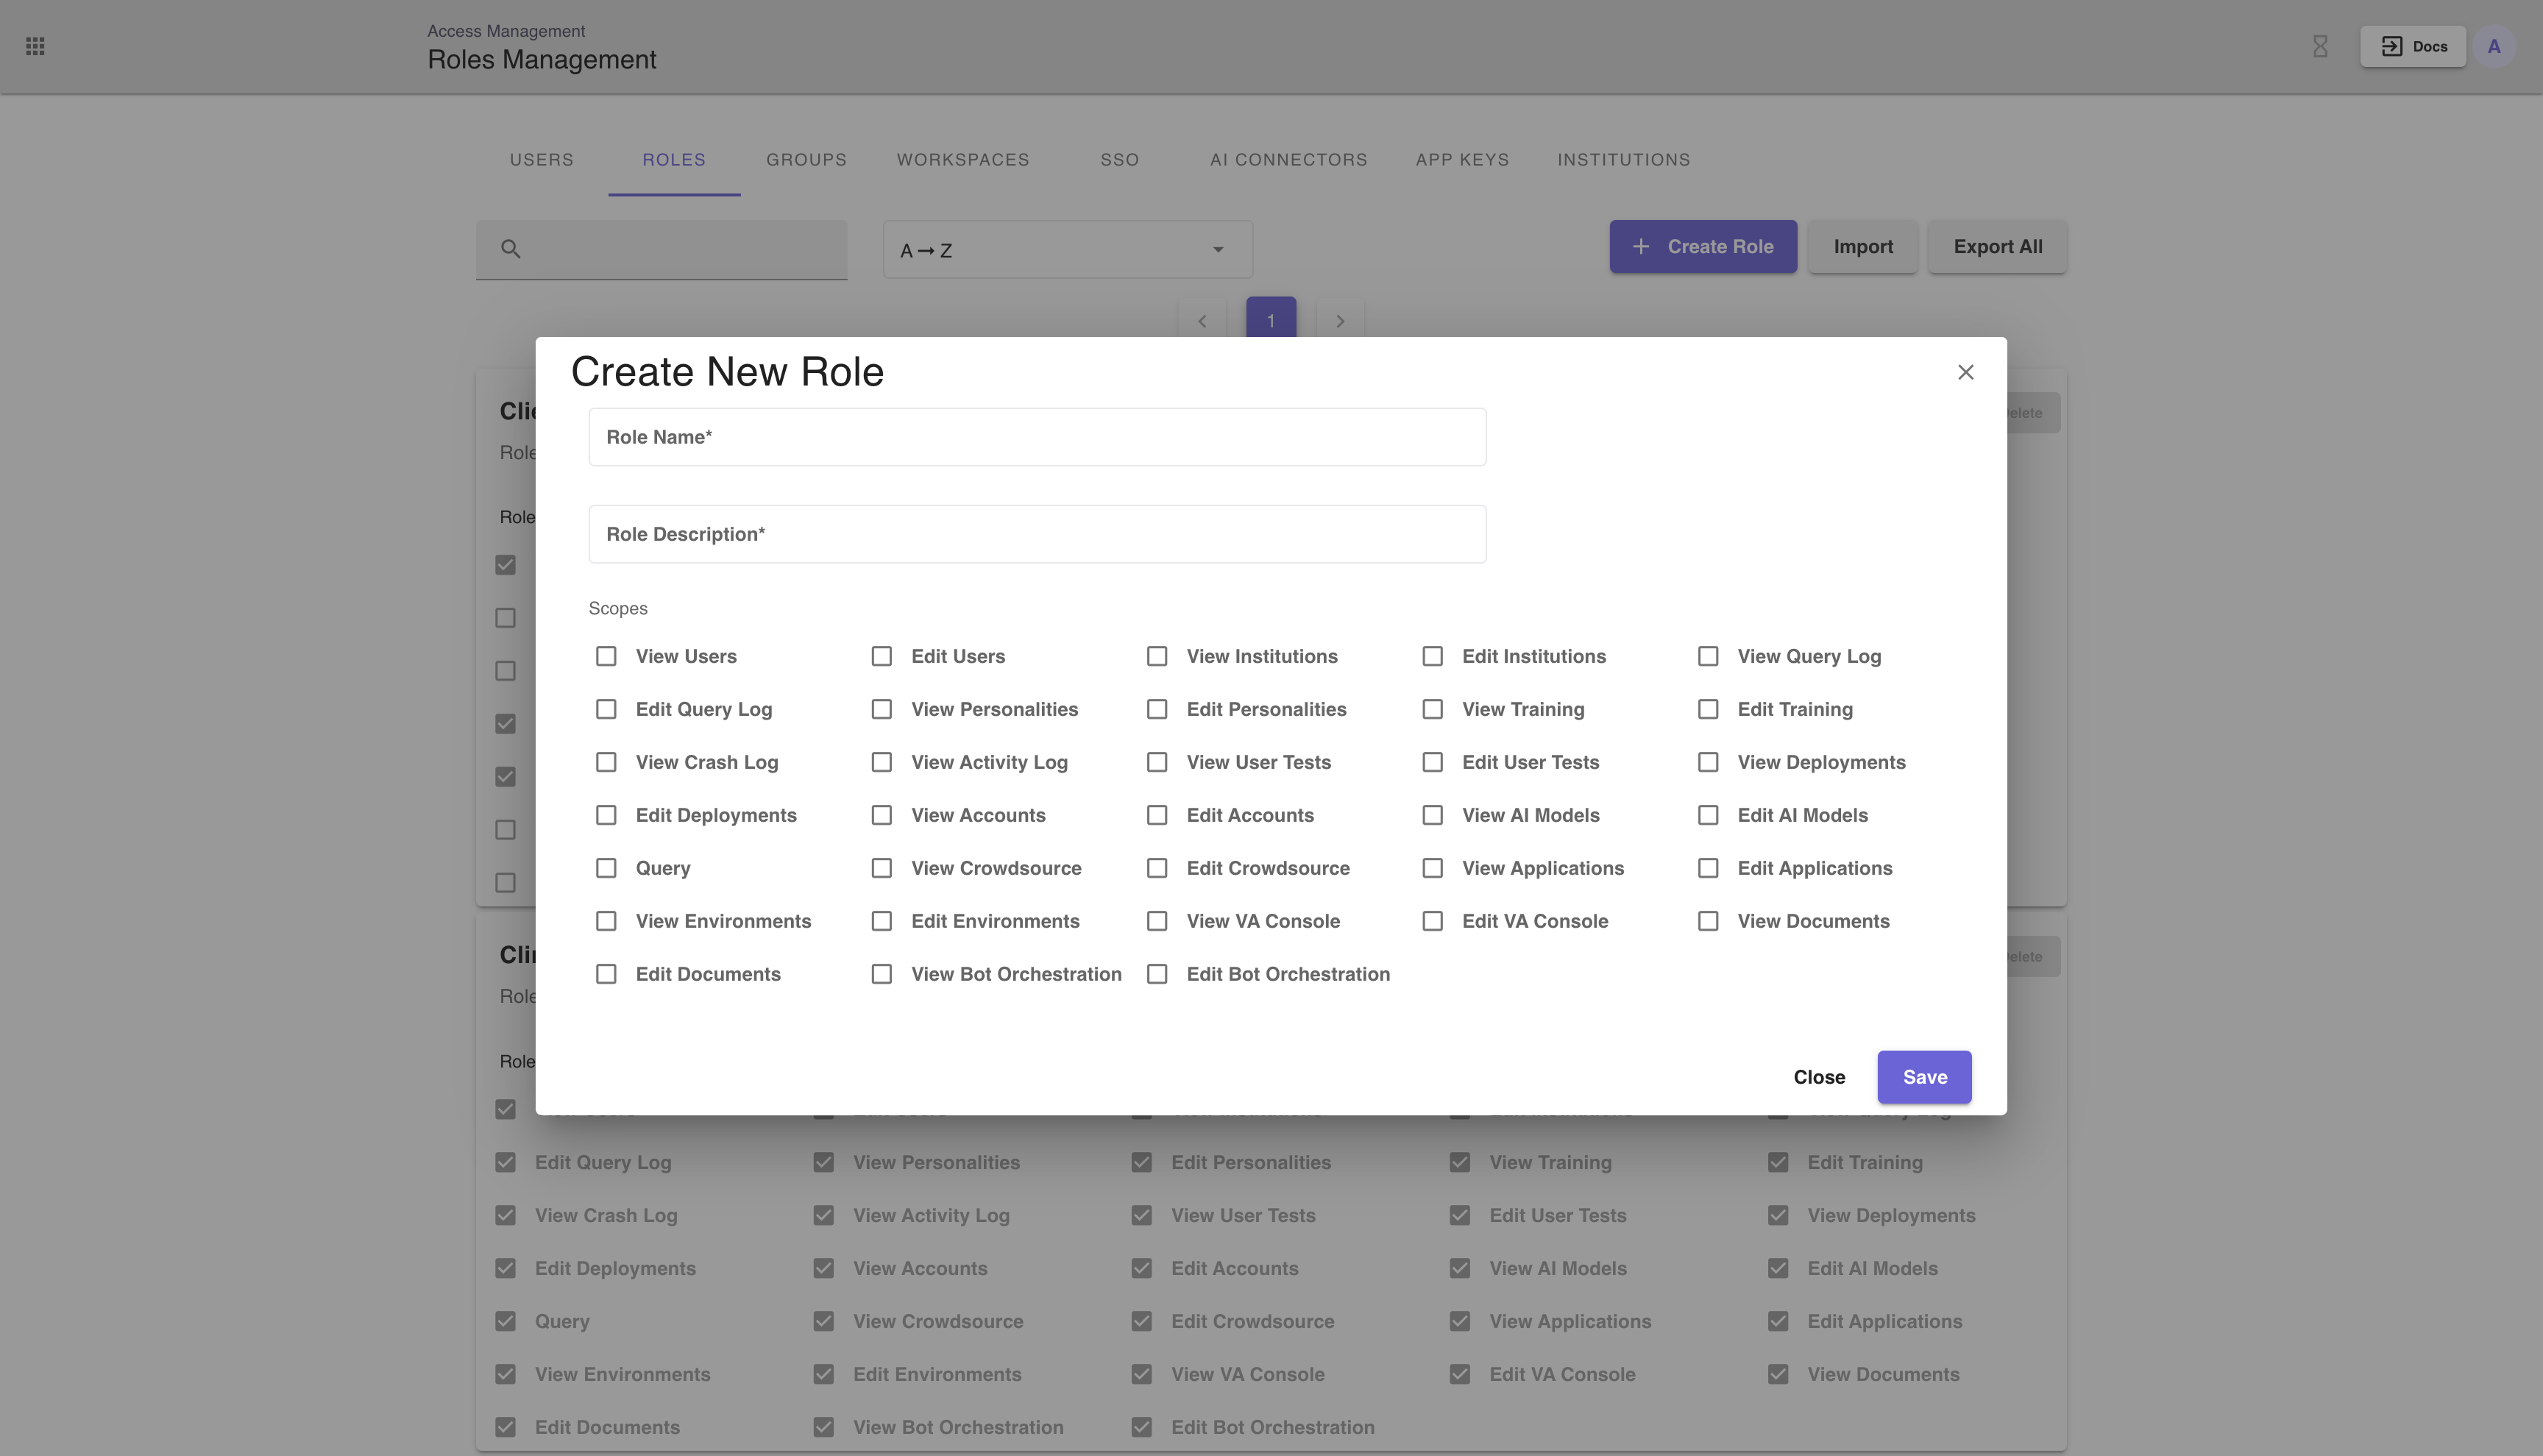
To create a role, click the + Create Role button and fill out the form with the name (must be unique), description, and select a set of scopes.
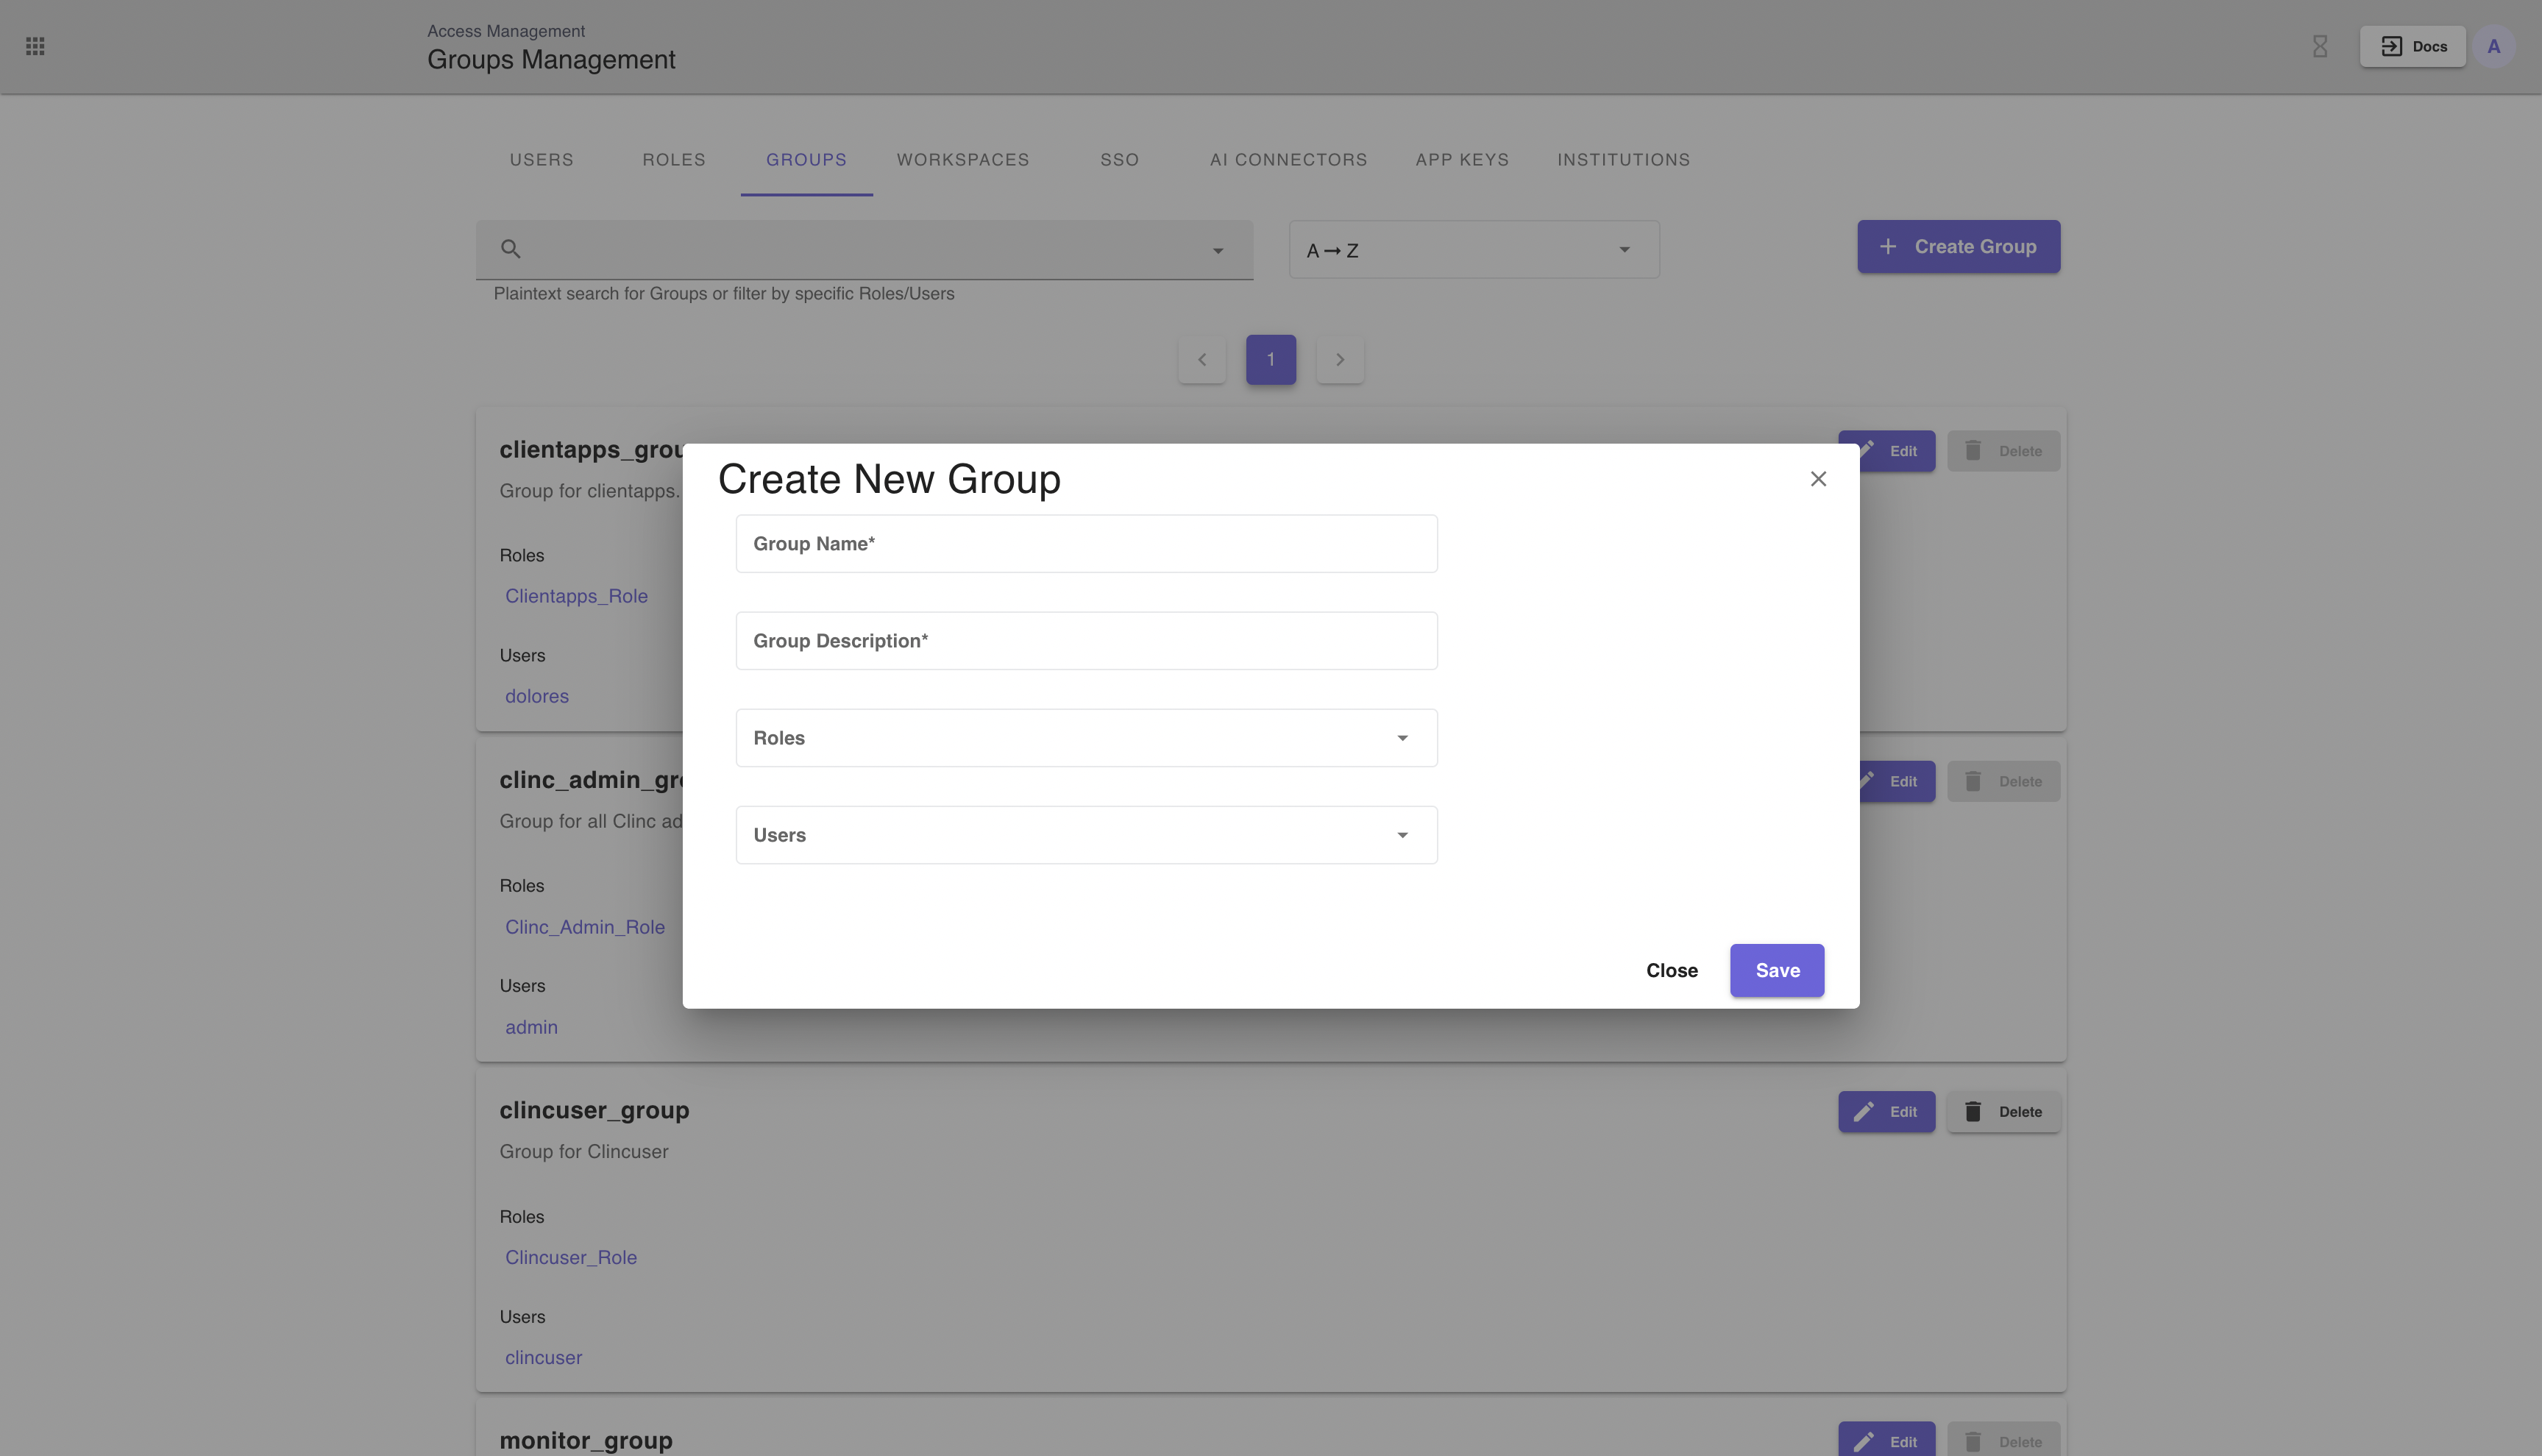
# Managing Groups within an institution
Groups are a collection of users and roles. Each user in the group will inherit the scopes from all of the associated roles. Groups are a good way to organize an instutition's users into teams.
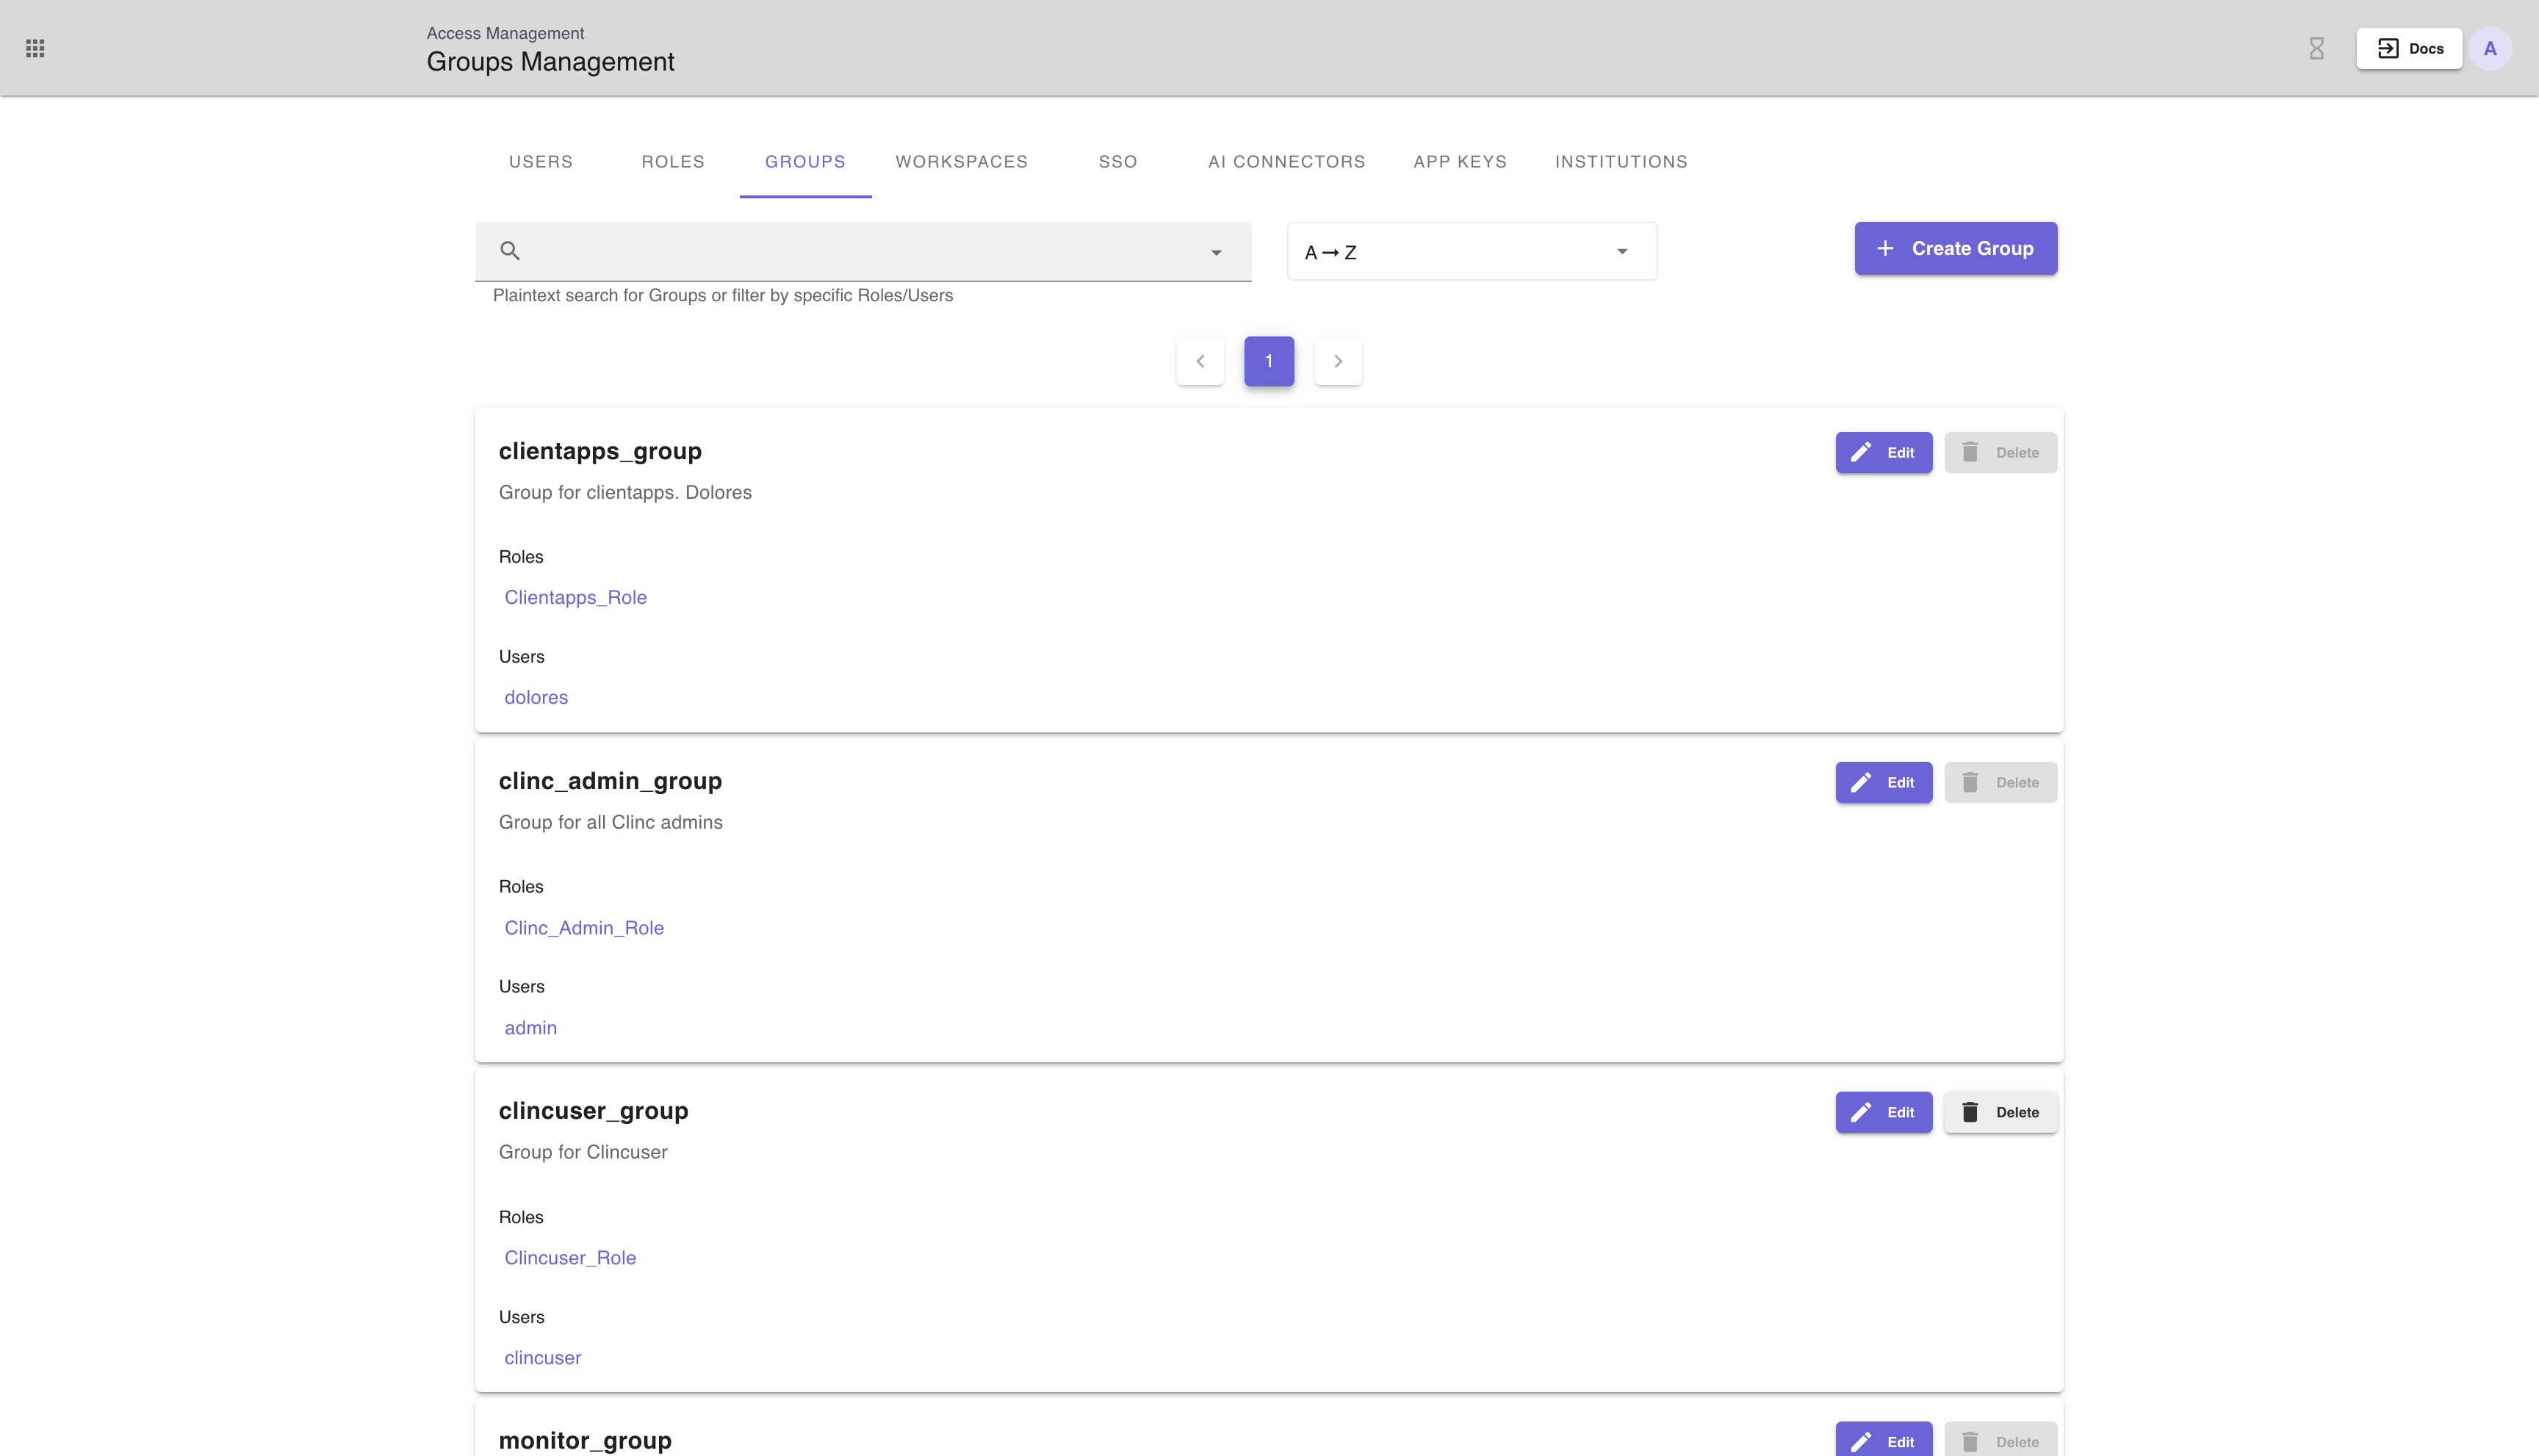
The Groups tab on the Access Management Page (shown above) allows a user to Create, Edit, and Delete Groups. The search bar enables filtering by roles and users, as well as plaintext search for group name. Sorting is additionally available.
To create a group, simply click the + Create Group button and fill out the form with name (must be unique) and description. One may also assign existing roles and users to a group during creation.
# Platform Scopes in Detail
| Scopes | Explanation |
|---|---|
| View Users | Grants users the ability to view all the platform users but not edit their permissions nor delete them |
| Edit Users | Grants users the ability to view and edit platform users permissions. |
| View Institutions | Grants users the ability to view all the institutions created on the instance (Institution Management page) |
| Edit Institutions | Grants users the ability to add new institutions, delete existing institutions or reset them. |
| View Query Log | Grants users the ability to read Query Log with which can be used to see the most recent queries for all the AI versions in an institution; apply filter to see queries that meets certain conditions and export the queries as training data. To learn more about Query Log, go to Query Log section under Analyze in the Platform Reference. With the read-only permission, users won't be able to correct classification, bookmark the query or export the queries to training data. The ability to create test dialog from the query side bar is disabled too. |
| Edit Query Log | Grants users the ability to edit Query Log. They will be able to do everything mentioned above. Without read and write permission, users won't be able to access Query Log and Export Logs under the logs section. |
| View Personalities | Grants users the ability to view Personalities. To enable this feature, a user configuring the permissions should always enable Read Personalities and Read Training on the users scope since they go hand in hand. Users will be able to view all the competencies in all the AI versions, access training data and responses. Users won't be able to make any changes to them such as add data, import data, add transitions or edit responses but they can still export data and export response templates. A user cannot create new channels(device) on the Personalities page. |
| Edit Personalities | Grants users the ability to edit Personalities. To enable editing Personalities, Edit Training and Edit Personalities scope should be enabled on the users role. With these two permissions, users will be able to edit and access all the Personalities functionality. Personalities can be found in the left sidebar on an AI Projects Page. |
| View Training | See Read Personalities. |
| Edit Training | See Edit Personalities. |
| View Crash Log | Users will be able to read crash log which provides insights about error types such as undefined slots in a response template, internal server error regarding to the Business Logic etc. which can guide further AI model improvement. |
| View Activity Log | Users will be able to see activities taken place on the platform such as new user creation, logins, change edit AI version etc. |
| View User Tests | With this permission, users will be able to view all the test suits, dialogs and test results on the Testing page. |
| Edit User Tests | With this permission, users can run tests, edit, export and delete suits, import and create new suits and dialogs, also export testing report. |
| View Deployments | Grants users the ability to see the applications launched on the Launch Page. |
| Edit Deployments | Grants users the ability to launch, edit or delete their AI version to devices like Alexa, Google Home, Mobile app, Web app, Slack etc. |
| View Accounts | Grants platform users the ability to read application end users account information. |
| Edit Accounts | Grants users the ability to add or remove application end users. |
| View AI Models | Grants users the ability to view details of all the AI versions as well as viewing the training progress. |
| Edit AI Models | Grants users the ability to edit, export and delete all the AI models insides all the AI versions, including training data, responses etc. |
| Query | Users are able to test a query in the query sidebar and send in a query through the query endpoint. |
| View Crowdsource | Users are able to read crowdsource jobs but not launch or delete them. |
| Edit Crowdsource | Users are able to launch crowdsource jobs on the platform to collect data. |
| View Environments | Users may view the environments and applications on the Deploy tab. |
| Edit Environments | Users may create, edit, and delete, environments and applications on the Deploy tab. Addionally, users may deploy environments to production. |
| View VA Console | Users may view the console tab and configurations associated with the users institution. |
| Edit VA Console | Users may create, edit, and delete configurations on the Console tab. Additionally, users who have this scope may create, edit, and delete response elements. |
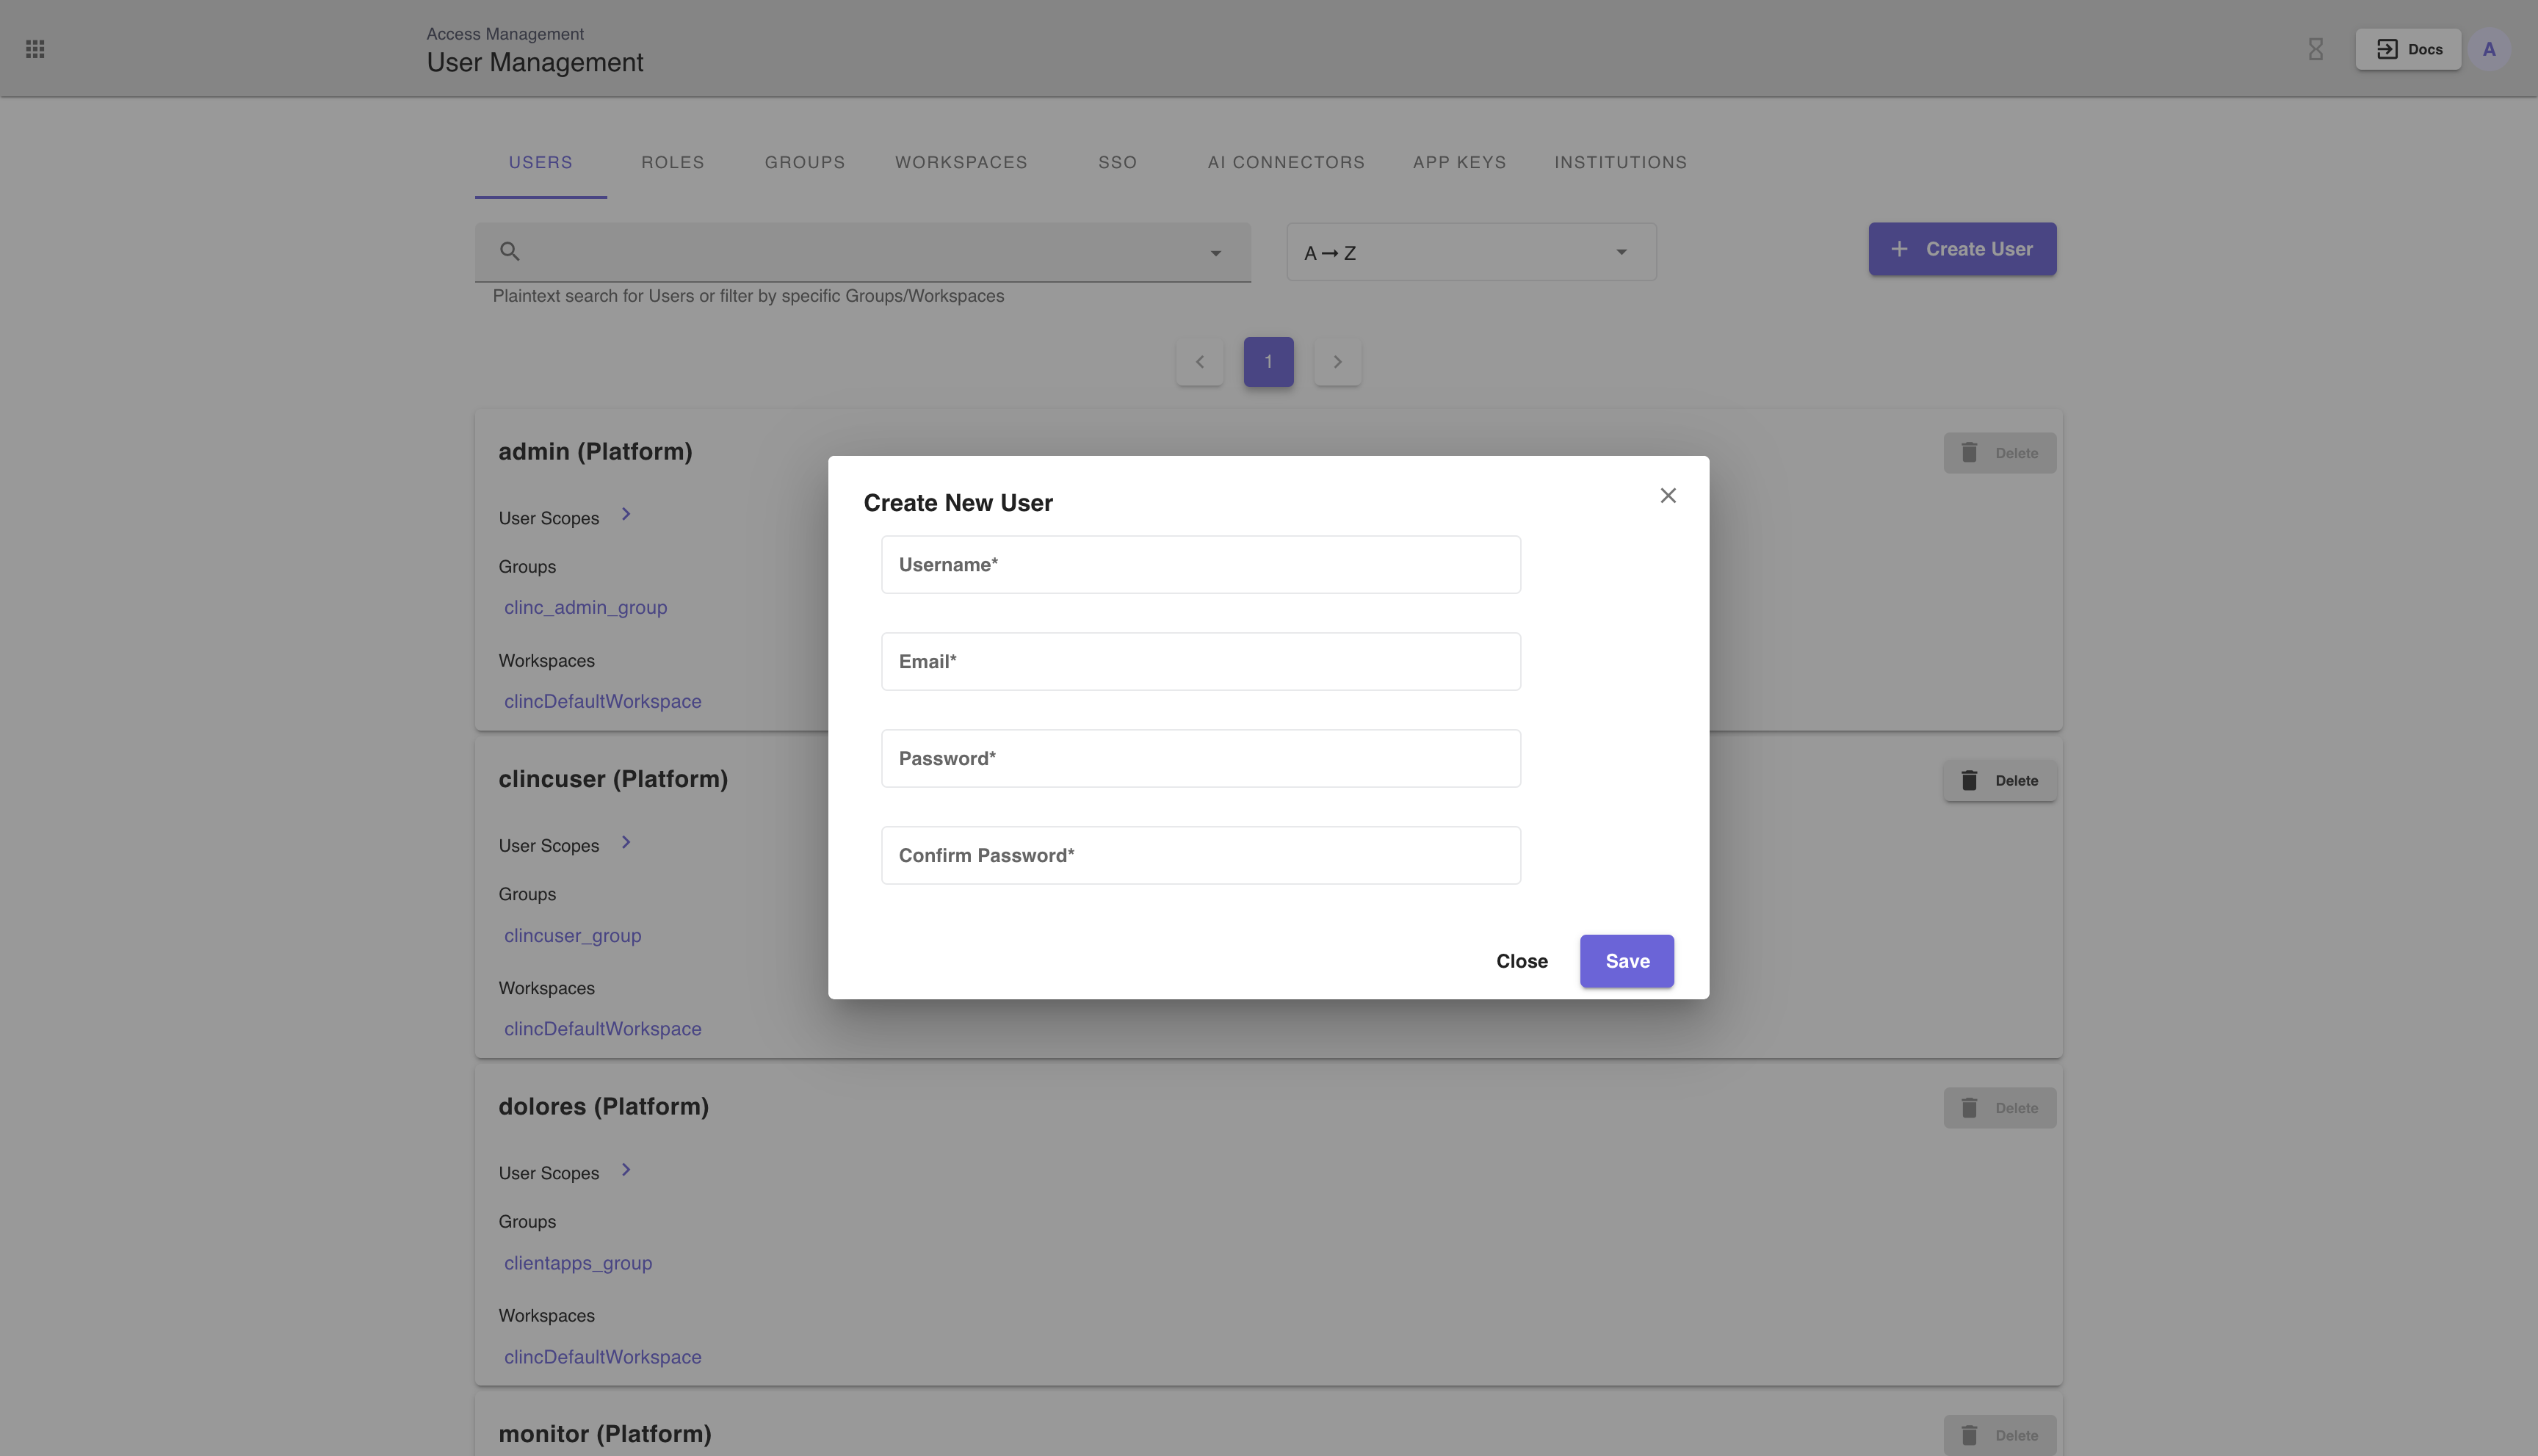
# Adding Platform Native Users to an institution
Click + Create User, in the modal pop up enter a username, email, and password.
# Managing Workspaces within an institution
A workspace represents a group of projects. This allows users to organize projects and grant users access to different projects within the same institution. A user will have different scopes based on the groups associated with each workspace. For example, a user can have the Edit Training scope in one workspace but lack that ability in a different workspace depending on what groups belong to each workspace.
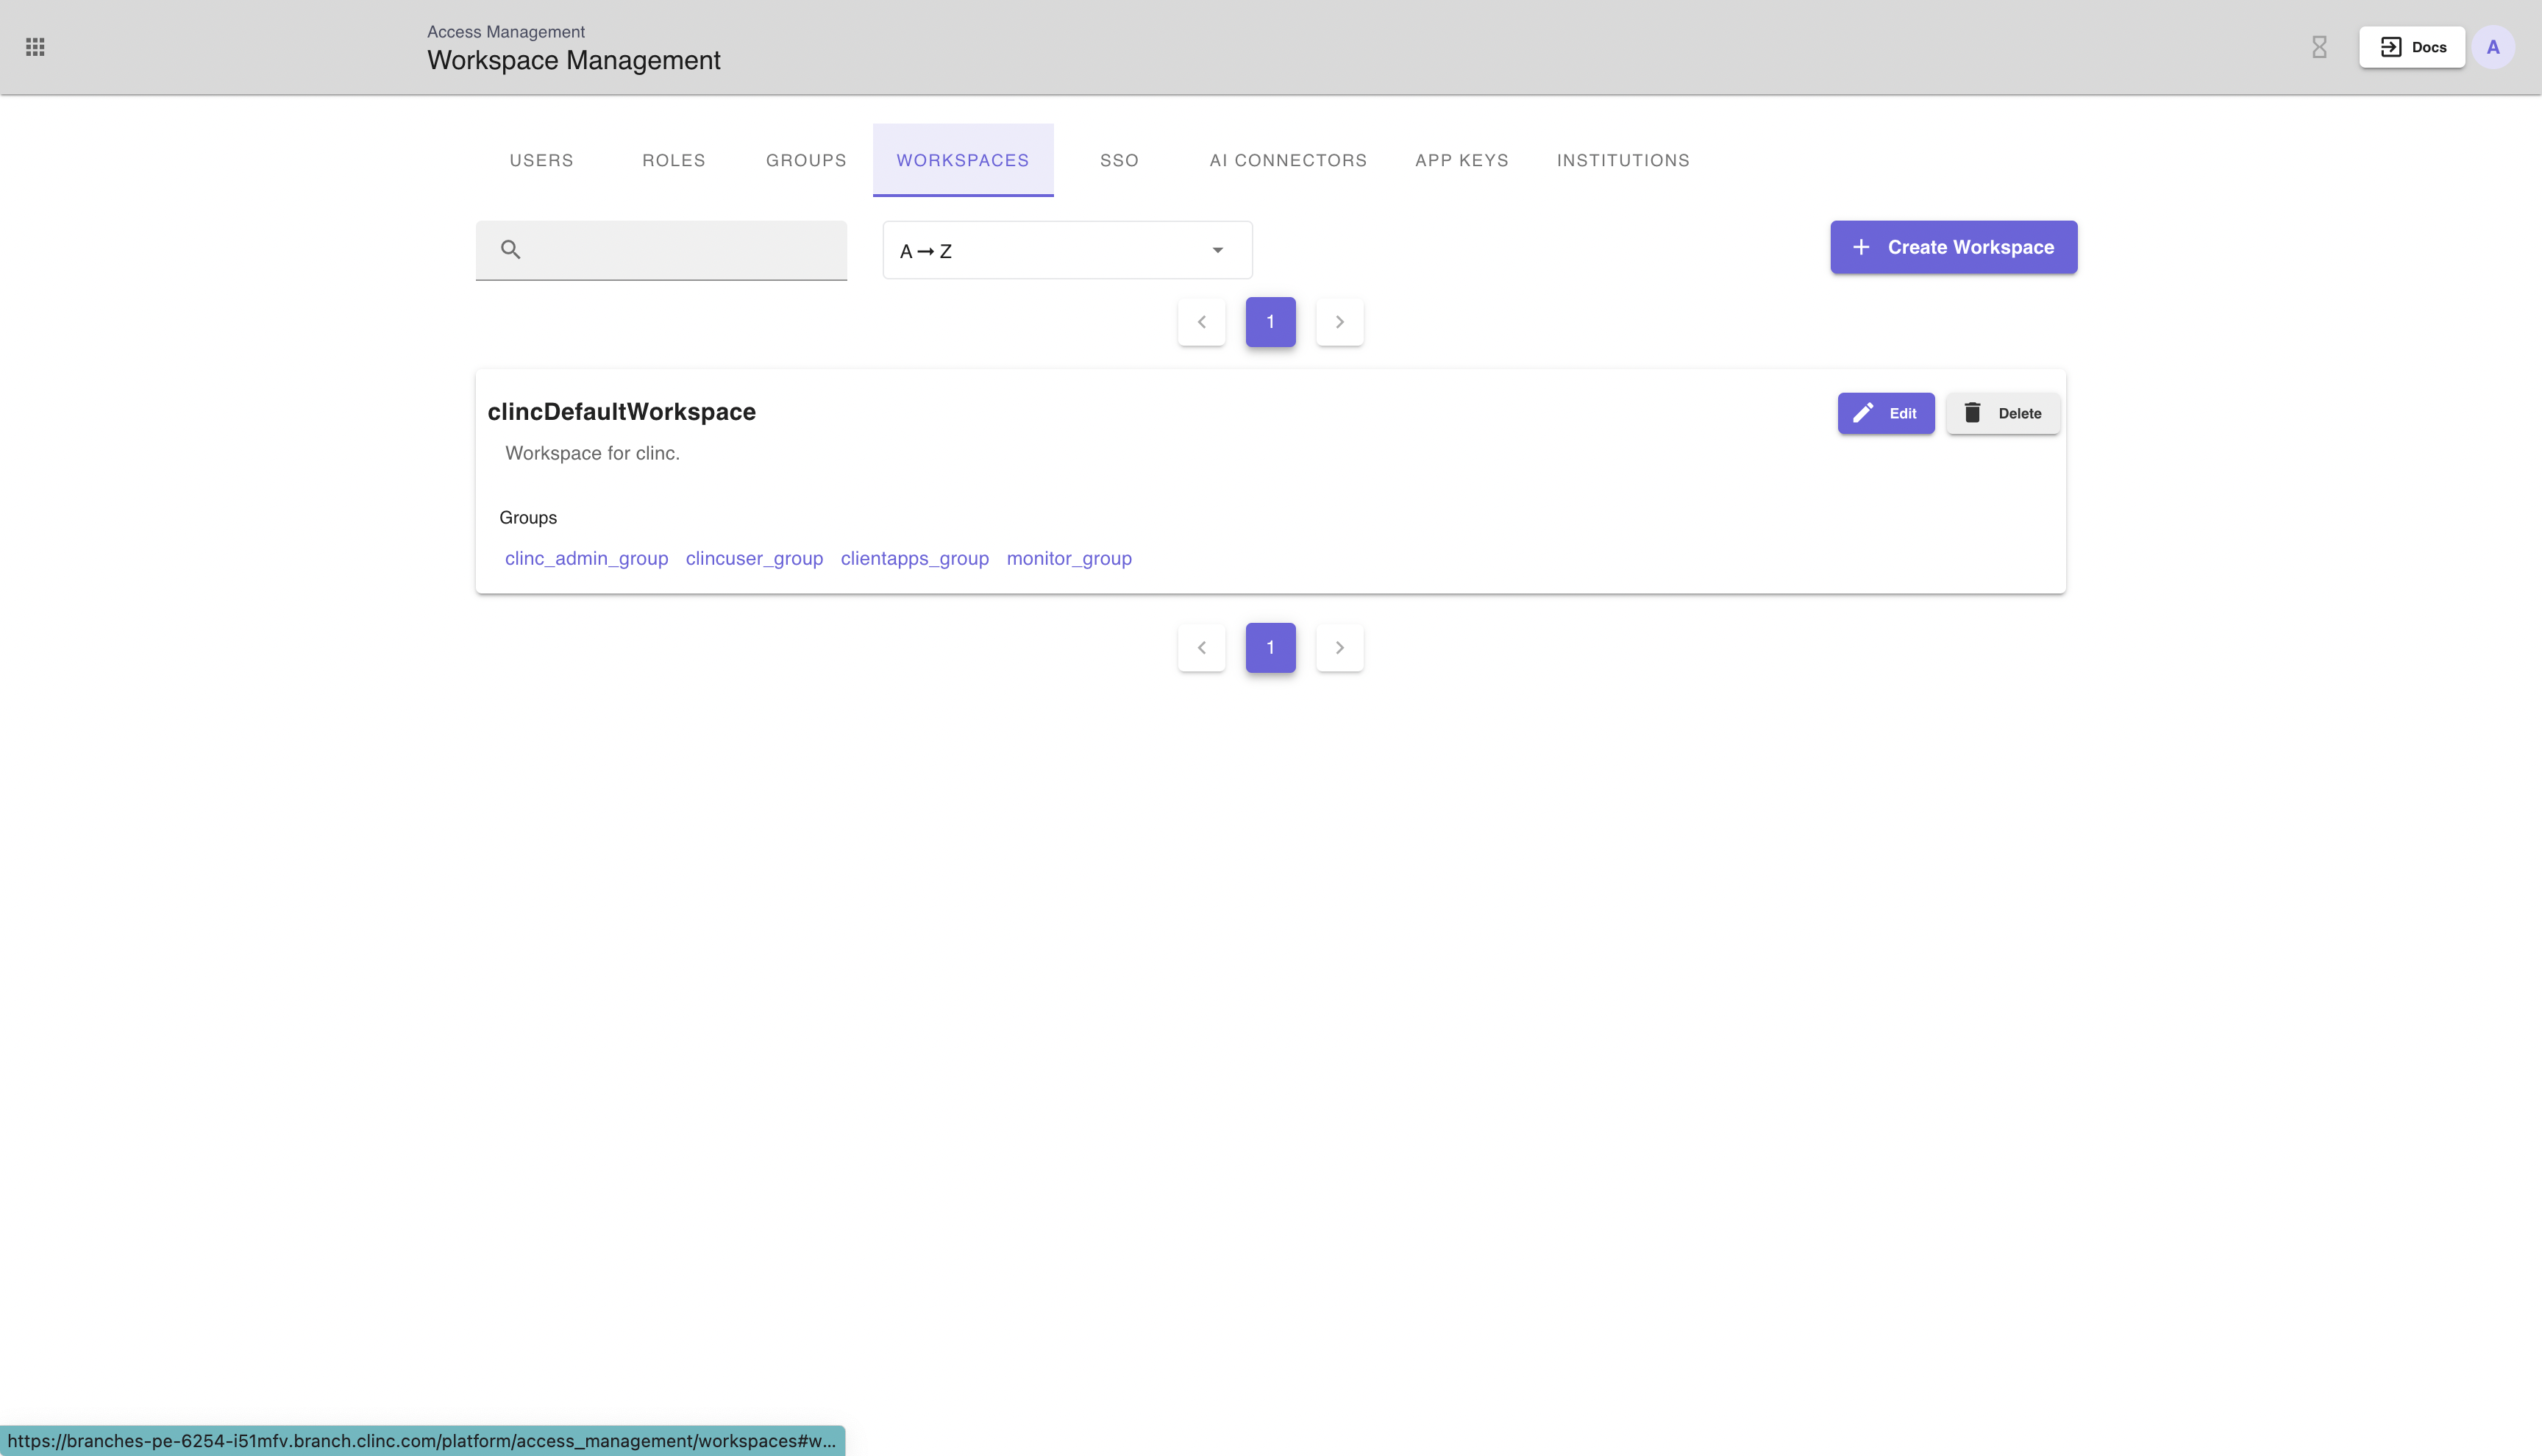
The Workspaces tab on the Access Management page allows a user to create, edit, and delete workspaces. The search bar enables searching by workspace name.
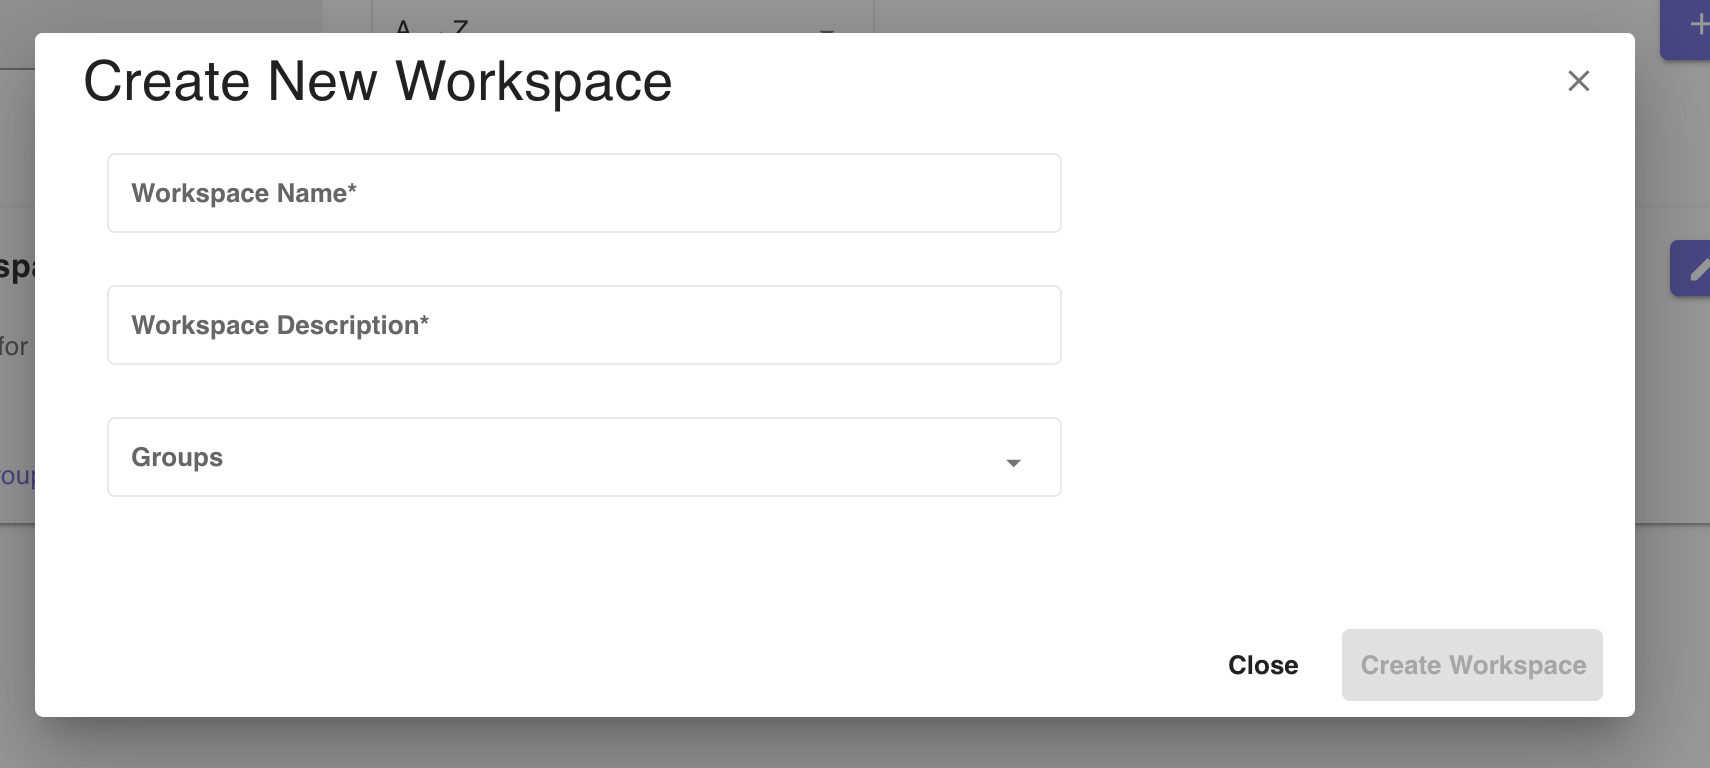
To create a workspace, click the + Create Workspace button and fill out the form with name (must be unique across institution), description, and zero or more groups.
All projects will now belong to a workspace. On the main projects page, users can select among the workspaces they have access to, and the projects under the selected workspace will show on the page. Users can also select among workspaces on the global testing page, and the test suites that belong to the projects under the selected workspace will show on the page. The selected workspace will persist across sessions.
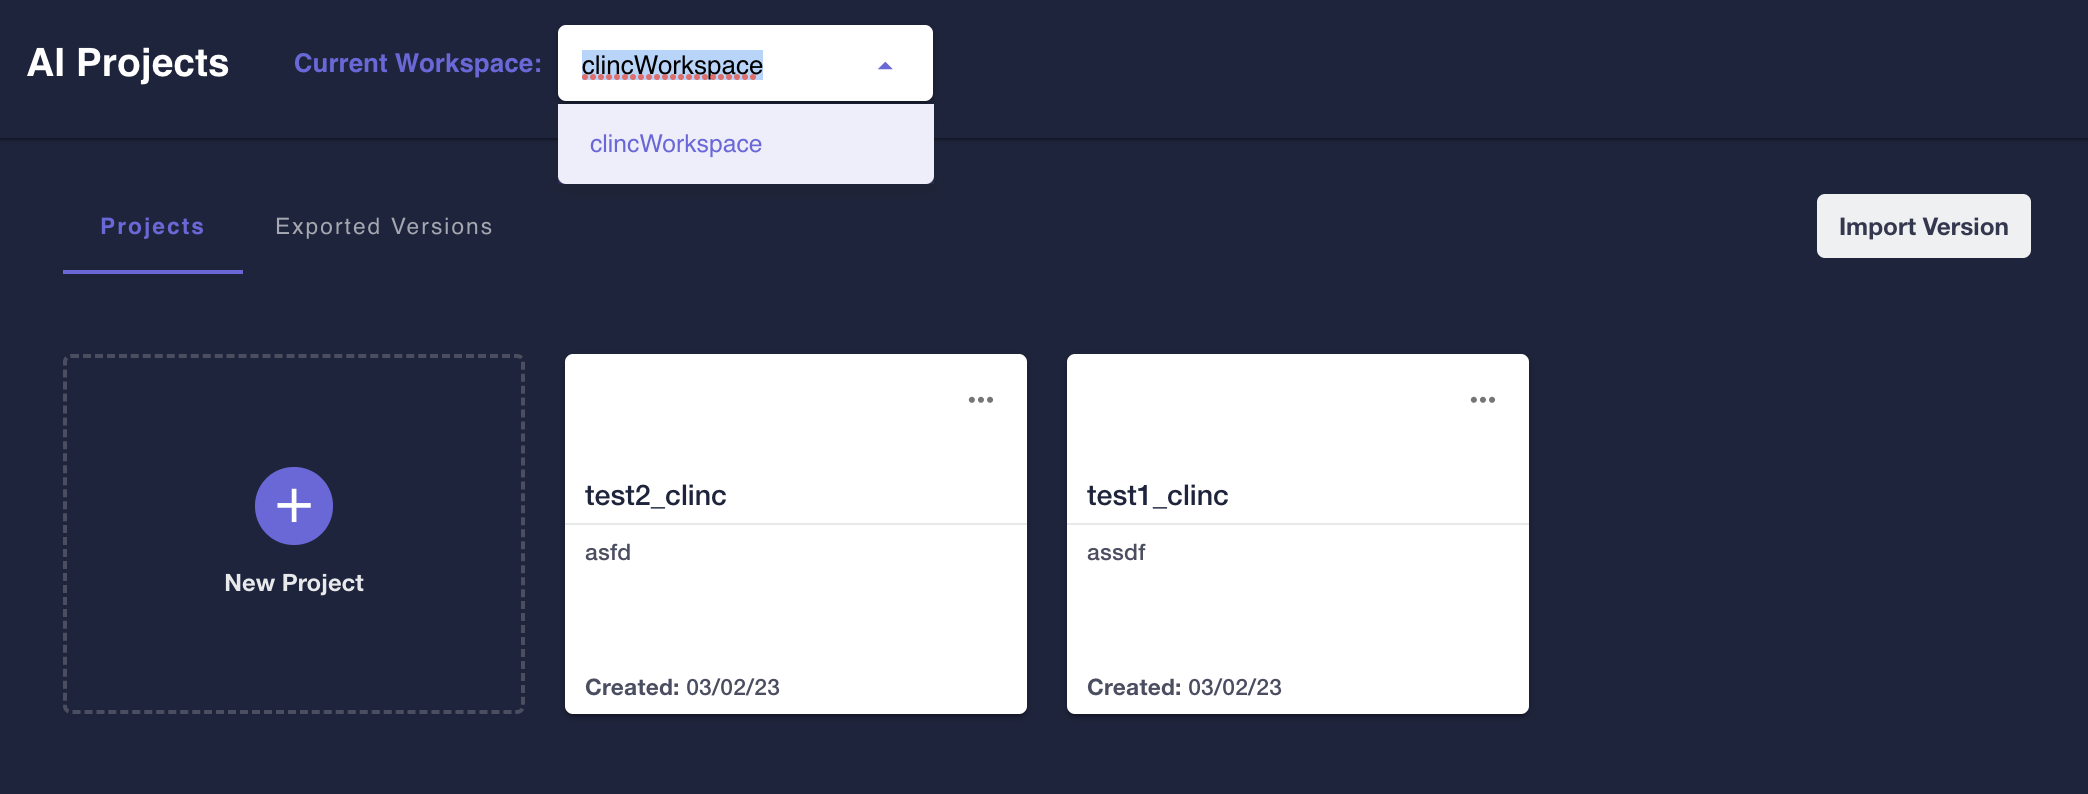
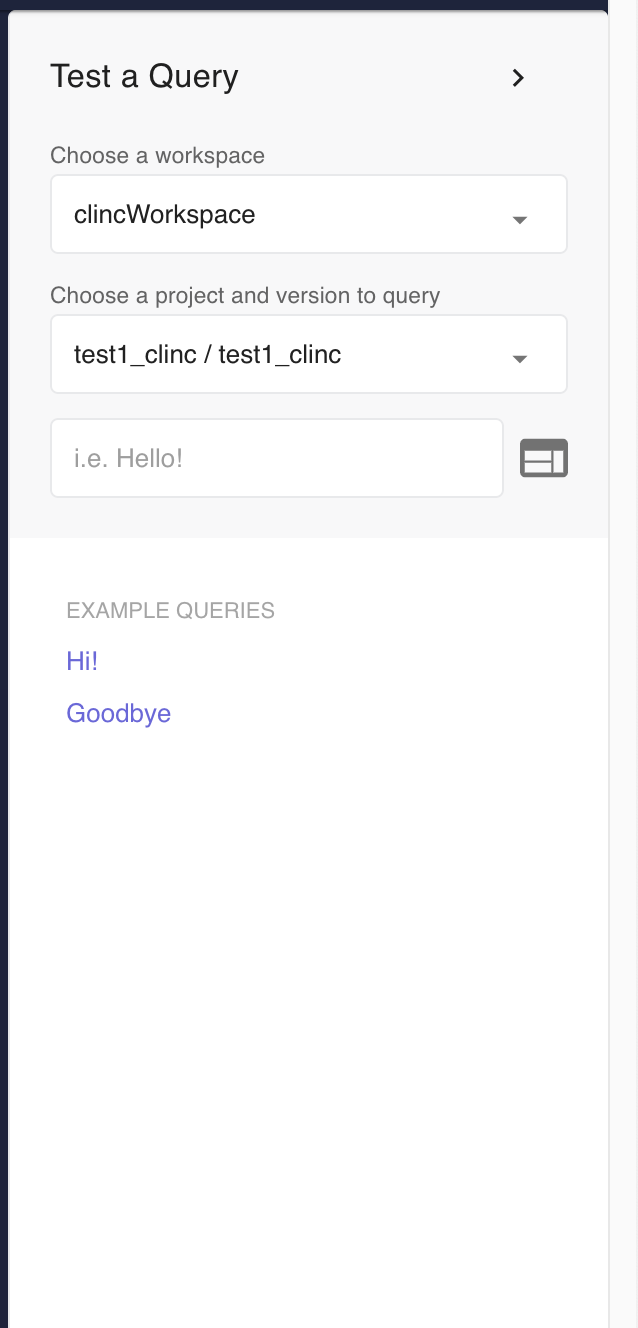
Similarly, the query sidebar will now have the option to choose the workspace on top of choosing a project. The list of projects/versions will automatically update if a user selects a new workspace. The selected querying workspace will persist across sessions.
# Managing AI Model Connectors
AI Model Connectors are used within the Clinc platform and allows users to connect to Large Language models of thier preference to specific features on the Clinc Platform. As of now the only features in which connectors can be created and utilized for is Classification Data Generation (From here on out Classification Data Generation will be refered to as CLF Data Generation, see Classification Data Generation documentation for more information on how to use the feature). Clinc will incorporate other features in which AI Model Connectors can be used in the future.
The Clinc Platform supports three Large Language Models out of the box. Our in house Mistral model, Chatgpt 4o, and Chatgpt Turbo 3.5k.
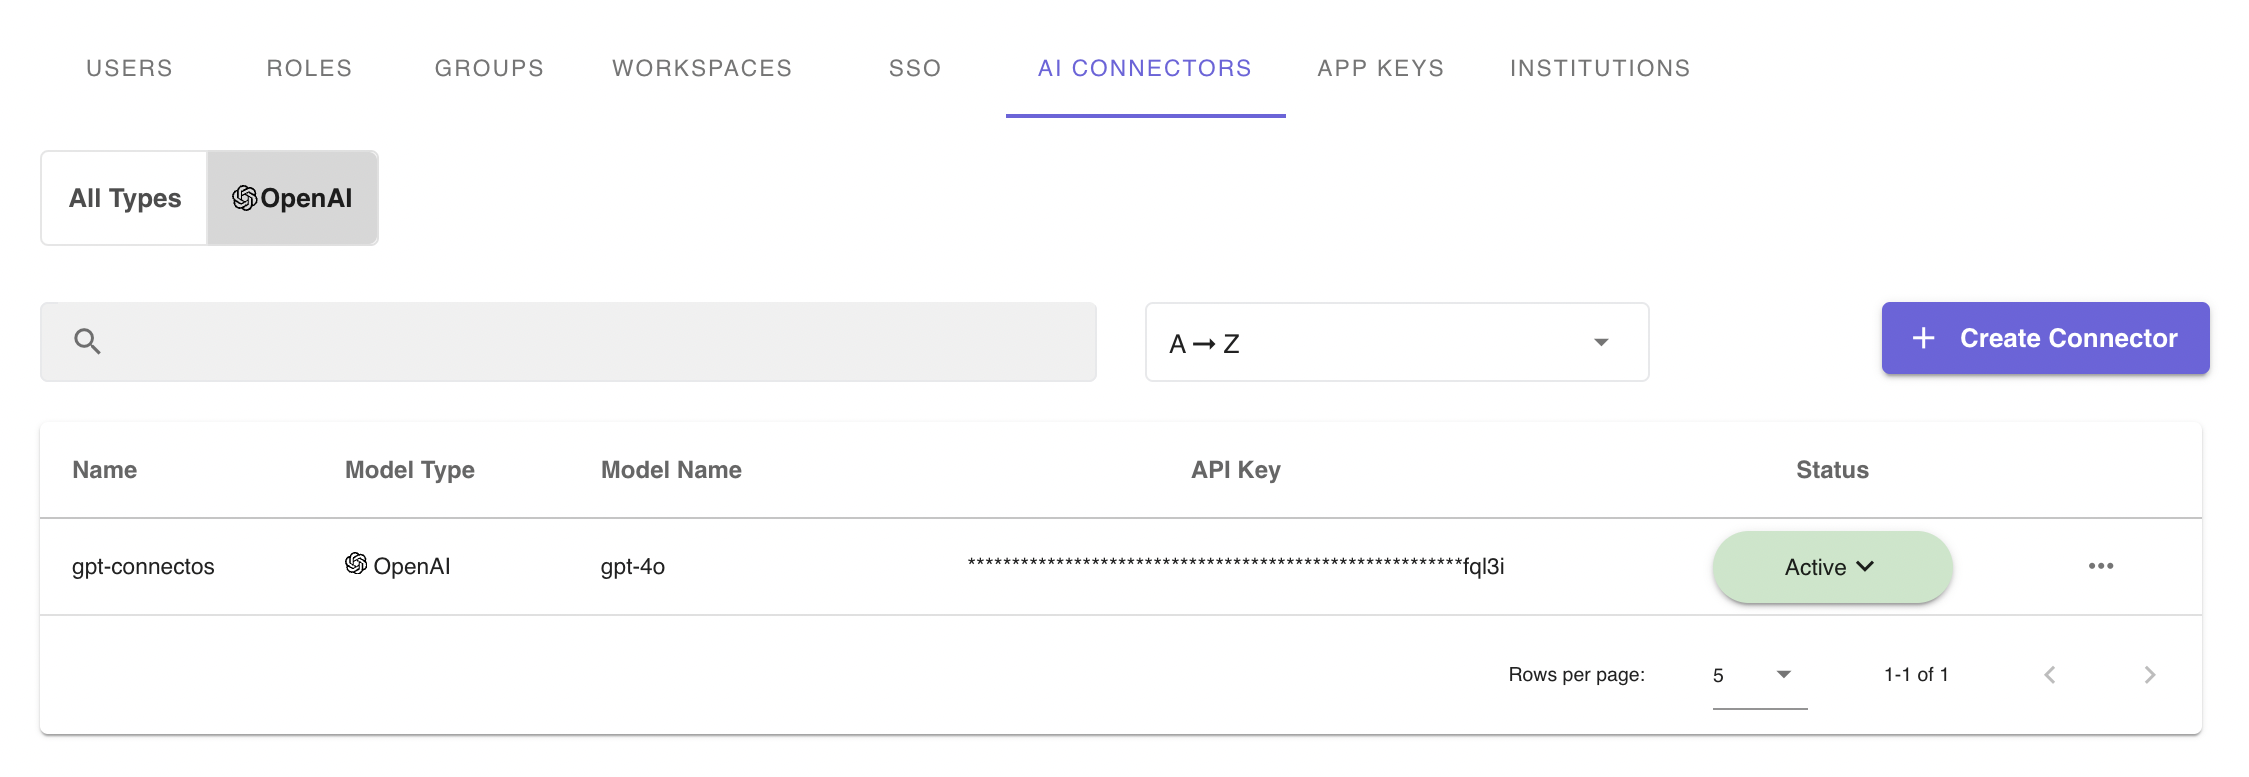
The AI Model Connectors tab on the Access Management Page (shown above) allows a user to Create, Edit, and Delete AI Model Connectors.
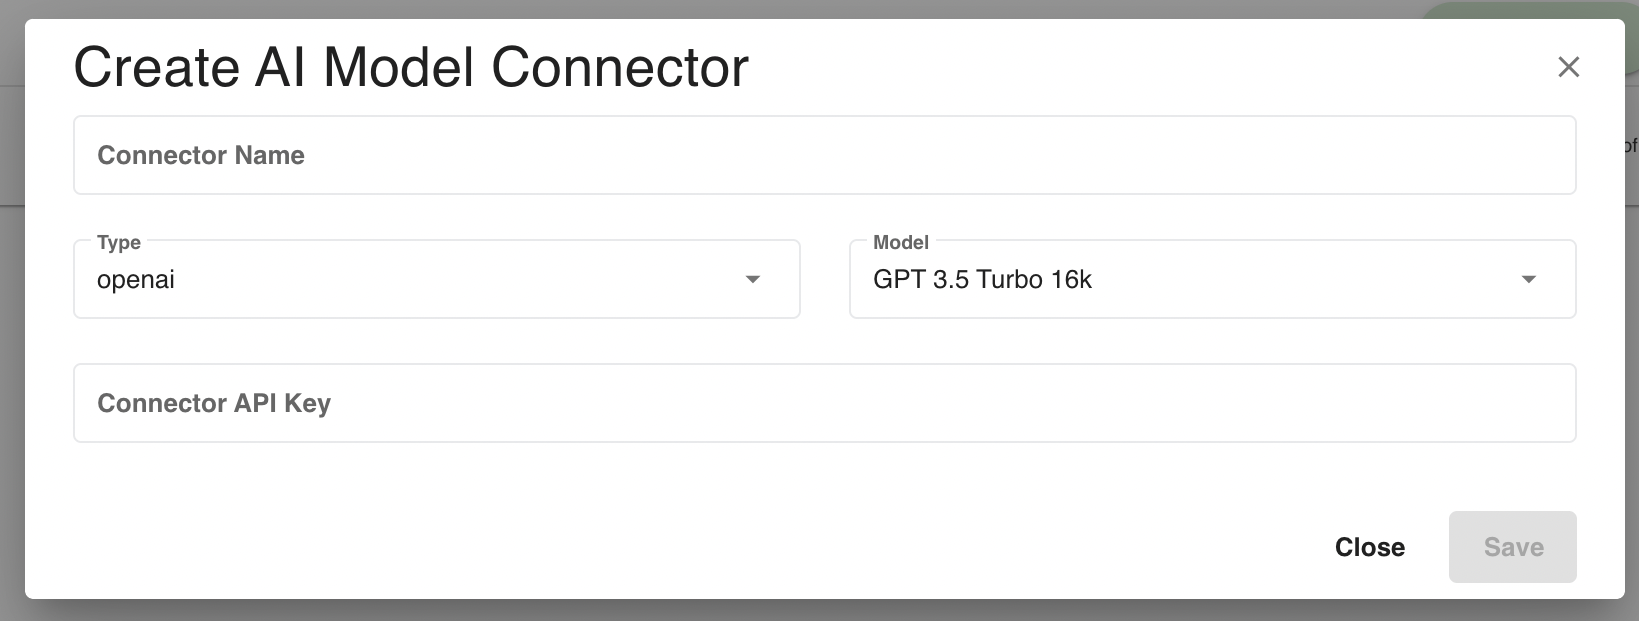
To create an AI Model Connector, click the + Create Connector button on the top right hand of Connectors listing page. Fill out the form by adding a name for the connector, selecting a Model Type and Model Name, and providing a valid API Key.
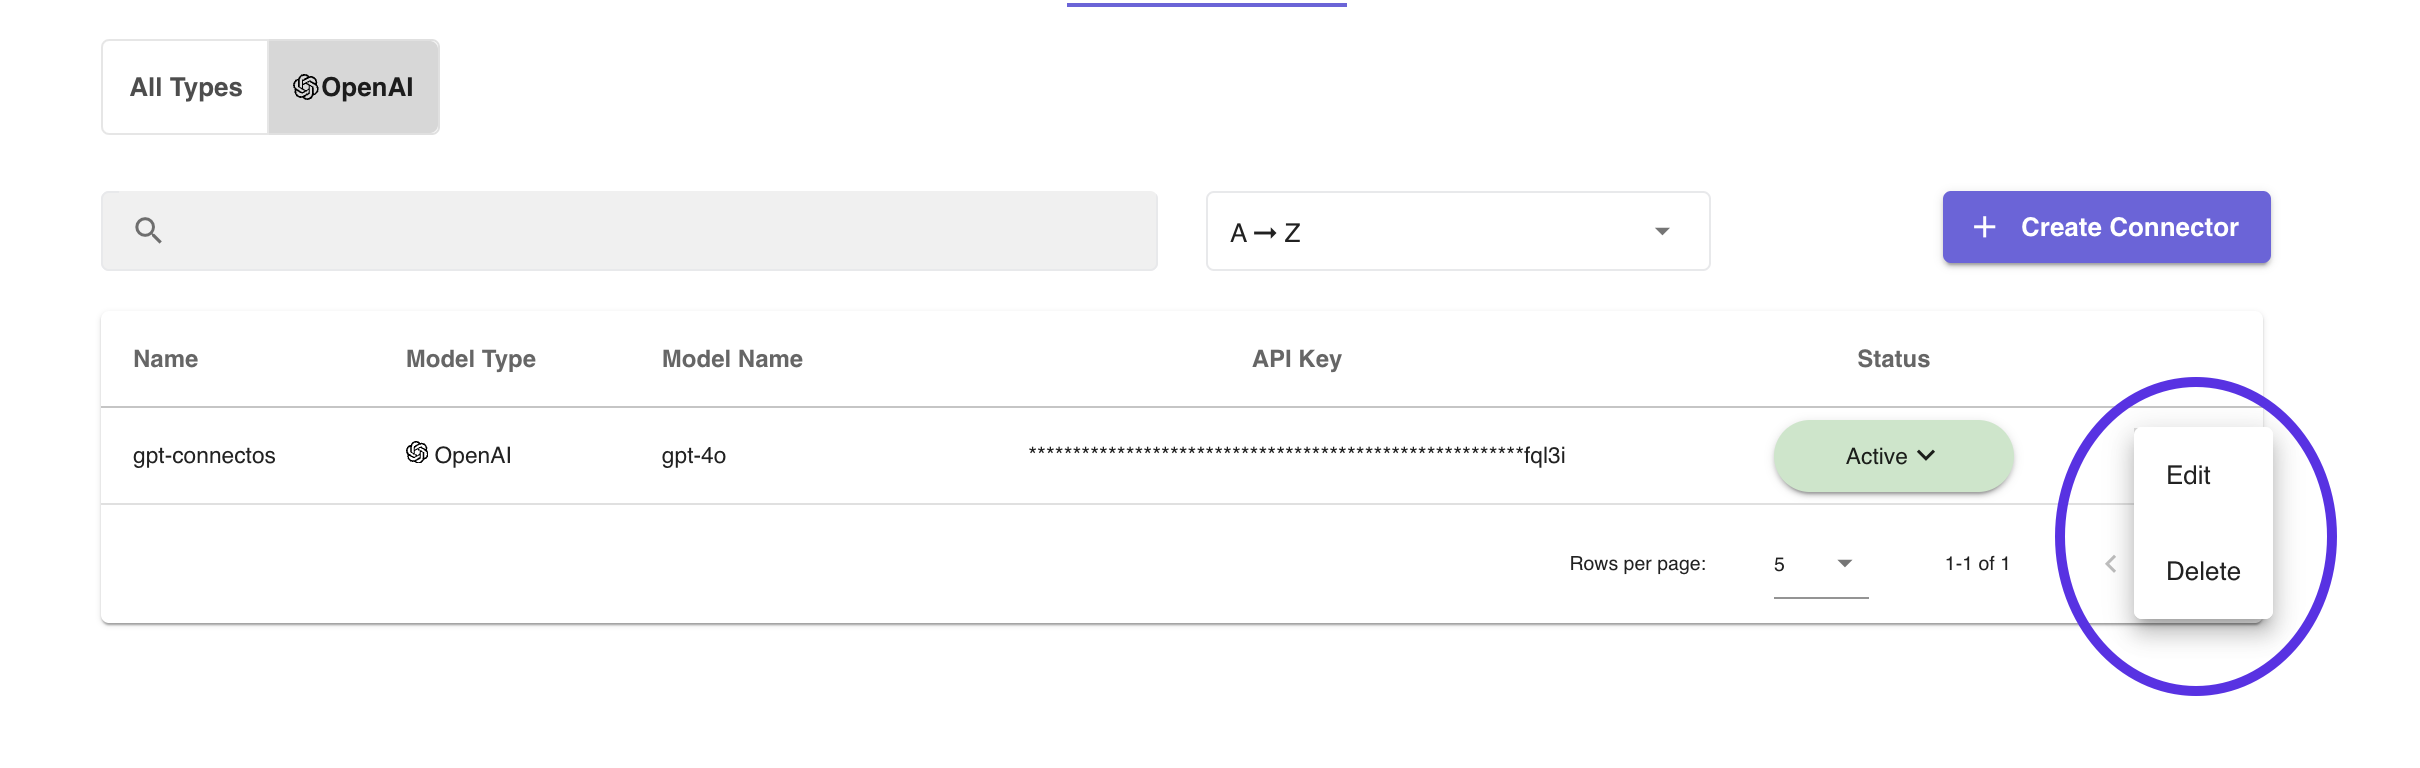
Deleting and Editing an AI Model Connector can be done on the listing page as well. Navigate to the row of the AI Connector intended for modification or delete and click on the triple dot at the end of the row (shown above). Here, a user can select Edit or Delete and following the necessary steps to complete each action.
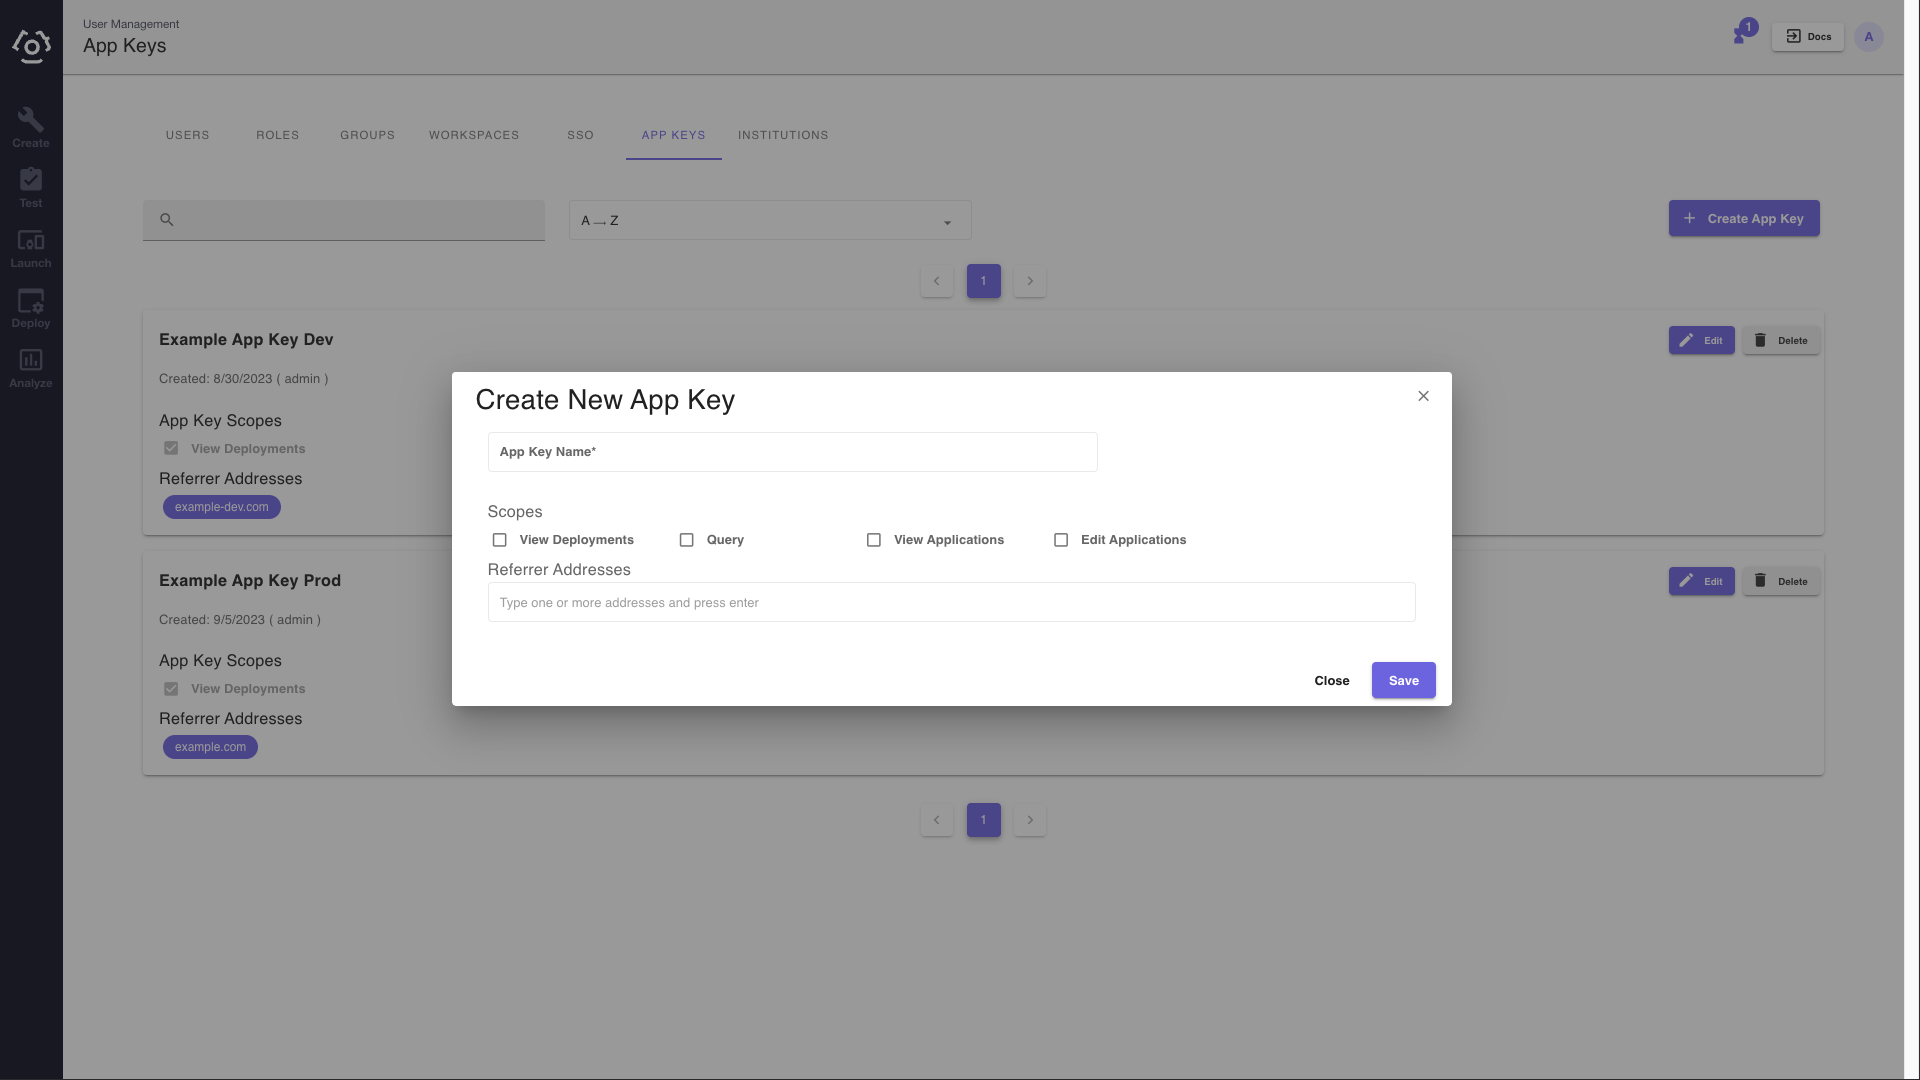
# Managing App Keys
App Keys are used to authenticate and interact with Clinc with a given set of scopes.
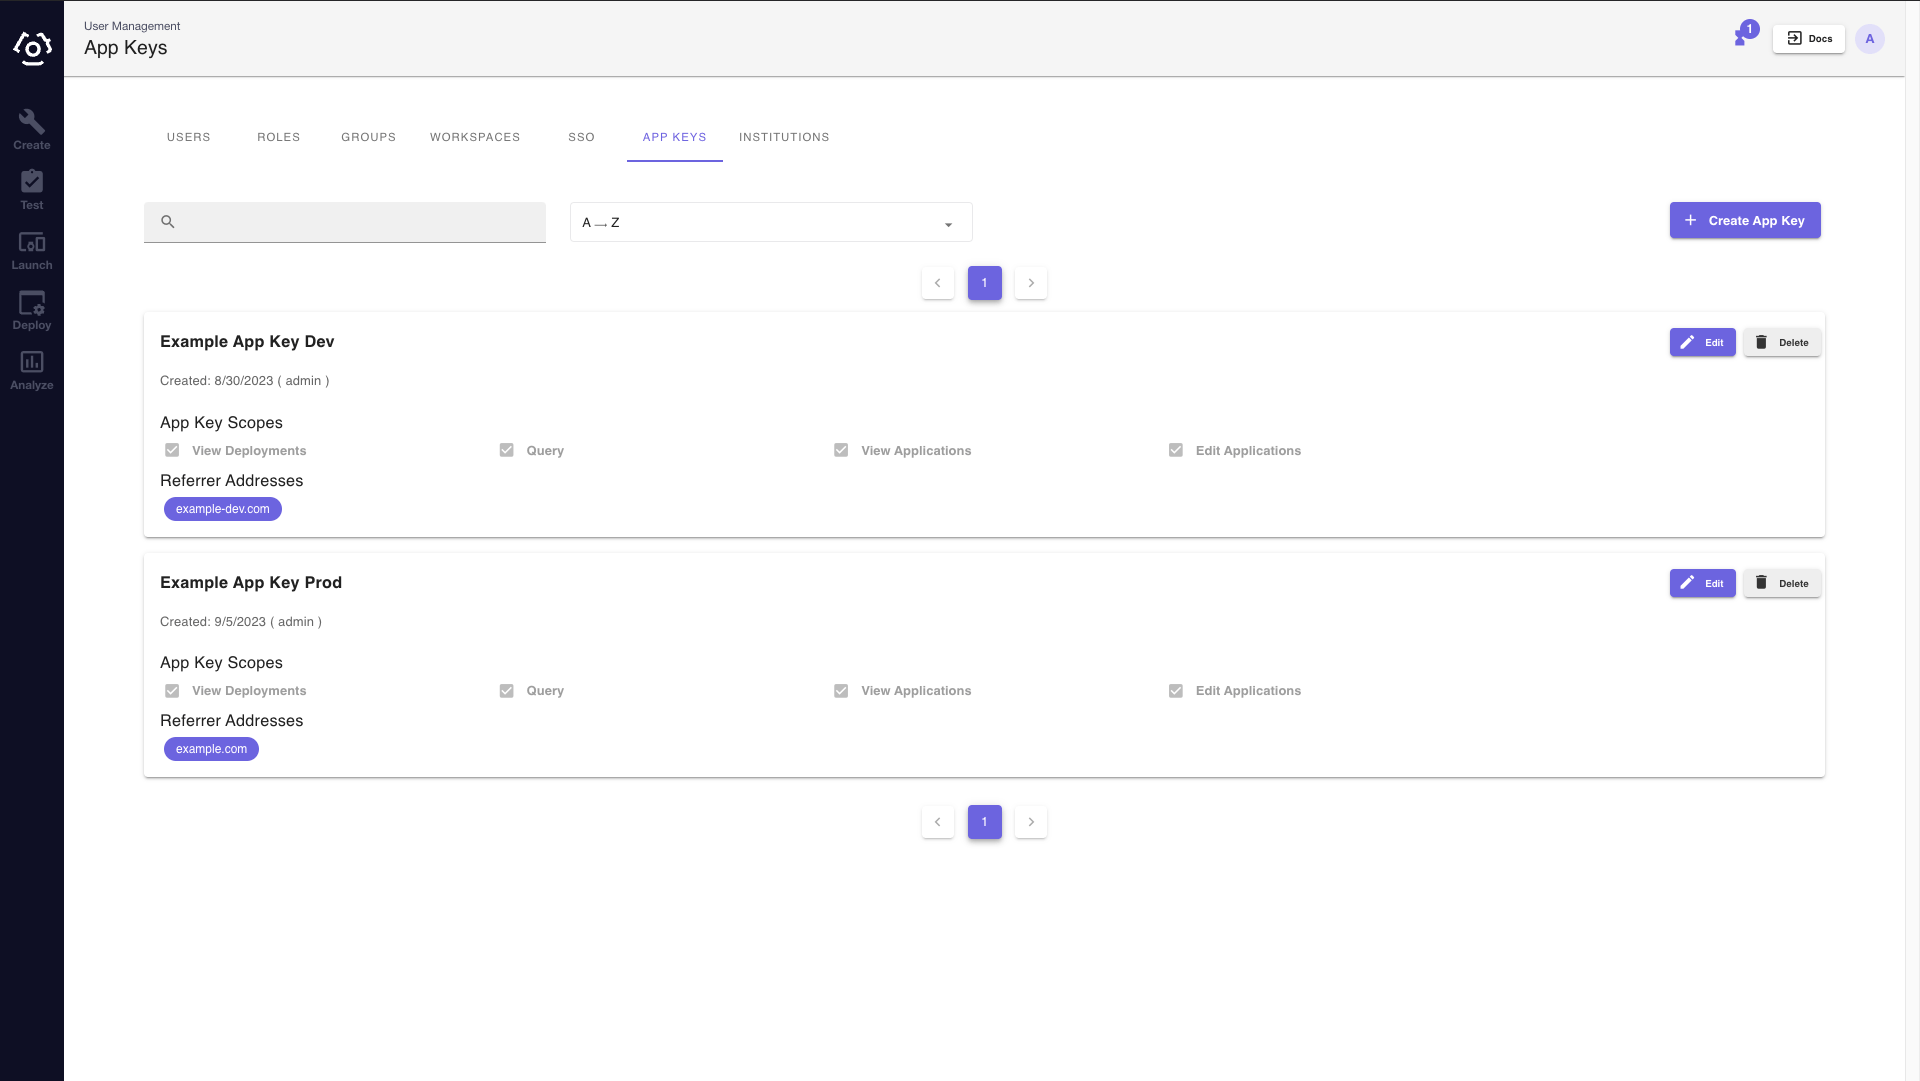
The App Key tab on the Access Management Page (shown above) allows a user to Create, Edit, and Delete App Keys.
To create an App Key, simply click the + Create App Key button. Fill out the form by adding a name, selecting one or more scopes, and provide a referrer address if a user wishes to limit where the App Key can be used.
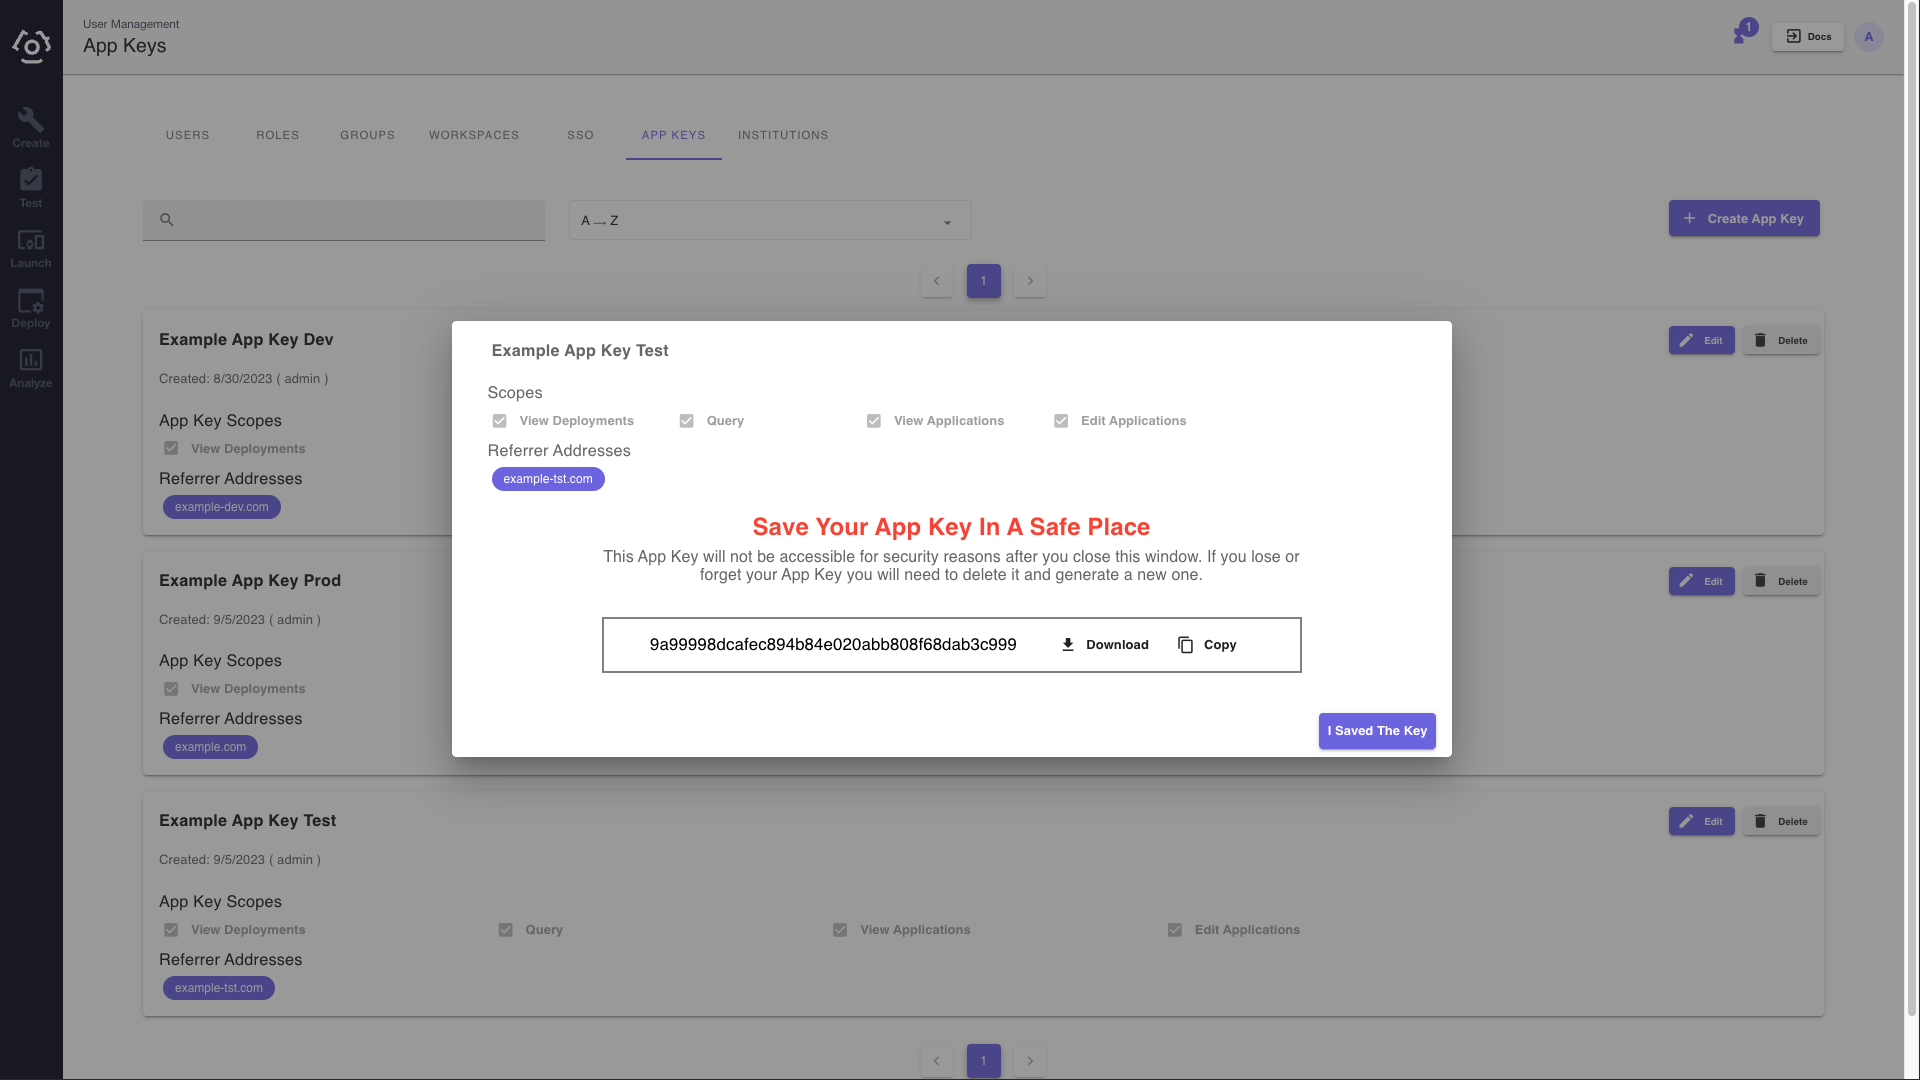
After creating an App Key, Clinc offers the opportunity to copy the key to a save place from the clipboard or download the key directly toa users device. For security purposes, this will be the only time the App Key is available for viewing and a user must save it at this time. It will not be available for viewing again.
# Configuring Single Sign On for an Institution
Admin users can set up single sign on for their institution. To set this up, go to the SSO tab under the Access Management page.
SSO will be disabled at first. Click Enable to enable the feature.

After enabling SSO, continue to Step 2 and fill in the form with details provided by the users identity provider.
The Identity Provider Group IDs field is optional. If a users IdP provides the option to set up IdP groups for whitelisting specific users, type in the IdP group IDs.
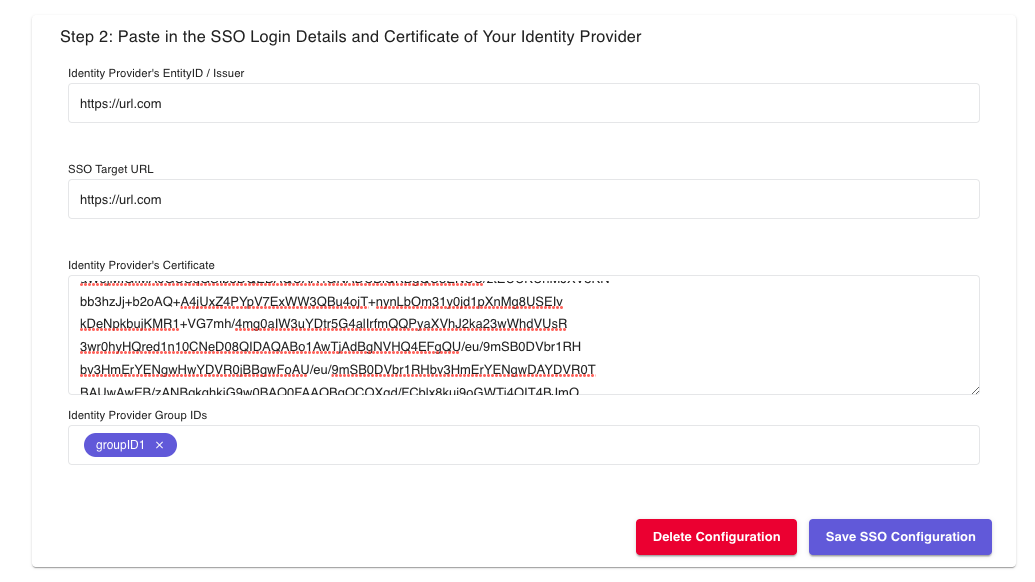
Click Save SSO Configuration. Users under this institution will now have SSO access.
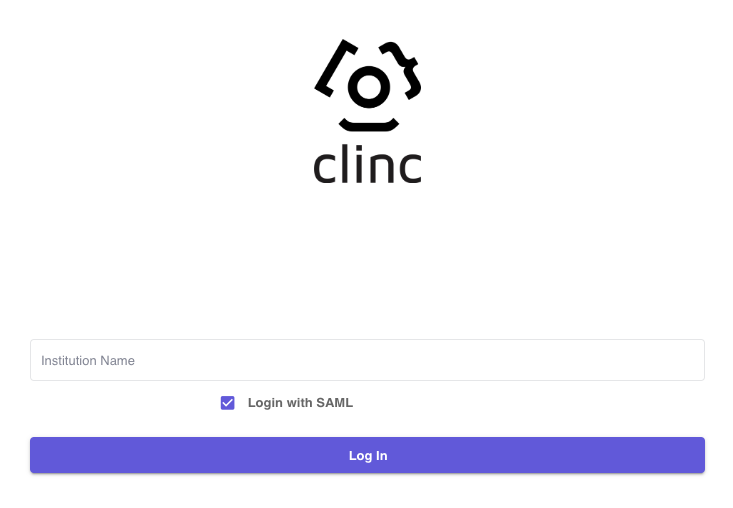
To log in using SSO, go to the login page of the platform.
Check Login with SAML and type in the institution. Clicking Login will direct the user to their identity provider for authentication.
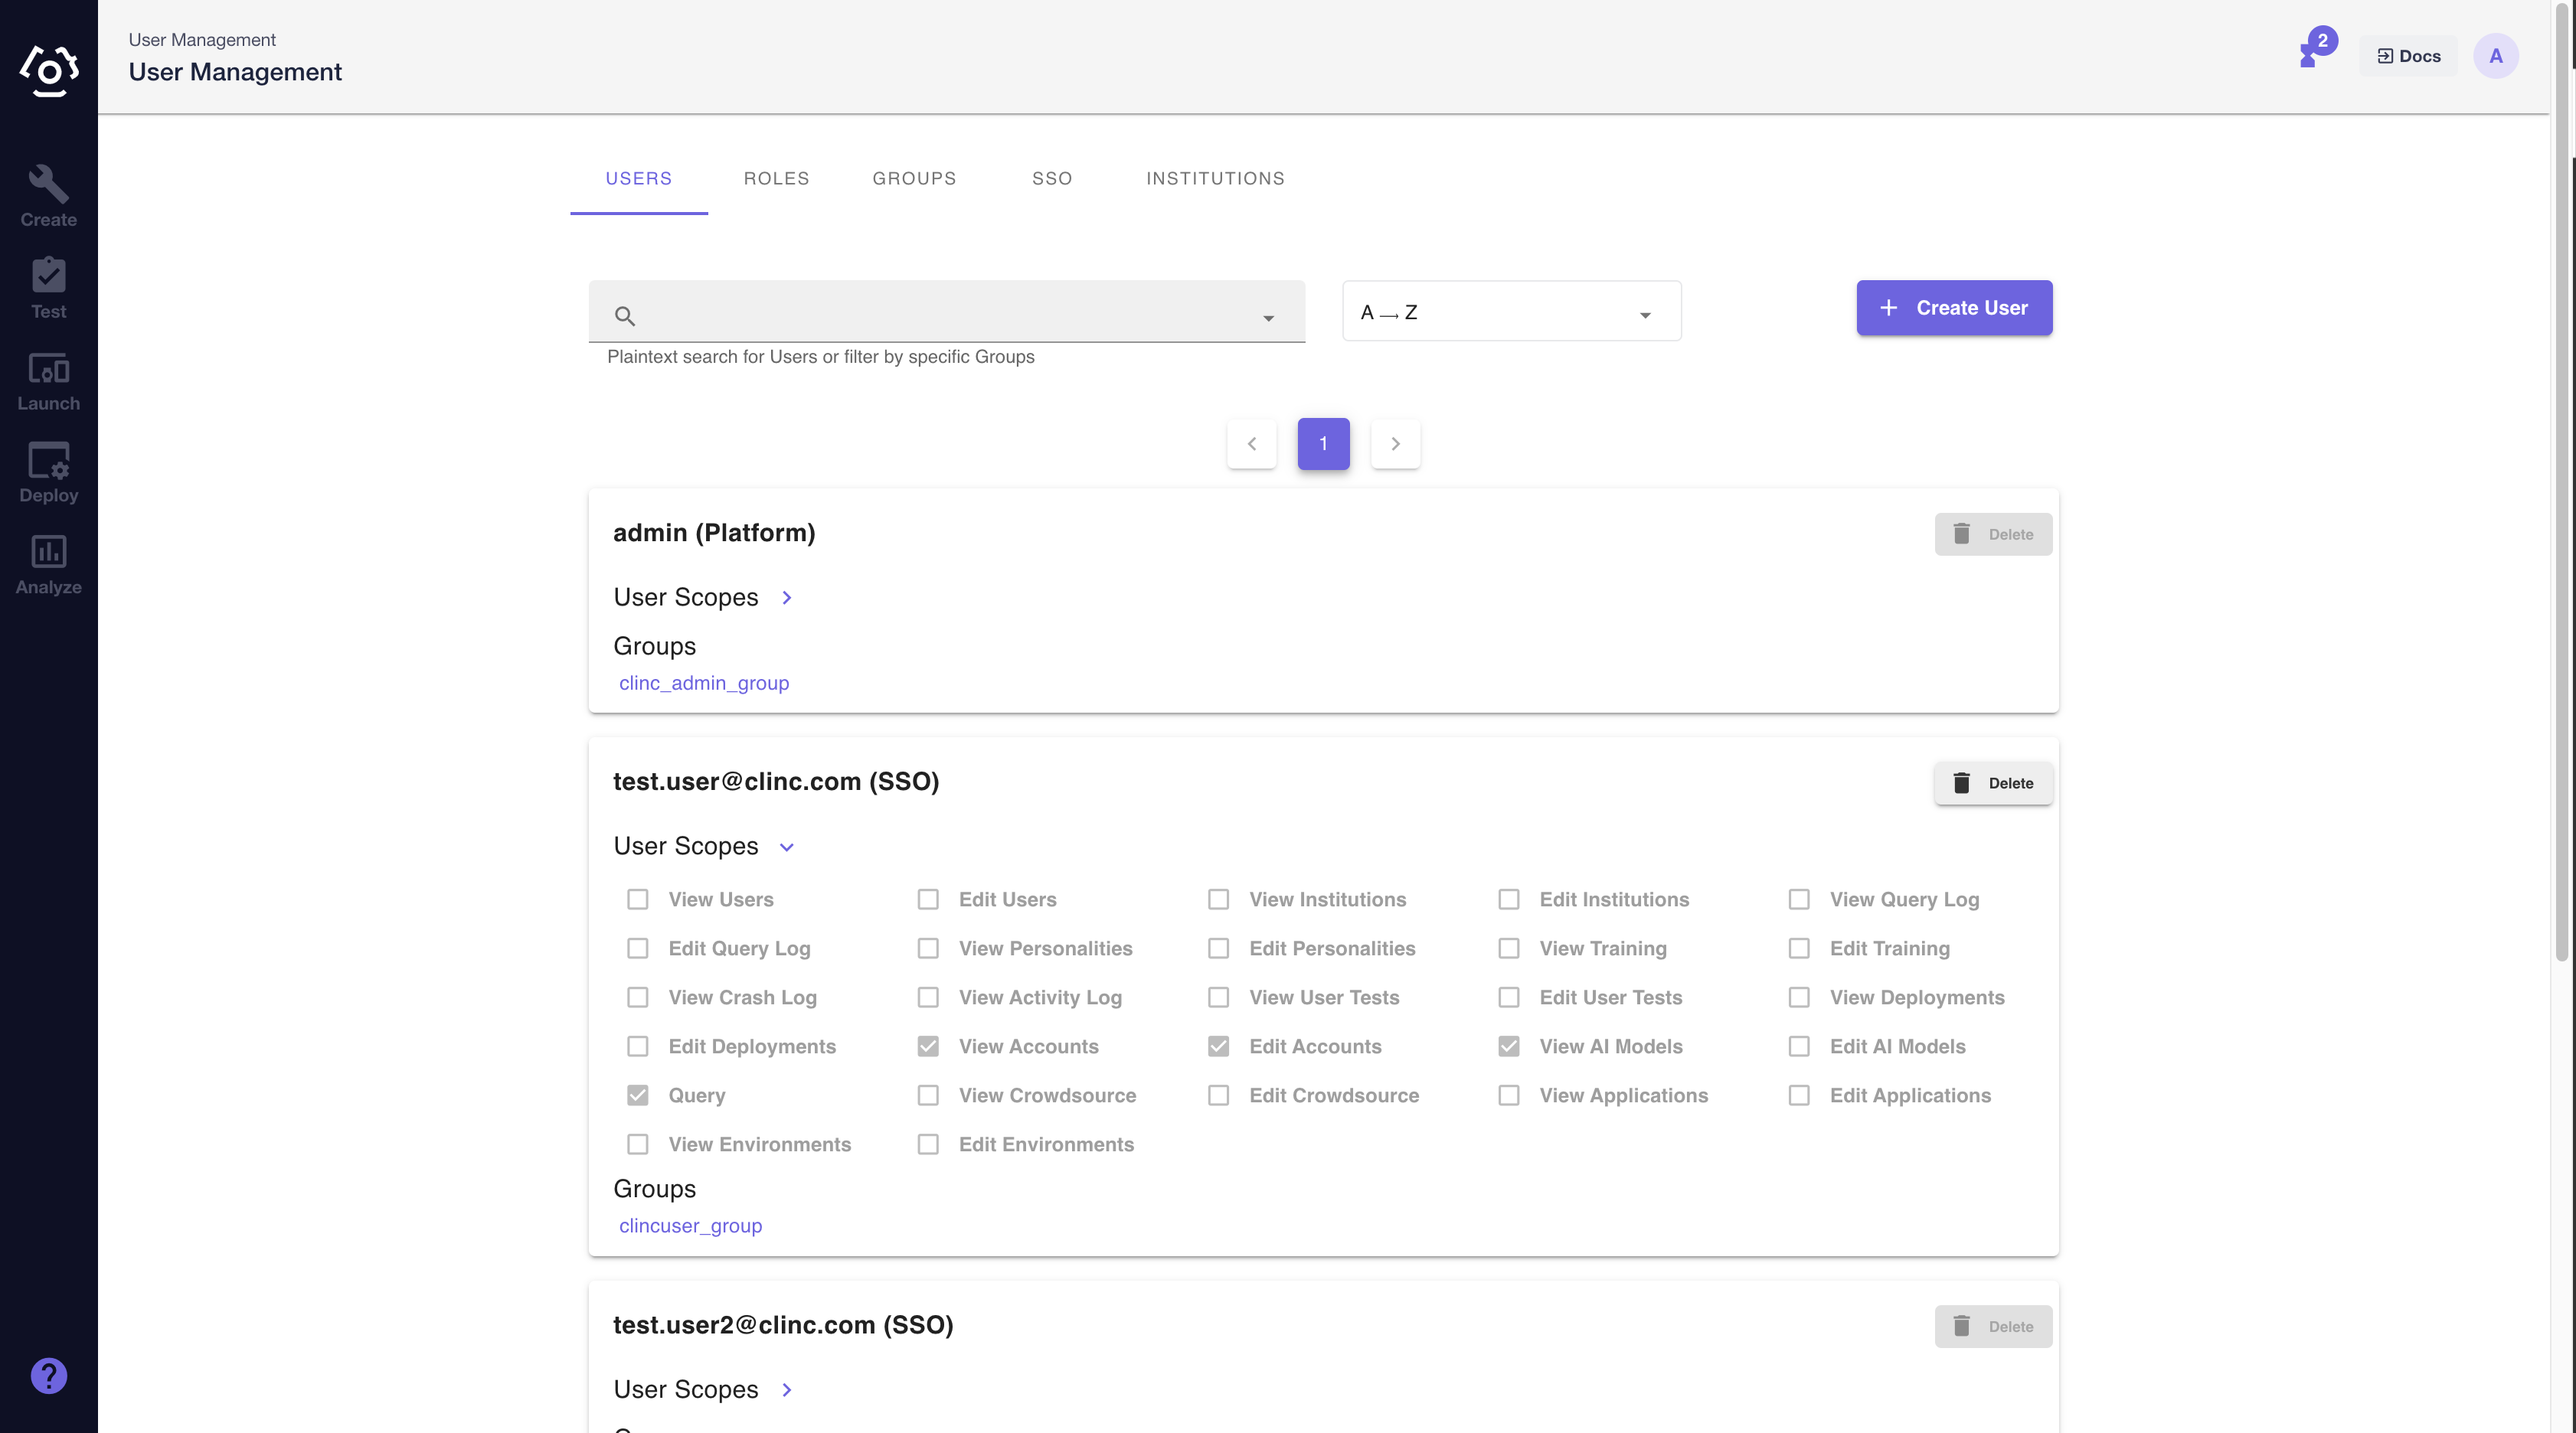
Users created through SSO login will start with only the Query scope. It is up to the institution admin to give additional permissions to each user.
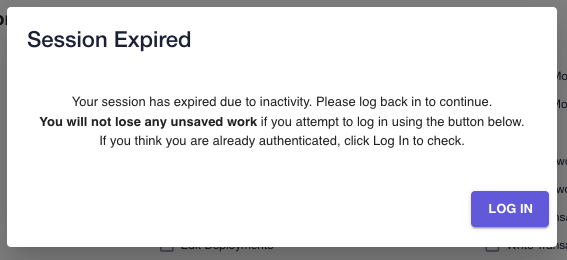
Existing features such as session timeout will work as before for both platform native and sso users.
SSO users will be logged back into the platform automatically once they re-authenticate with their identity provider by clicking Log In.
# Converting Existing Native Platform Users to SSO Users
Native platform users who log in with SAML using the same email will be converted to SSO users and they will always use SAML to log in to the Platform in the future.
If a user logs in with SAML using a new email, a new SSO user will be created.
Once SSO is disabled, SSO users will no longer be able to log in to the Platform.
# Viewing SSO Users
On the Users tab, the admin user will be able to distinguish between native platform users and sso users.
Last updated: 09/05/2023