# Alexa Integration
# Amazon Developer Console Setup
# Creating Amazon Developer Account
- Navigate to Amazon Developer Console (opens new window).

Click Sign In in the upper right corner. Put in your Amazon Developer Credentials or Create Your Amazon Developer Account if you don't already have one.
Go through the Profile Information, Agreement, and Payment pages (Check No for both options on this page).
# Creating an Alexa Skill
Navigate to Amazon Alexa Developer Page (opens new window).
You should be automatically signed in otherwise click Sign In in the top right and login with previously created Amazon Developer Account.
Navigate to Alexa Skills Kit Developer Console (opens new window)
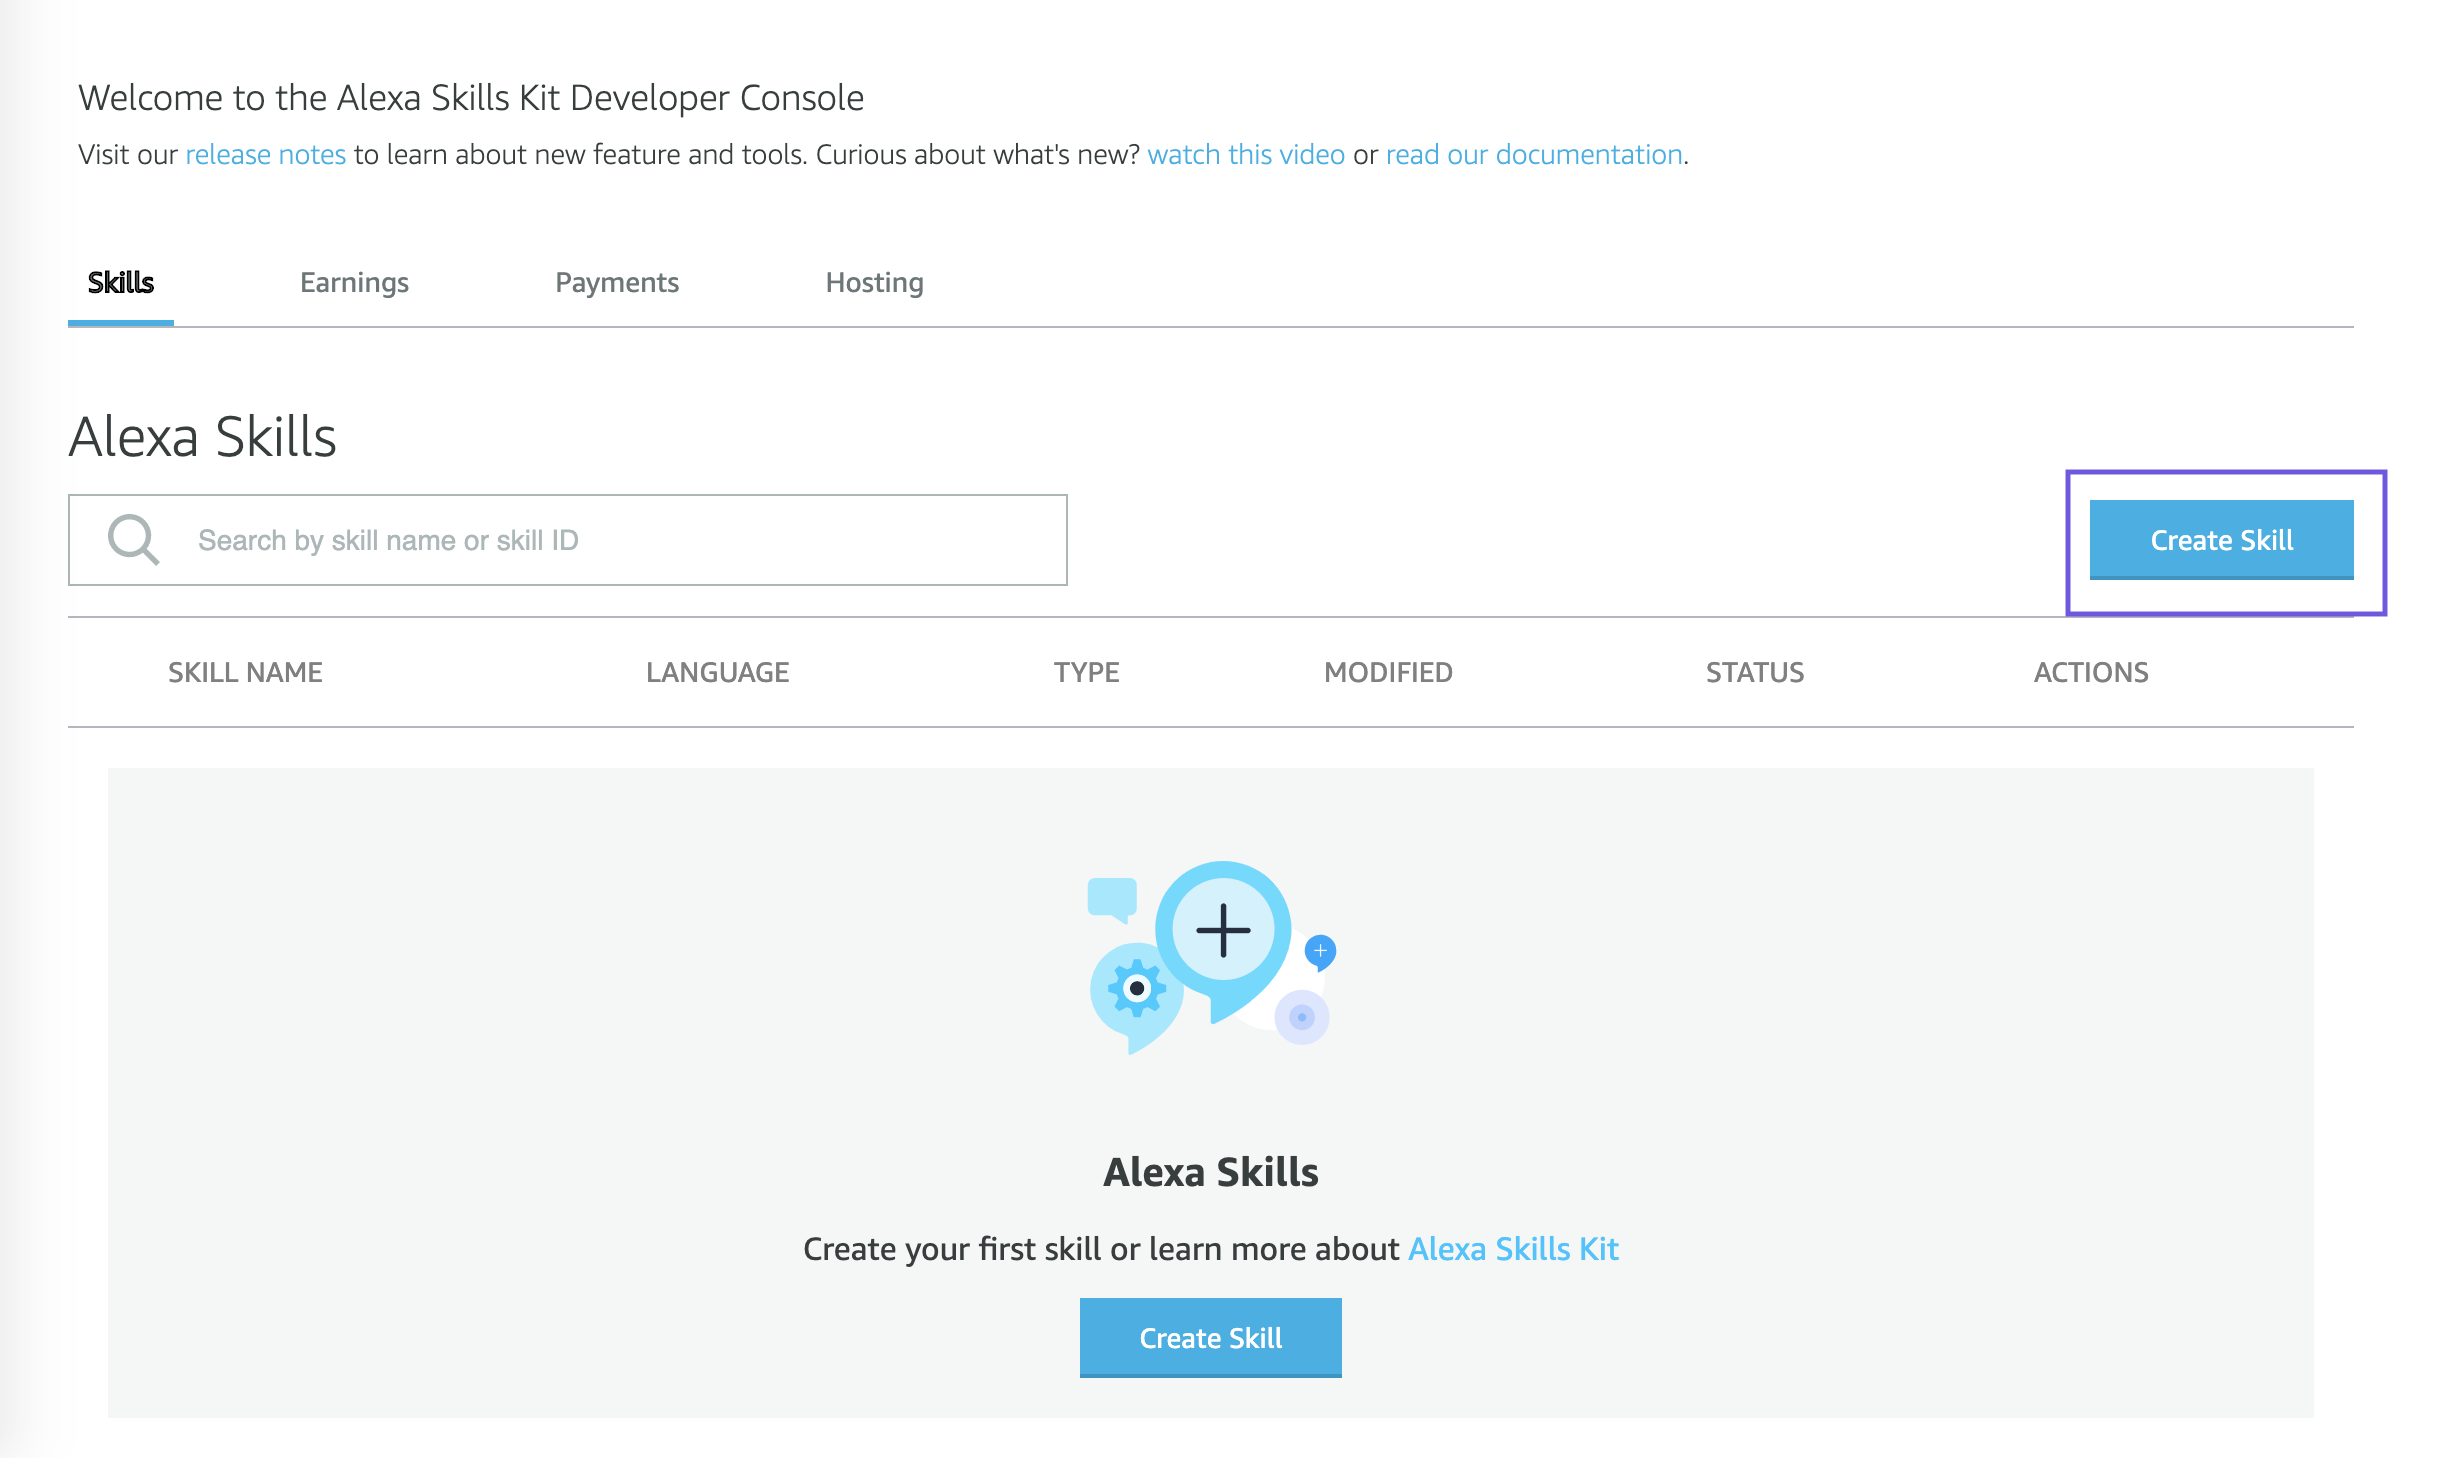
Click Create Skill in the top right.
Type in a skill name.
Under Choose a model to add to your skill, select Custom and under Choose a method to host leave it as Provision your own. Click Create.
On the Choose a template page select Start from Scratch and then click Choose.
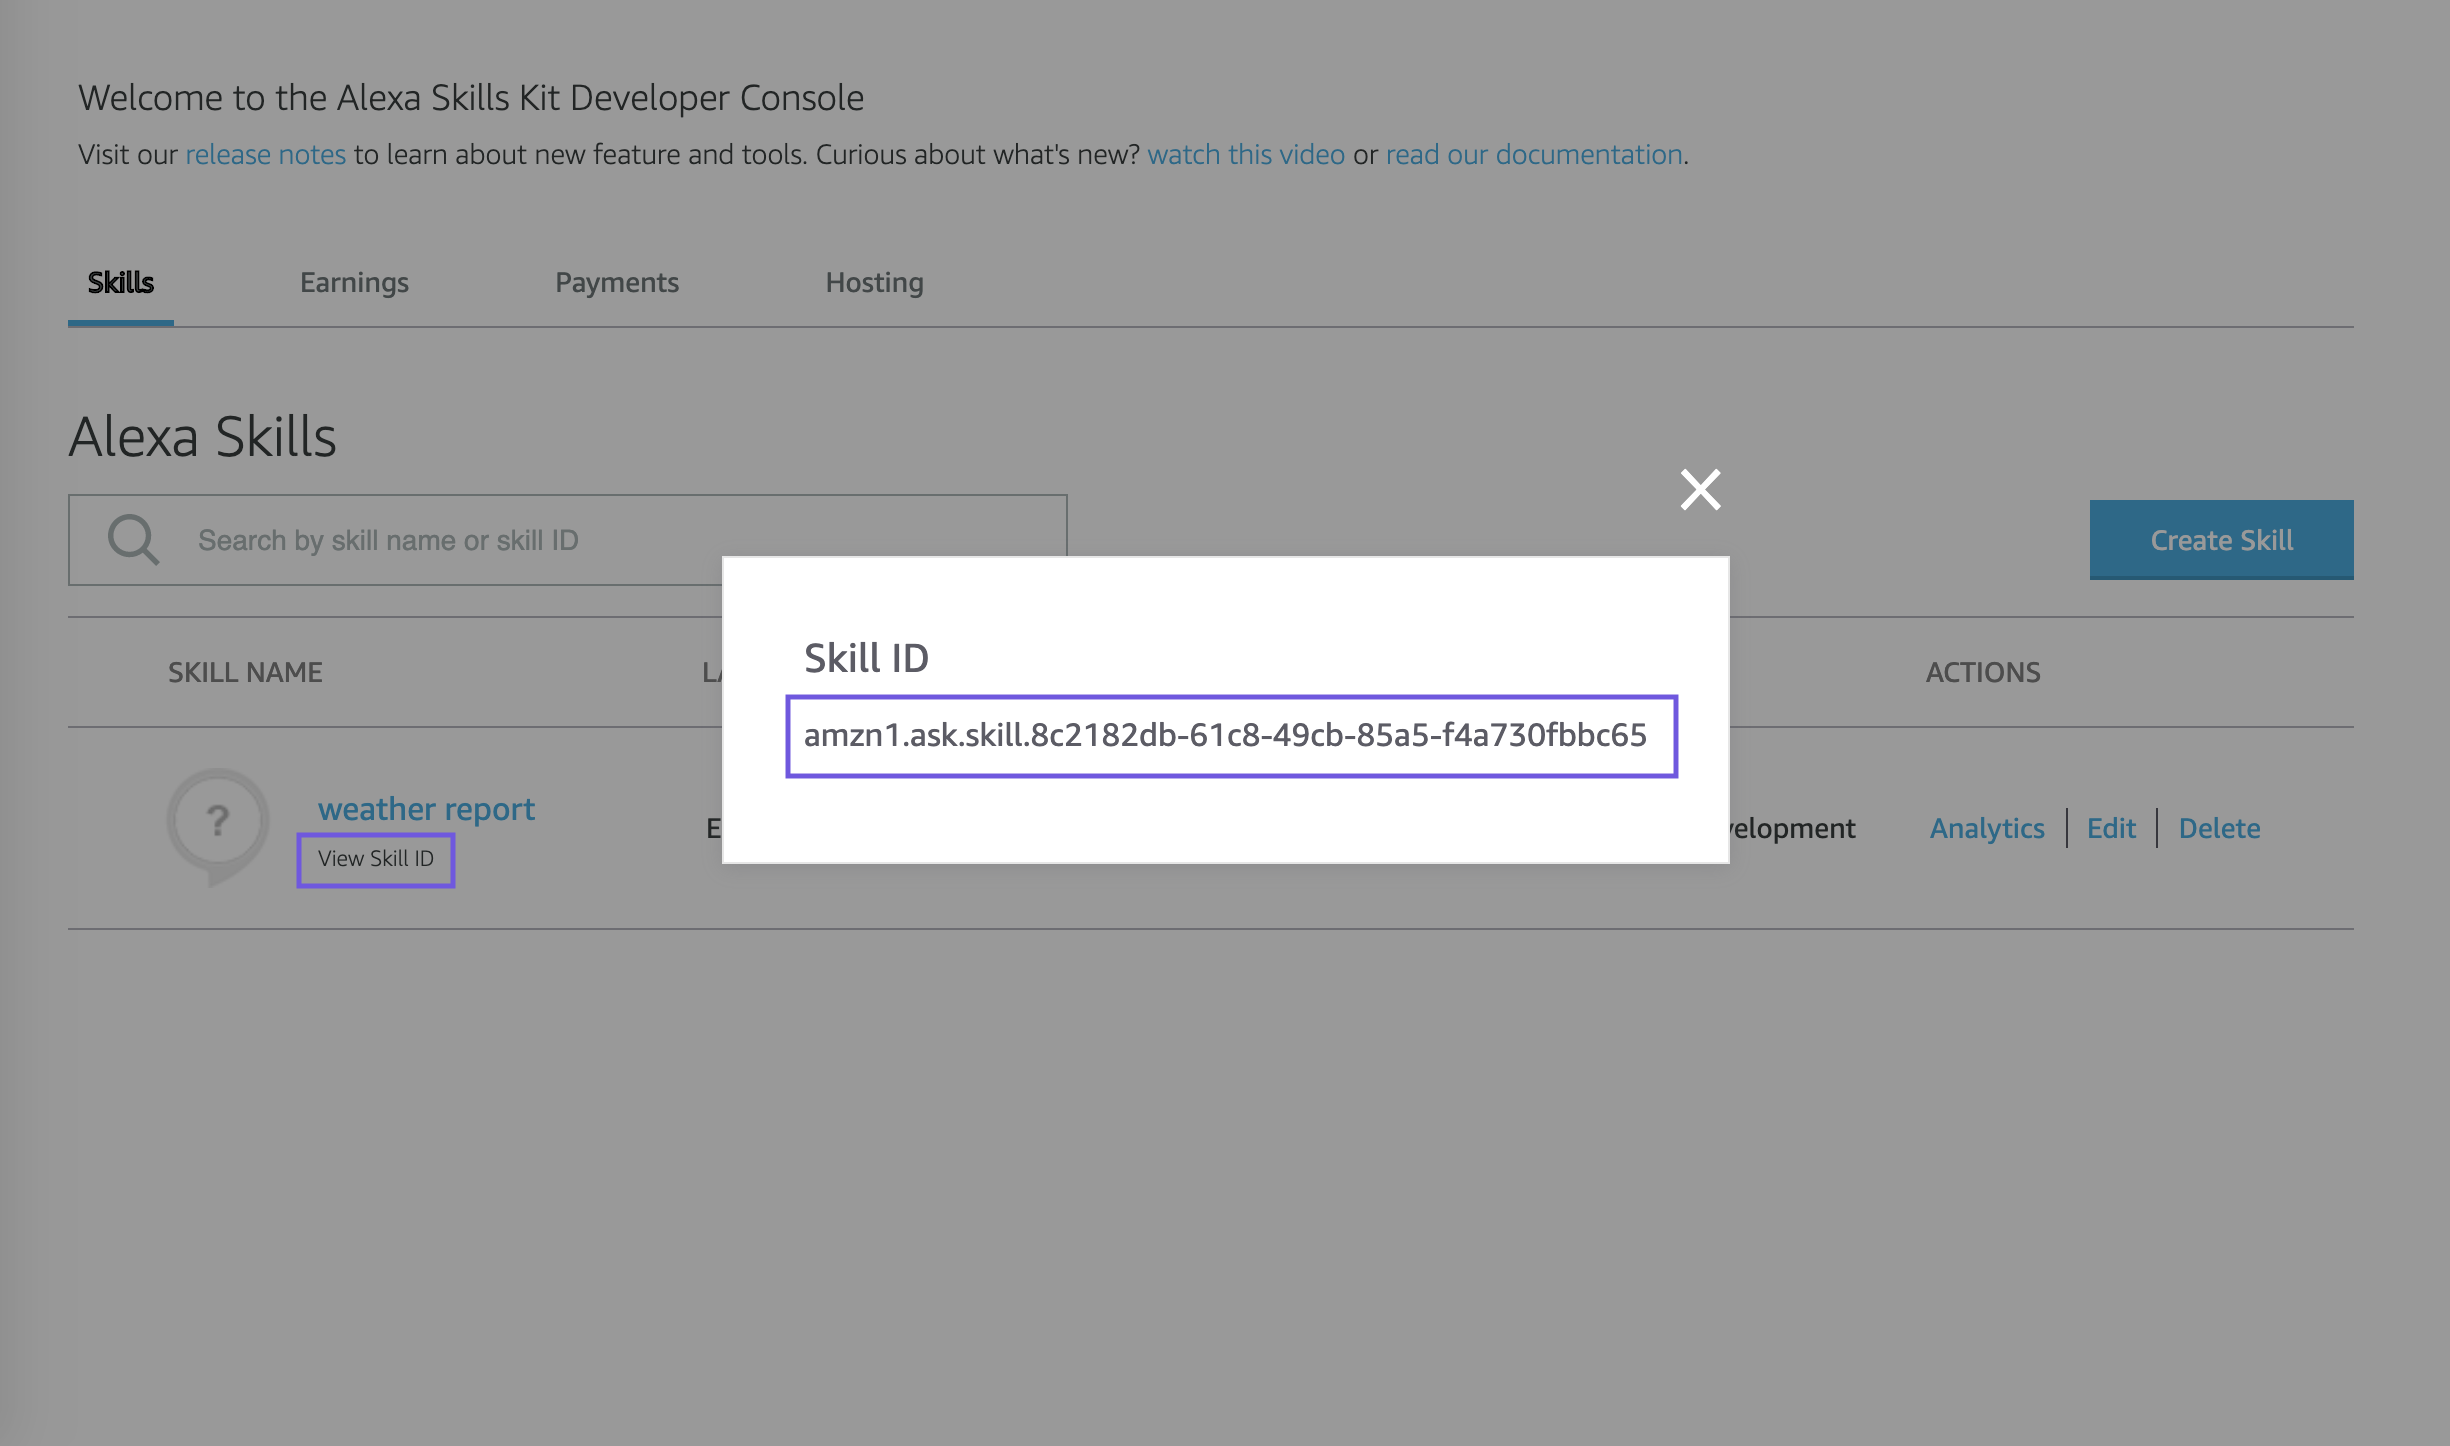
Go back to Alexa Developer Console (opens new window), click on View Skill ID under the skill name. This will be referenced later as
<ALEXA_SKILL_ID>.The ID looks likeamzn1.ask.skill.XXXXXXXX-XXXX-XXXX-XXXX-XXXXXXXXXXXX.
# Configuring Alexa Skill (Build Settings)
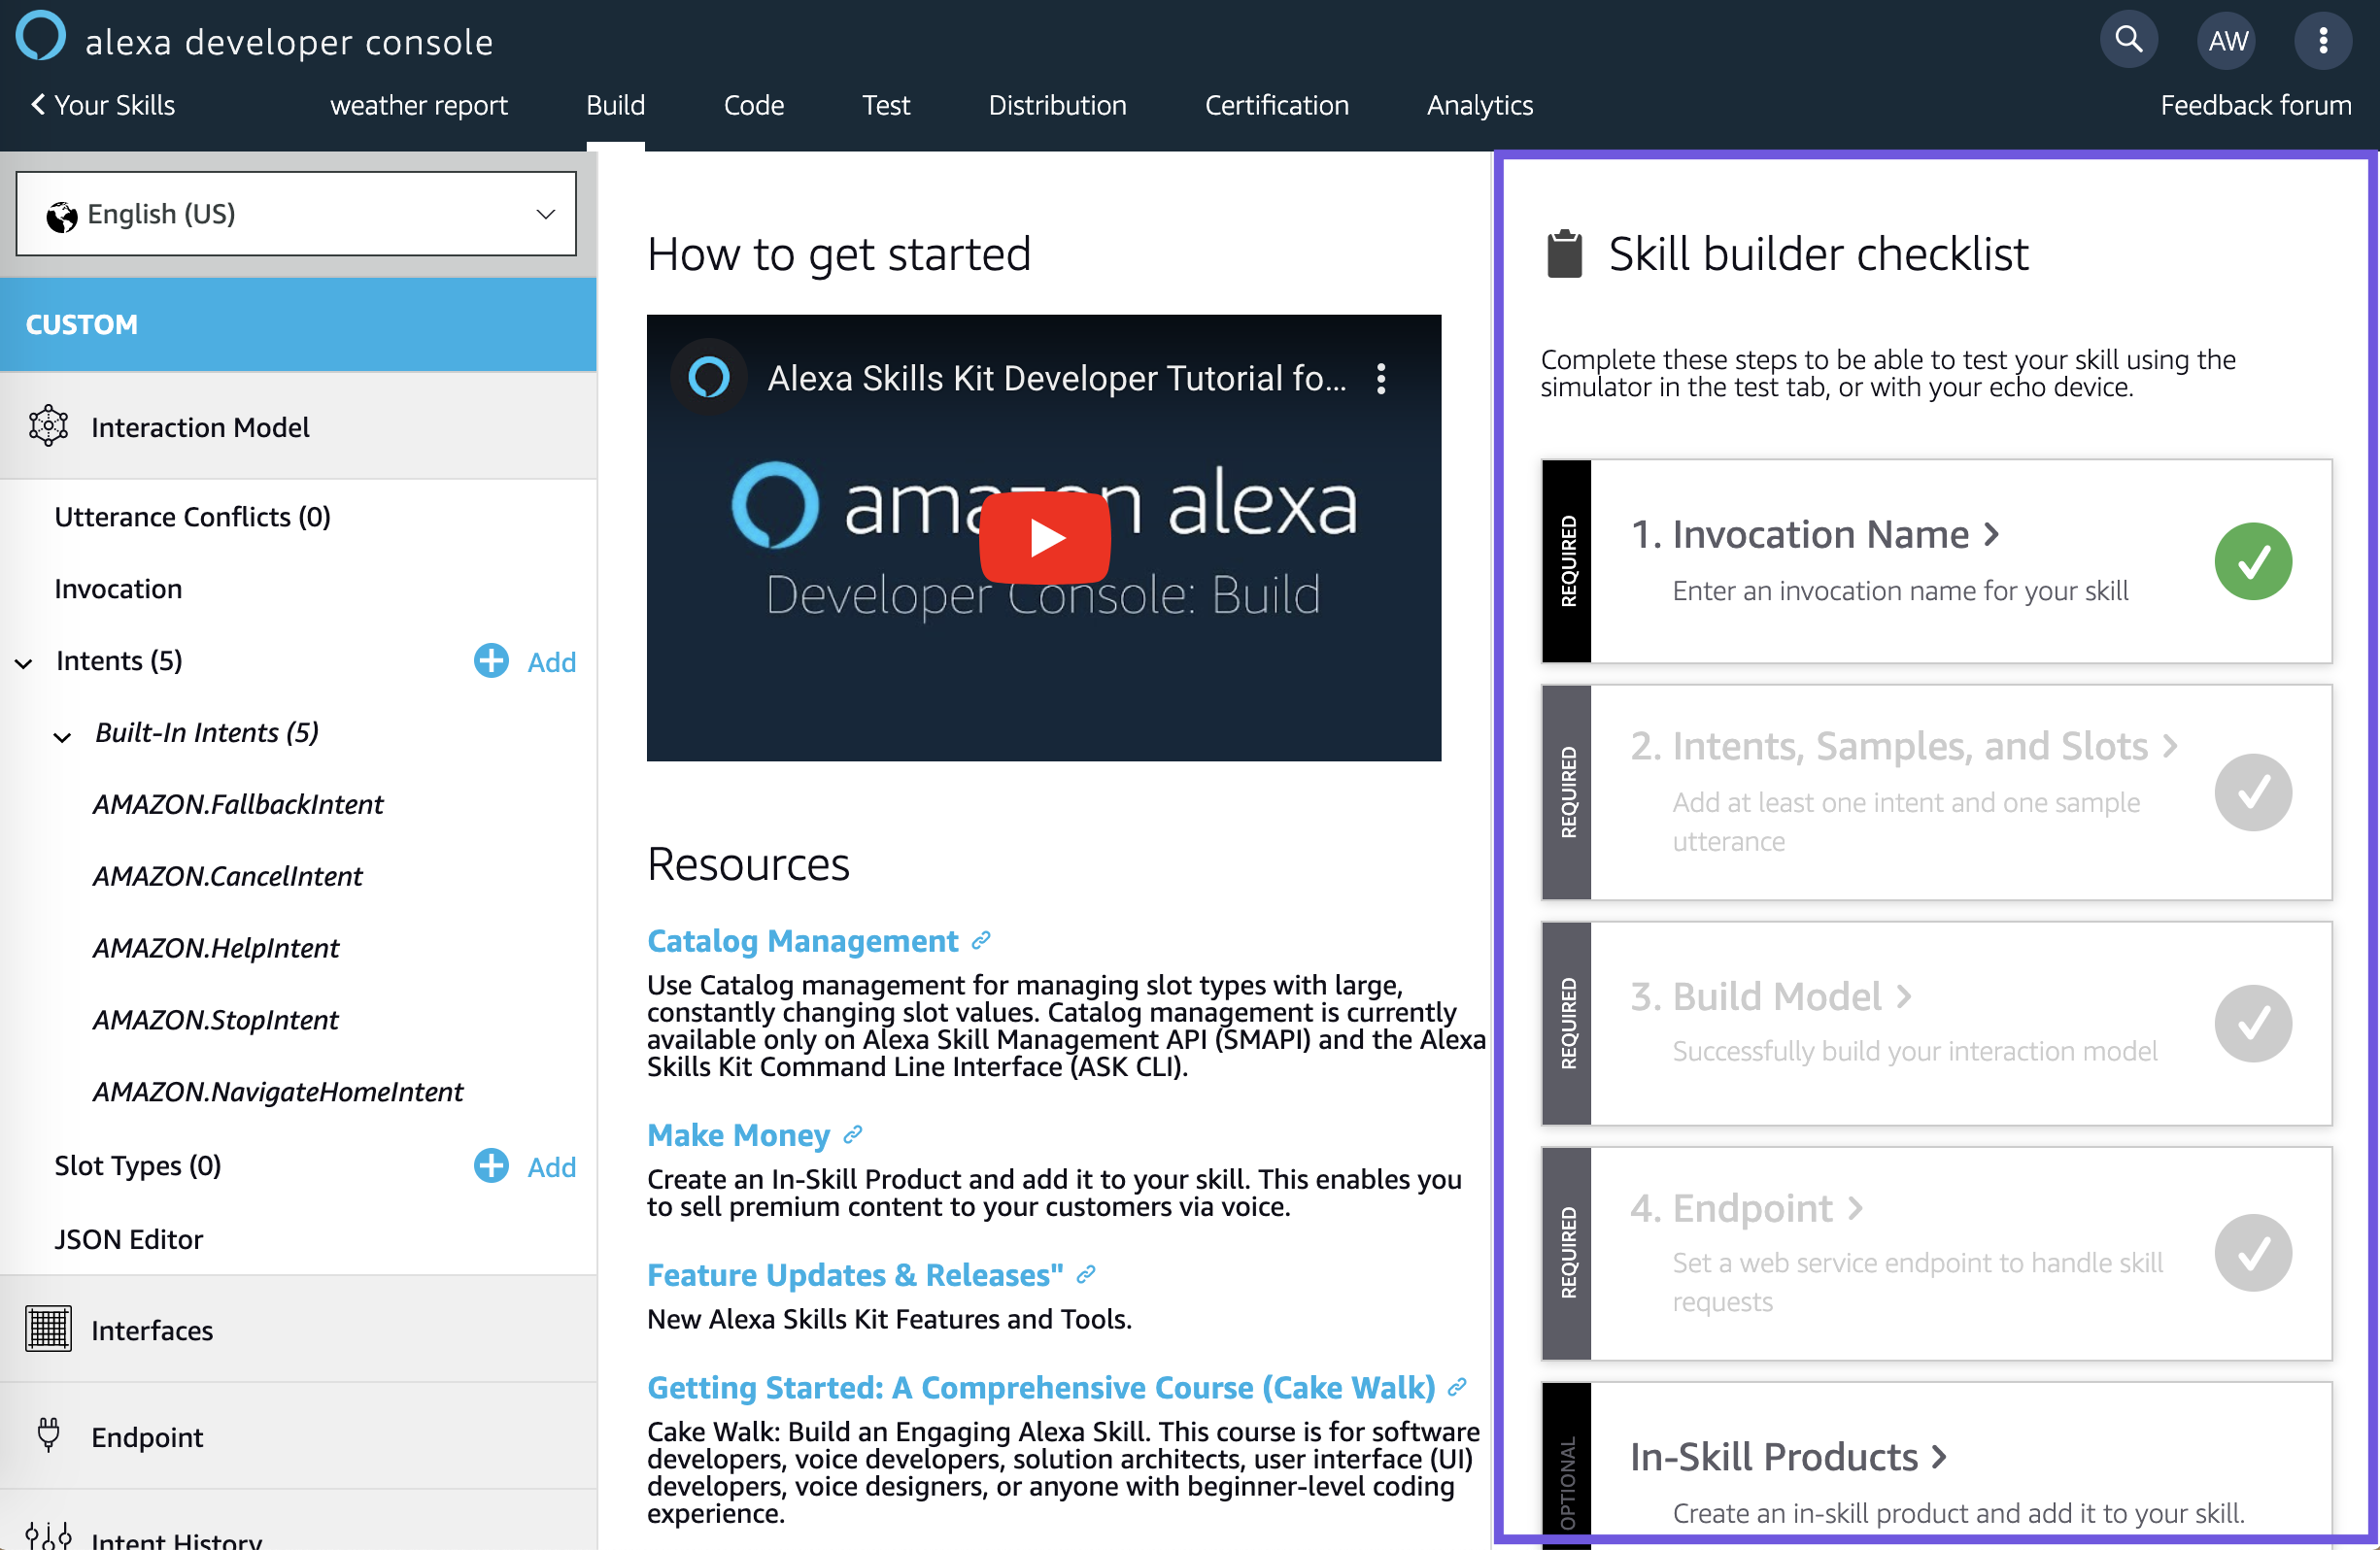
Go to Alexa Developer Console (opens new window) and login if not already.
Click edit under ACTIONS section.
You should now be on a page with 4 initially greyed out sections under the title Skill builder checklist. This list will be completed by the end of the setup.
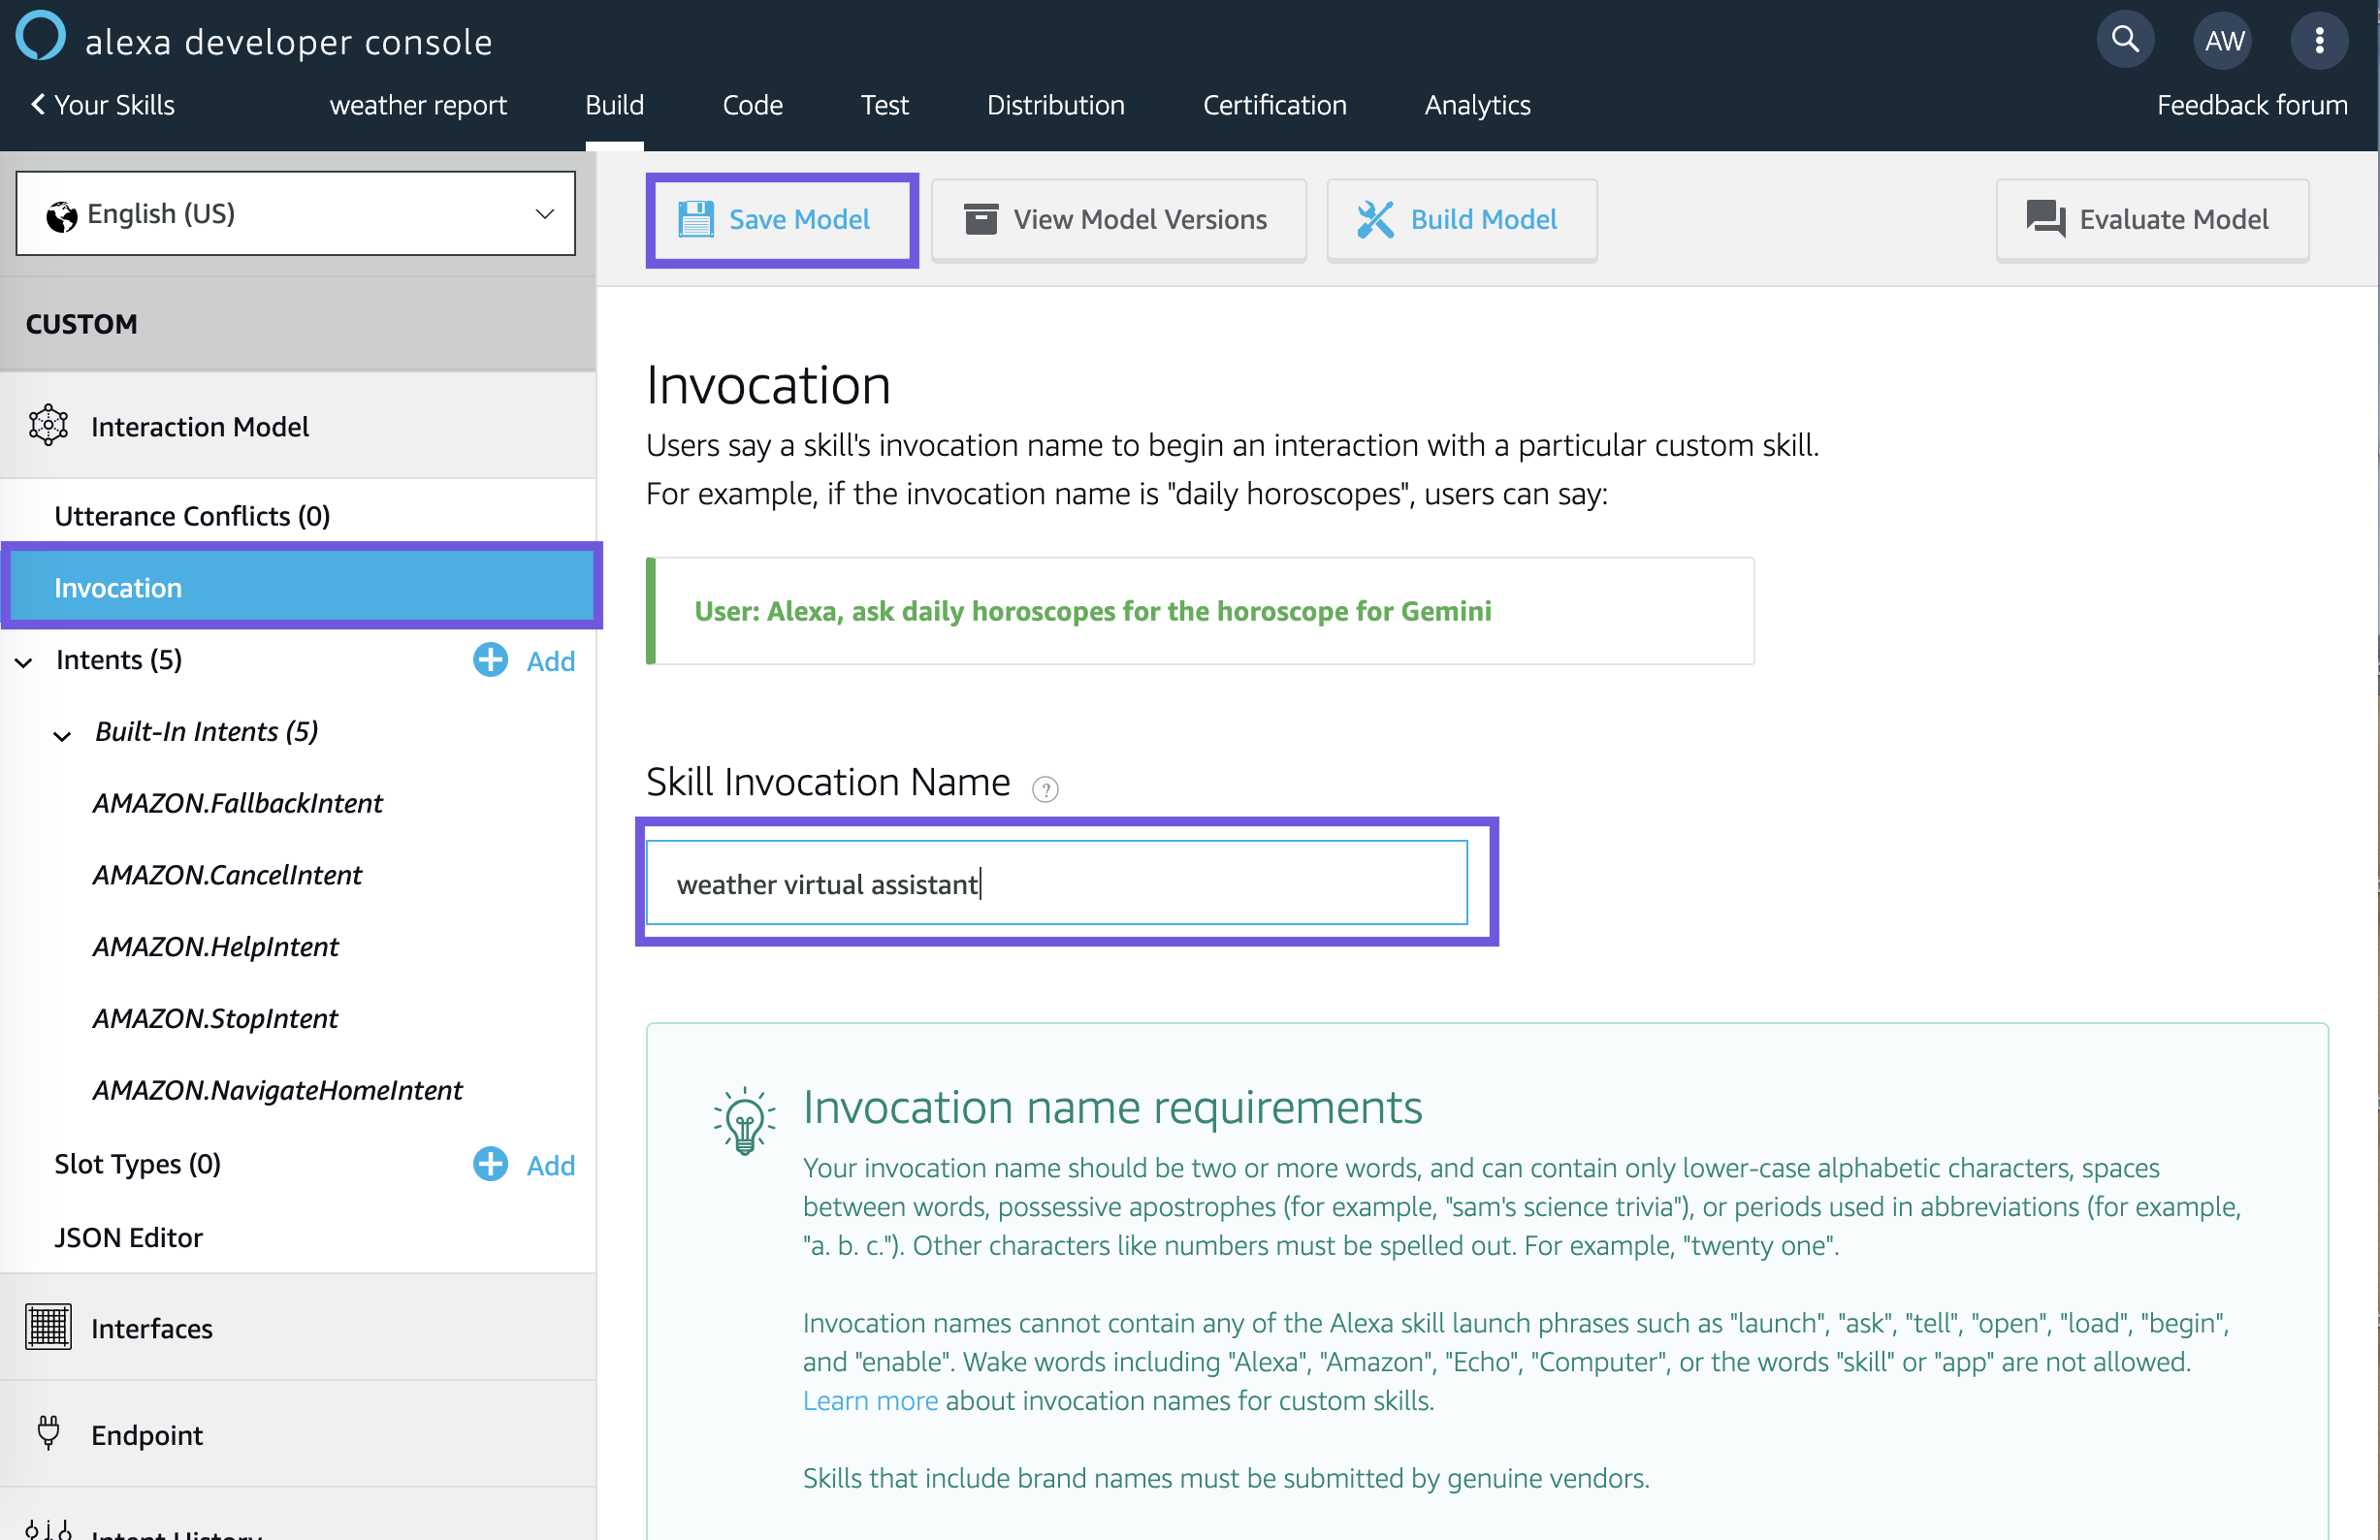
- Click Invocation on the left side menu and add a Skill Invocation Name of your choice. This will be the name users say to open the app. An example would be "virtual assistant". Click Save Model to save the Invocation Name. Keep note of this as it will be used later in step 5 as
INVOCATION_NAME.
- Click JSON Editor on the left side menu. Download the JSON file provided below. Paste or drag and drop the file above the editor.
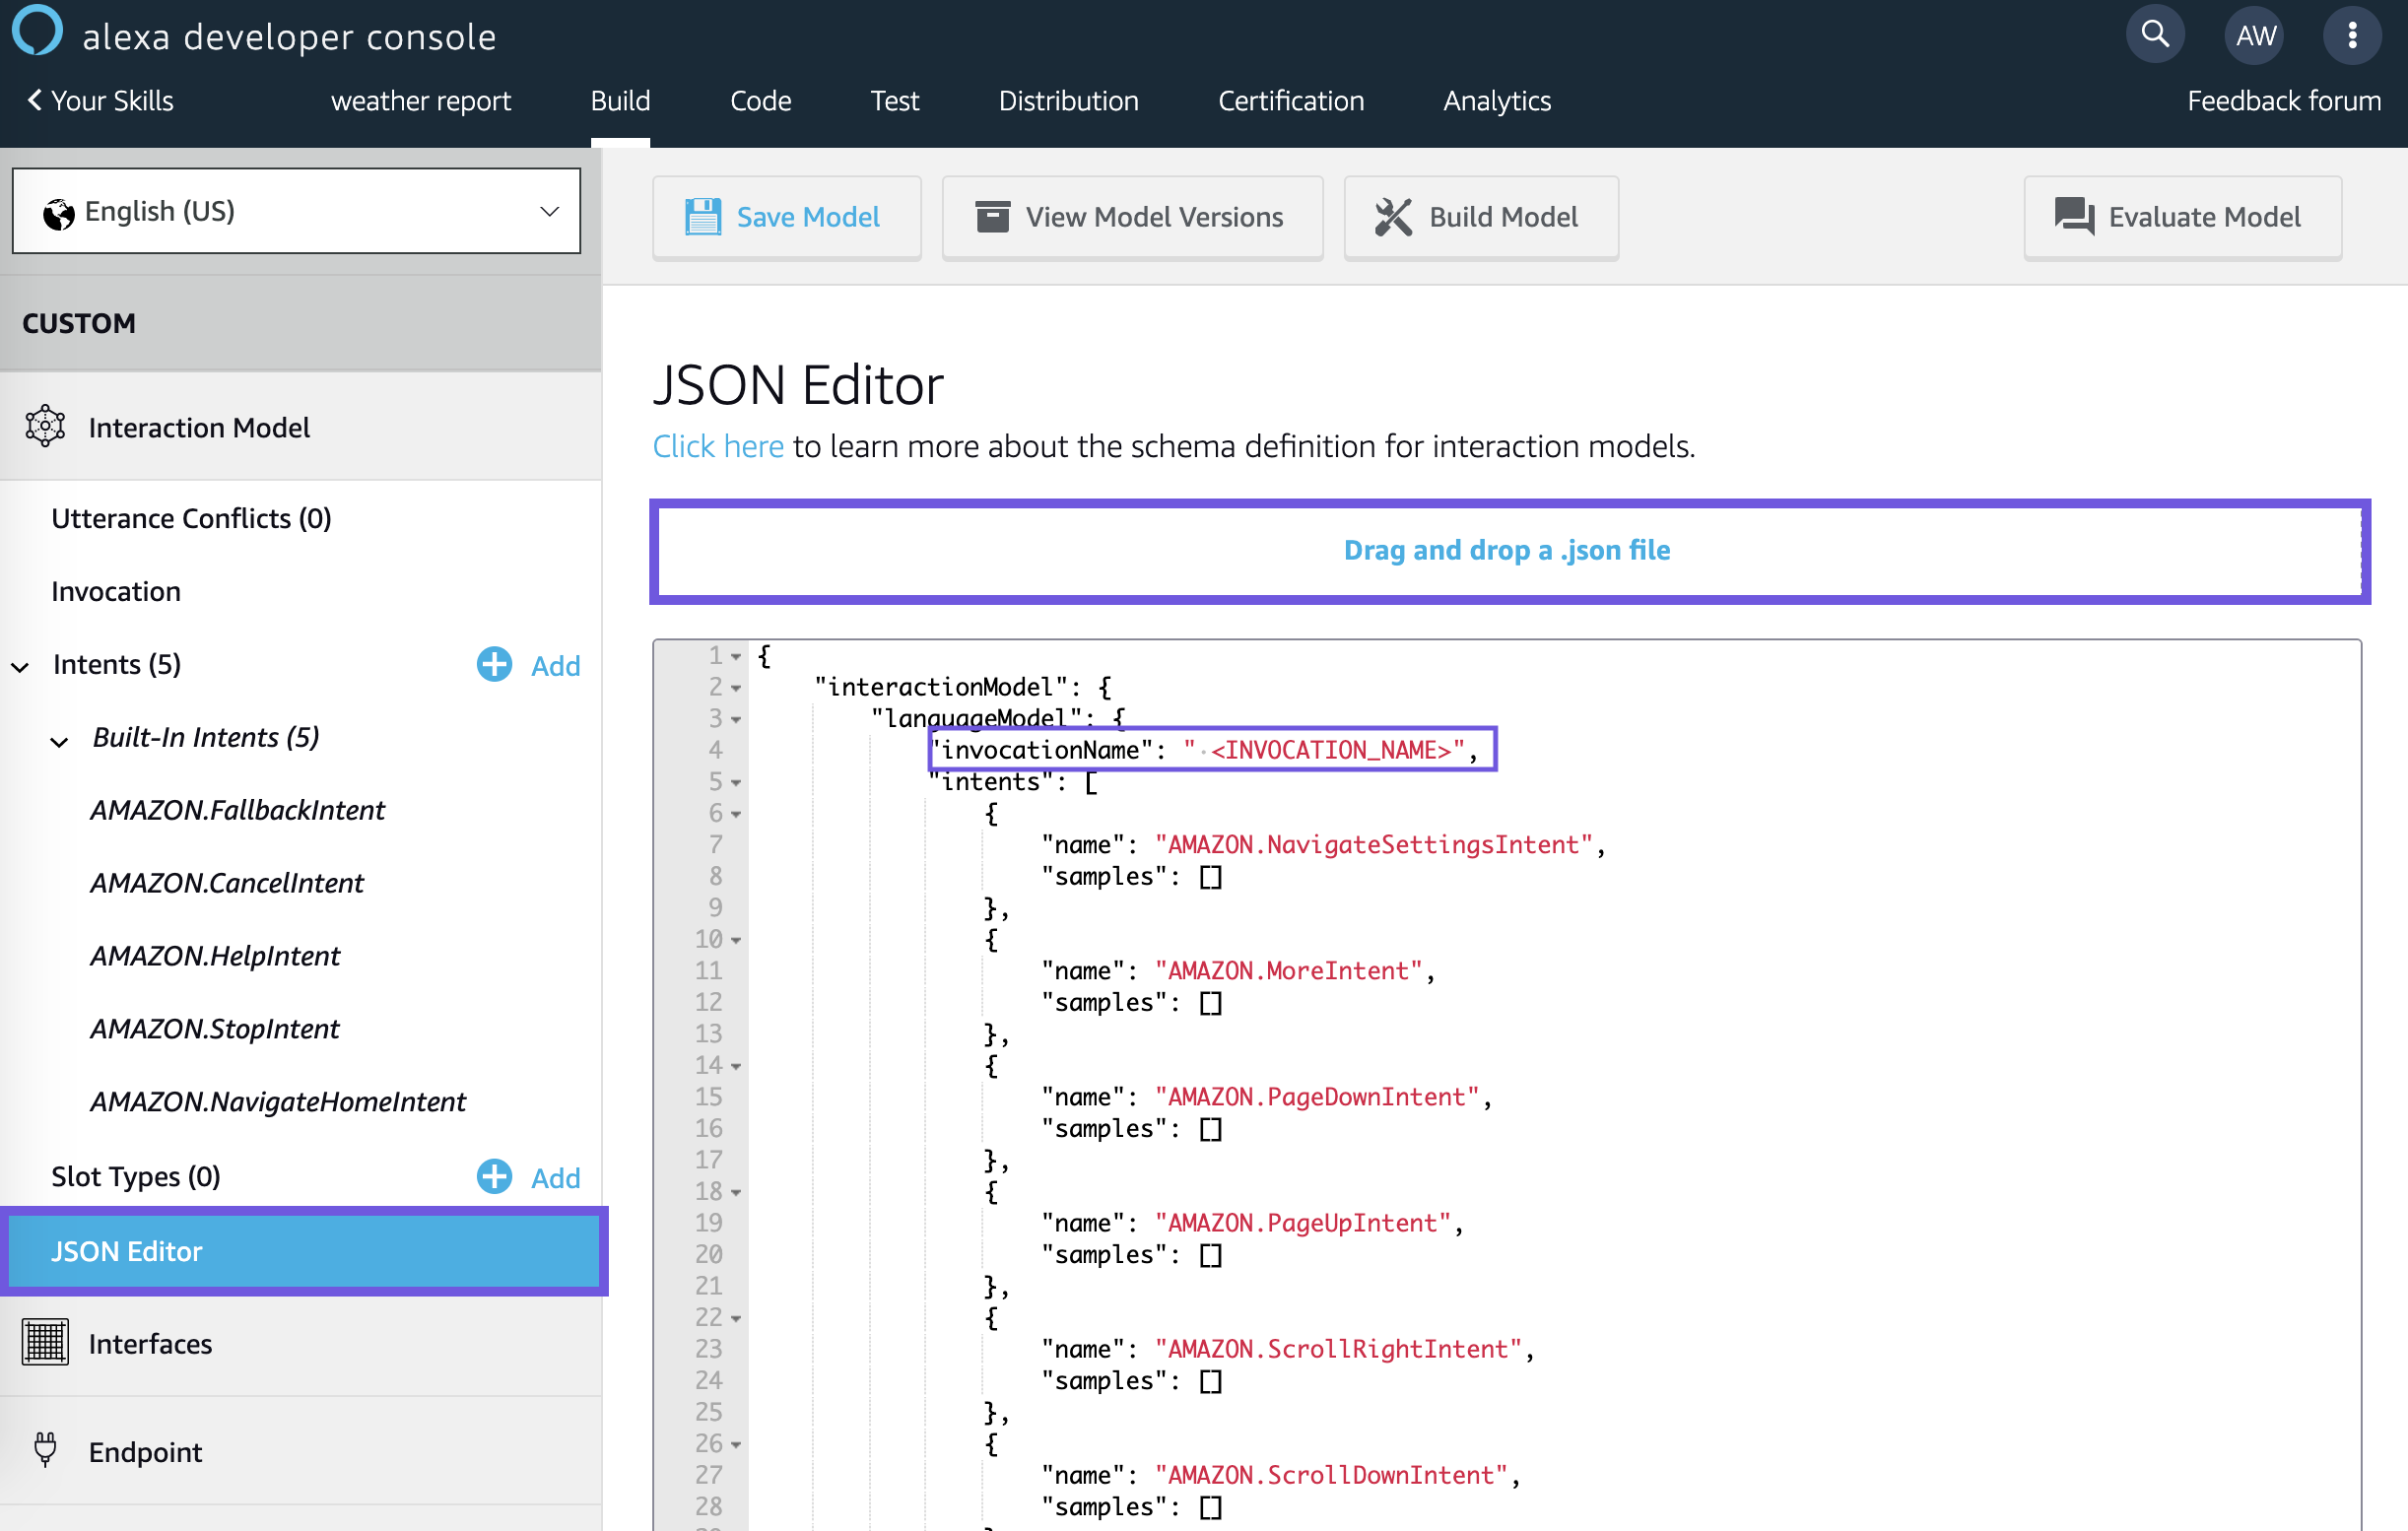
Change
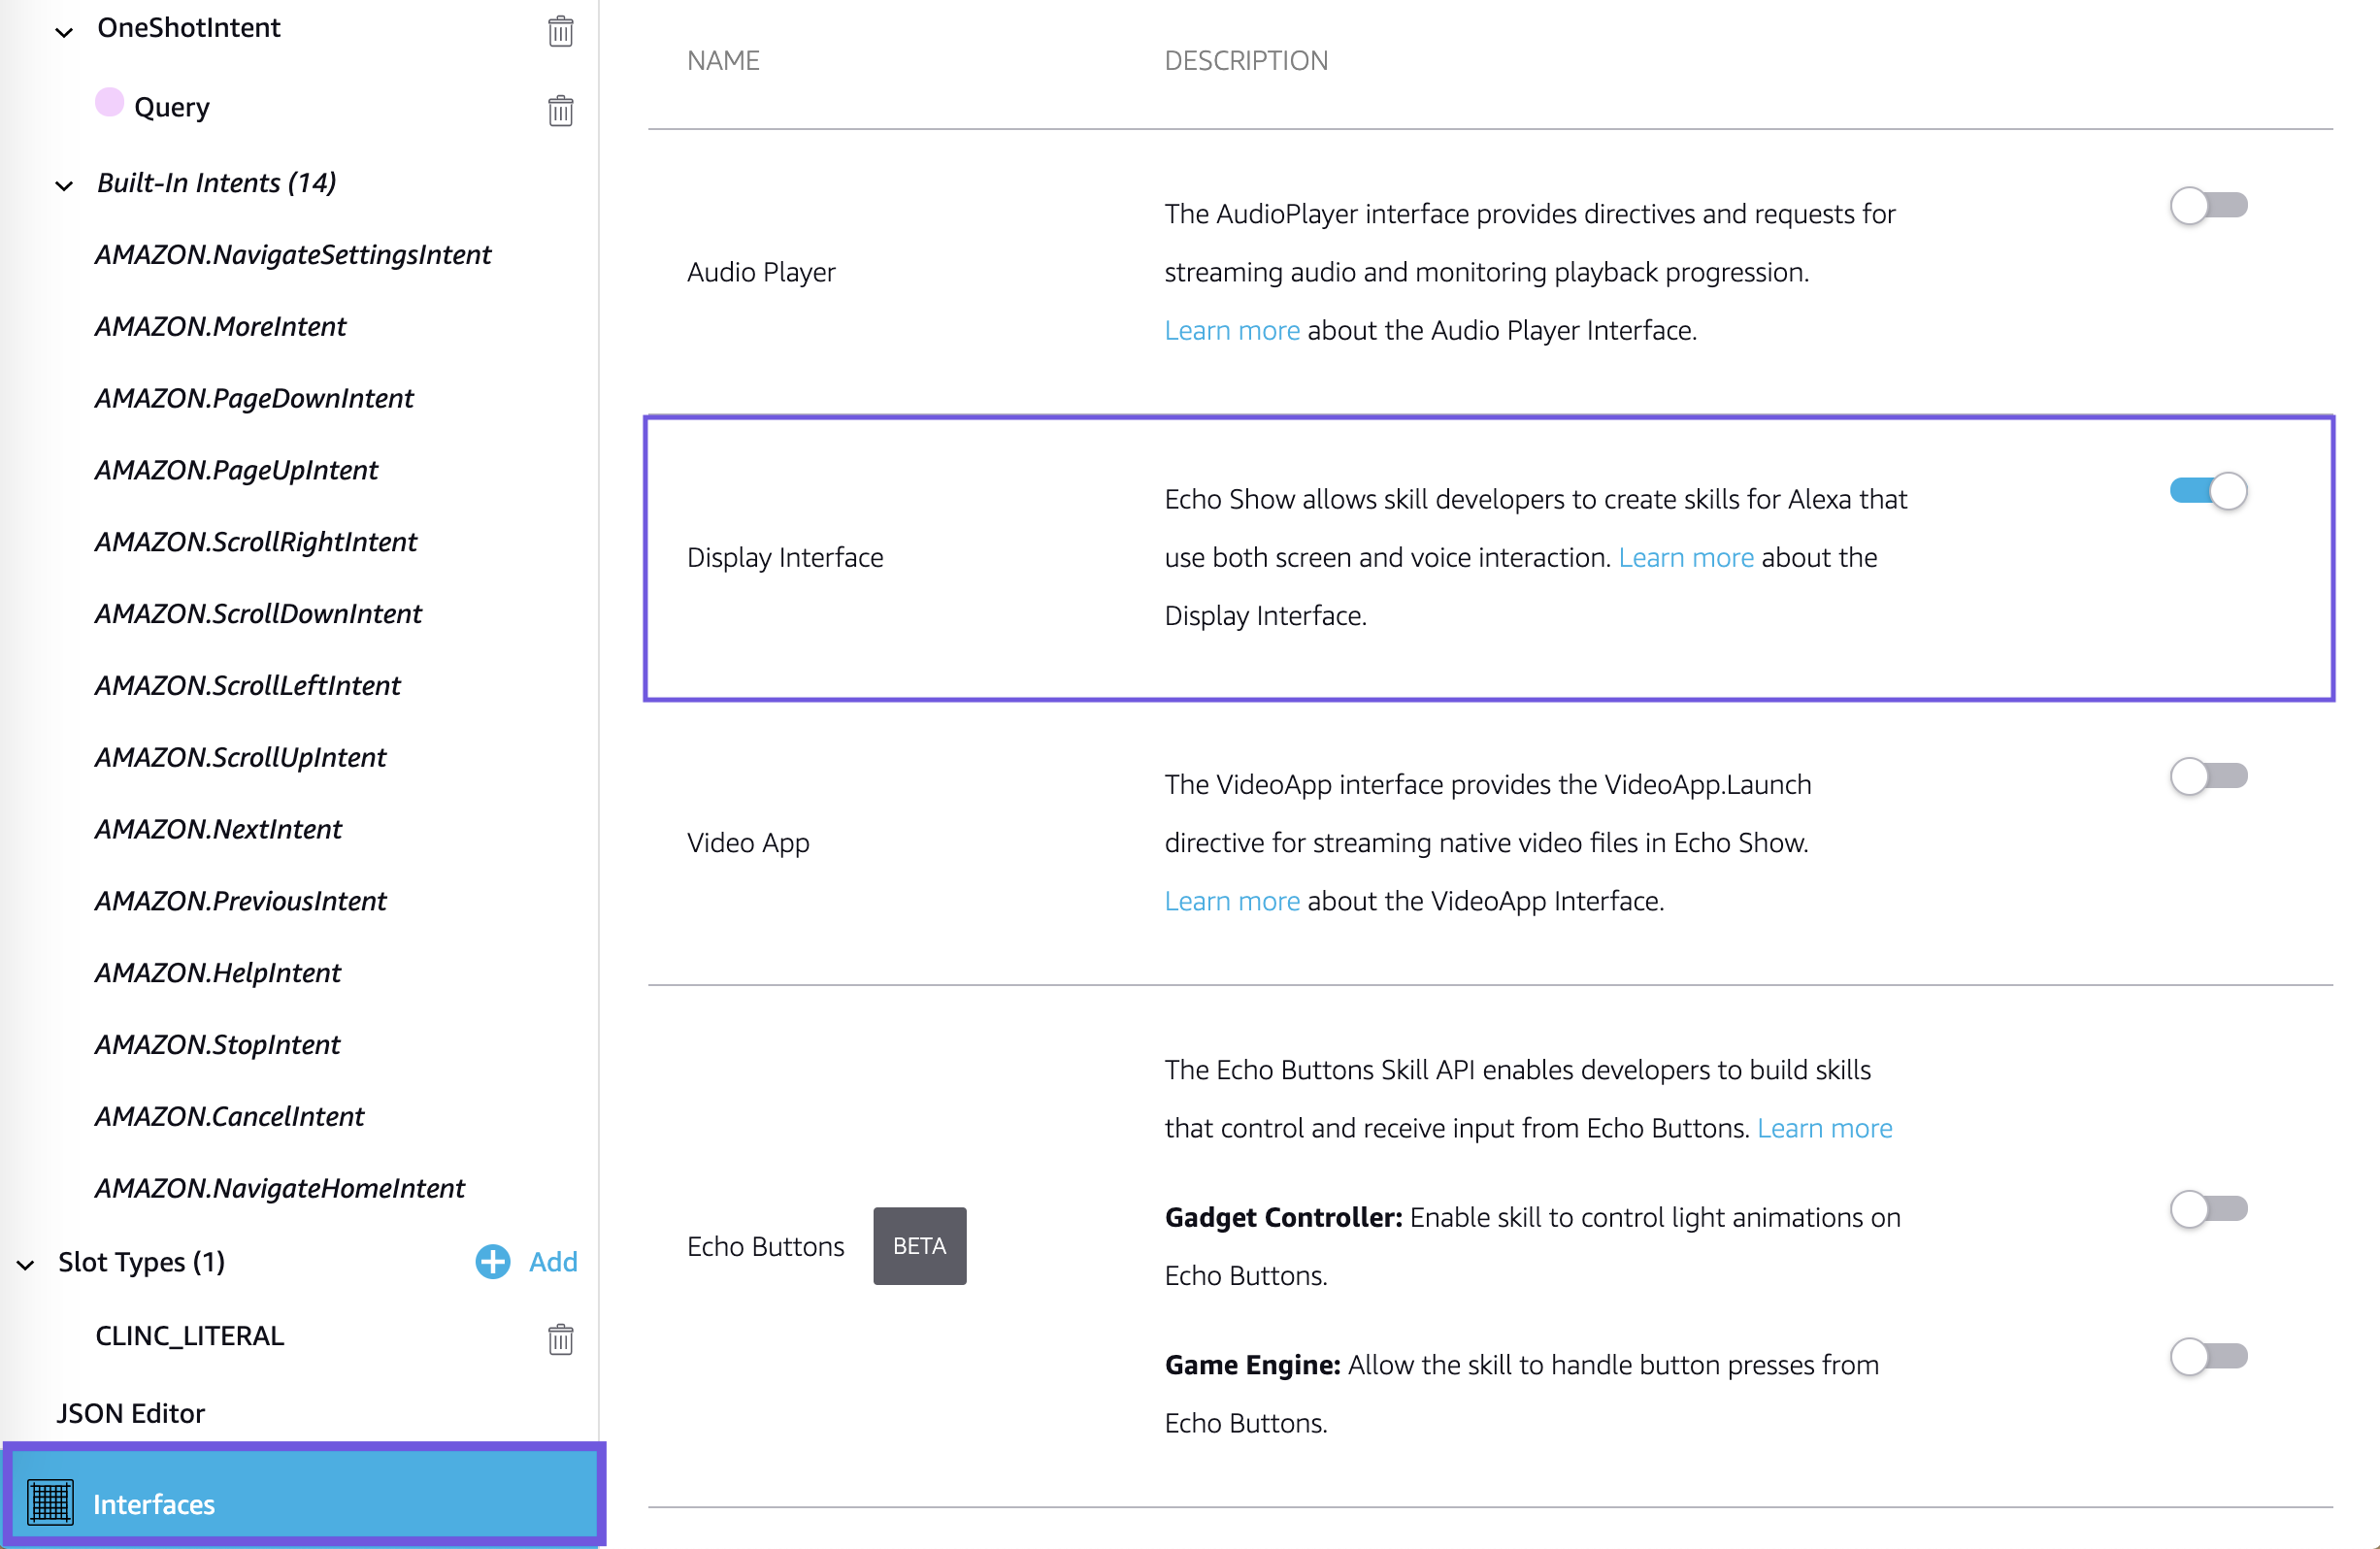
INVOCATION_NAMEto the name created in step 4 and click Save Model at the top. Then click Build Model.Click Interfaces on the left side menu. Turn on Display Interface so that the button is blue. Then click Save Interfaces.
# Clinc Platform Setup
If you don't already have an integration, please reference How to create an integration.
# Creating Alexa Integration
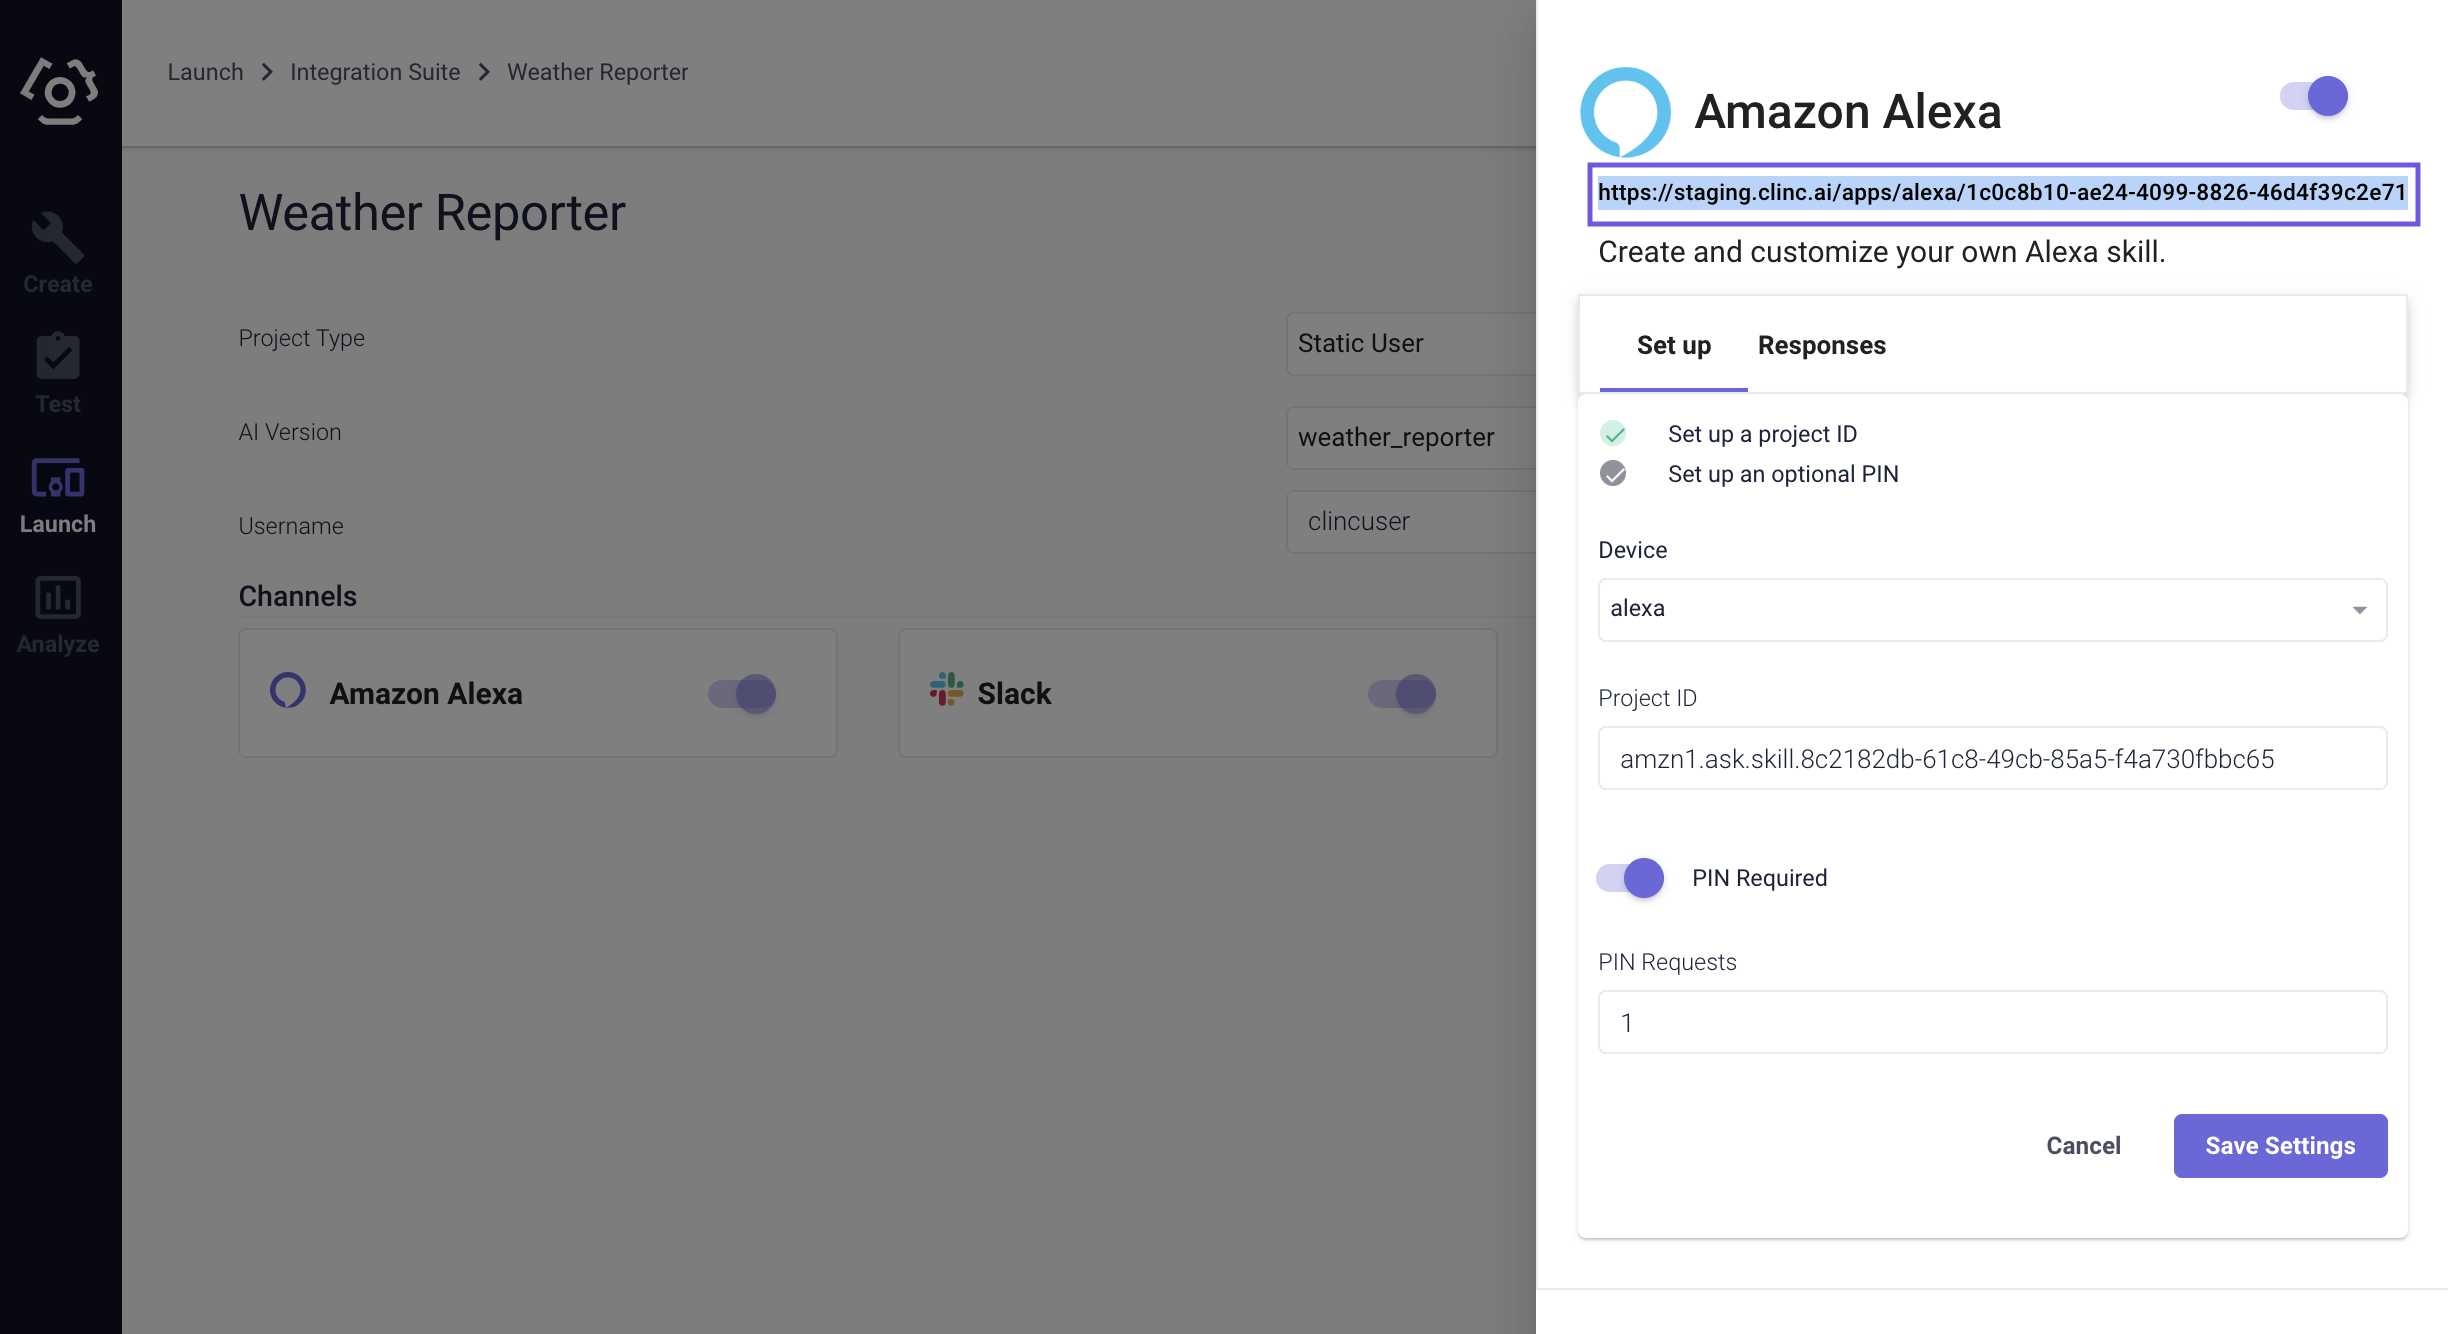
- In the integration, select the Amazon Alexa card under the Channels section to open the integration sidebar.
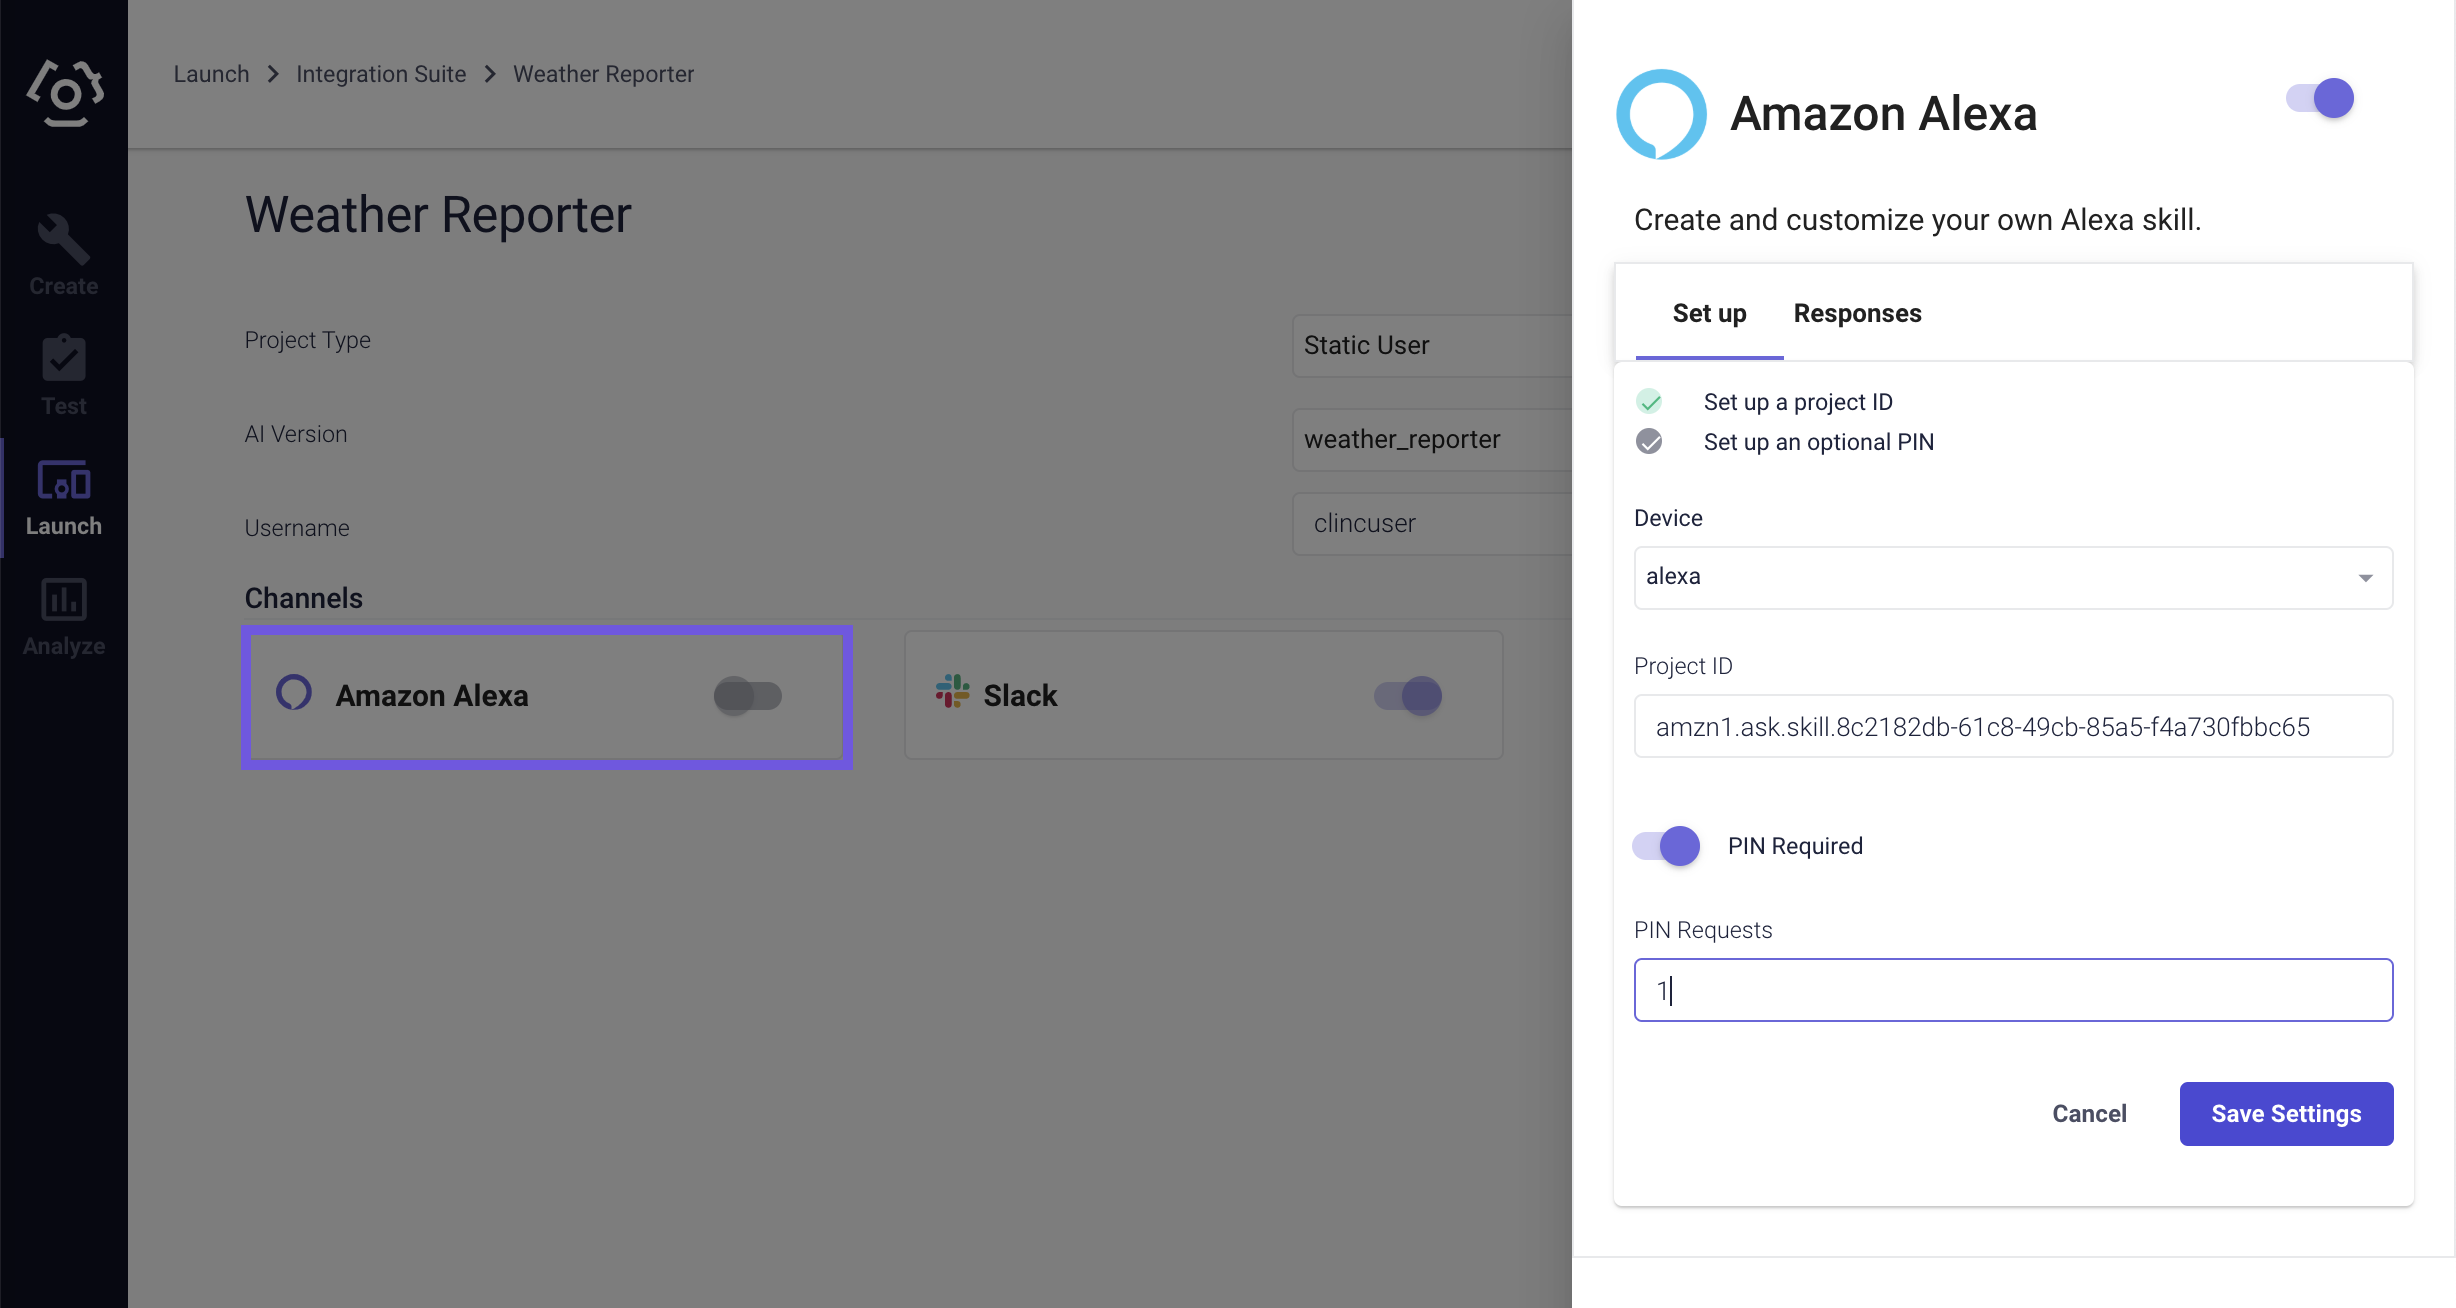
- Configuration
| Field | Description |
|---|---|
| Device | Select a Personality for the device |
| Project ID | Use <ALEXA_SKILL_ID> obtained in step 8 of Creating an Alexa Skill |
| Login Type | Type of authentication used by the enduser. |
| Vendor ID | Required when Login Type is set to Standard Login. Can be found from Alexa Vendor ID (opens new window) |
| PIN Required | Toggle this button to force users to log in with a PIN |
| PIN Requests | Number of attempts the user has to log in with PIN |
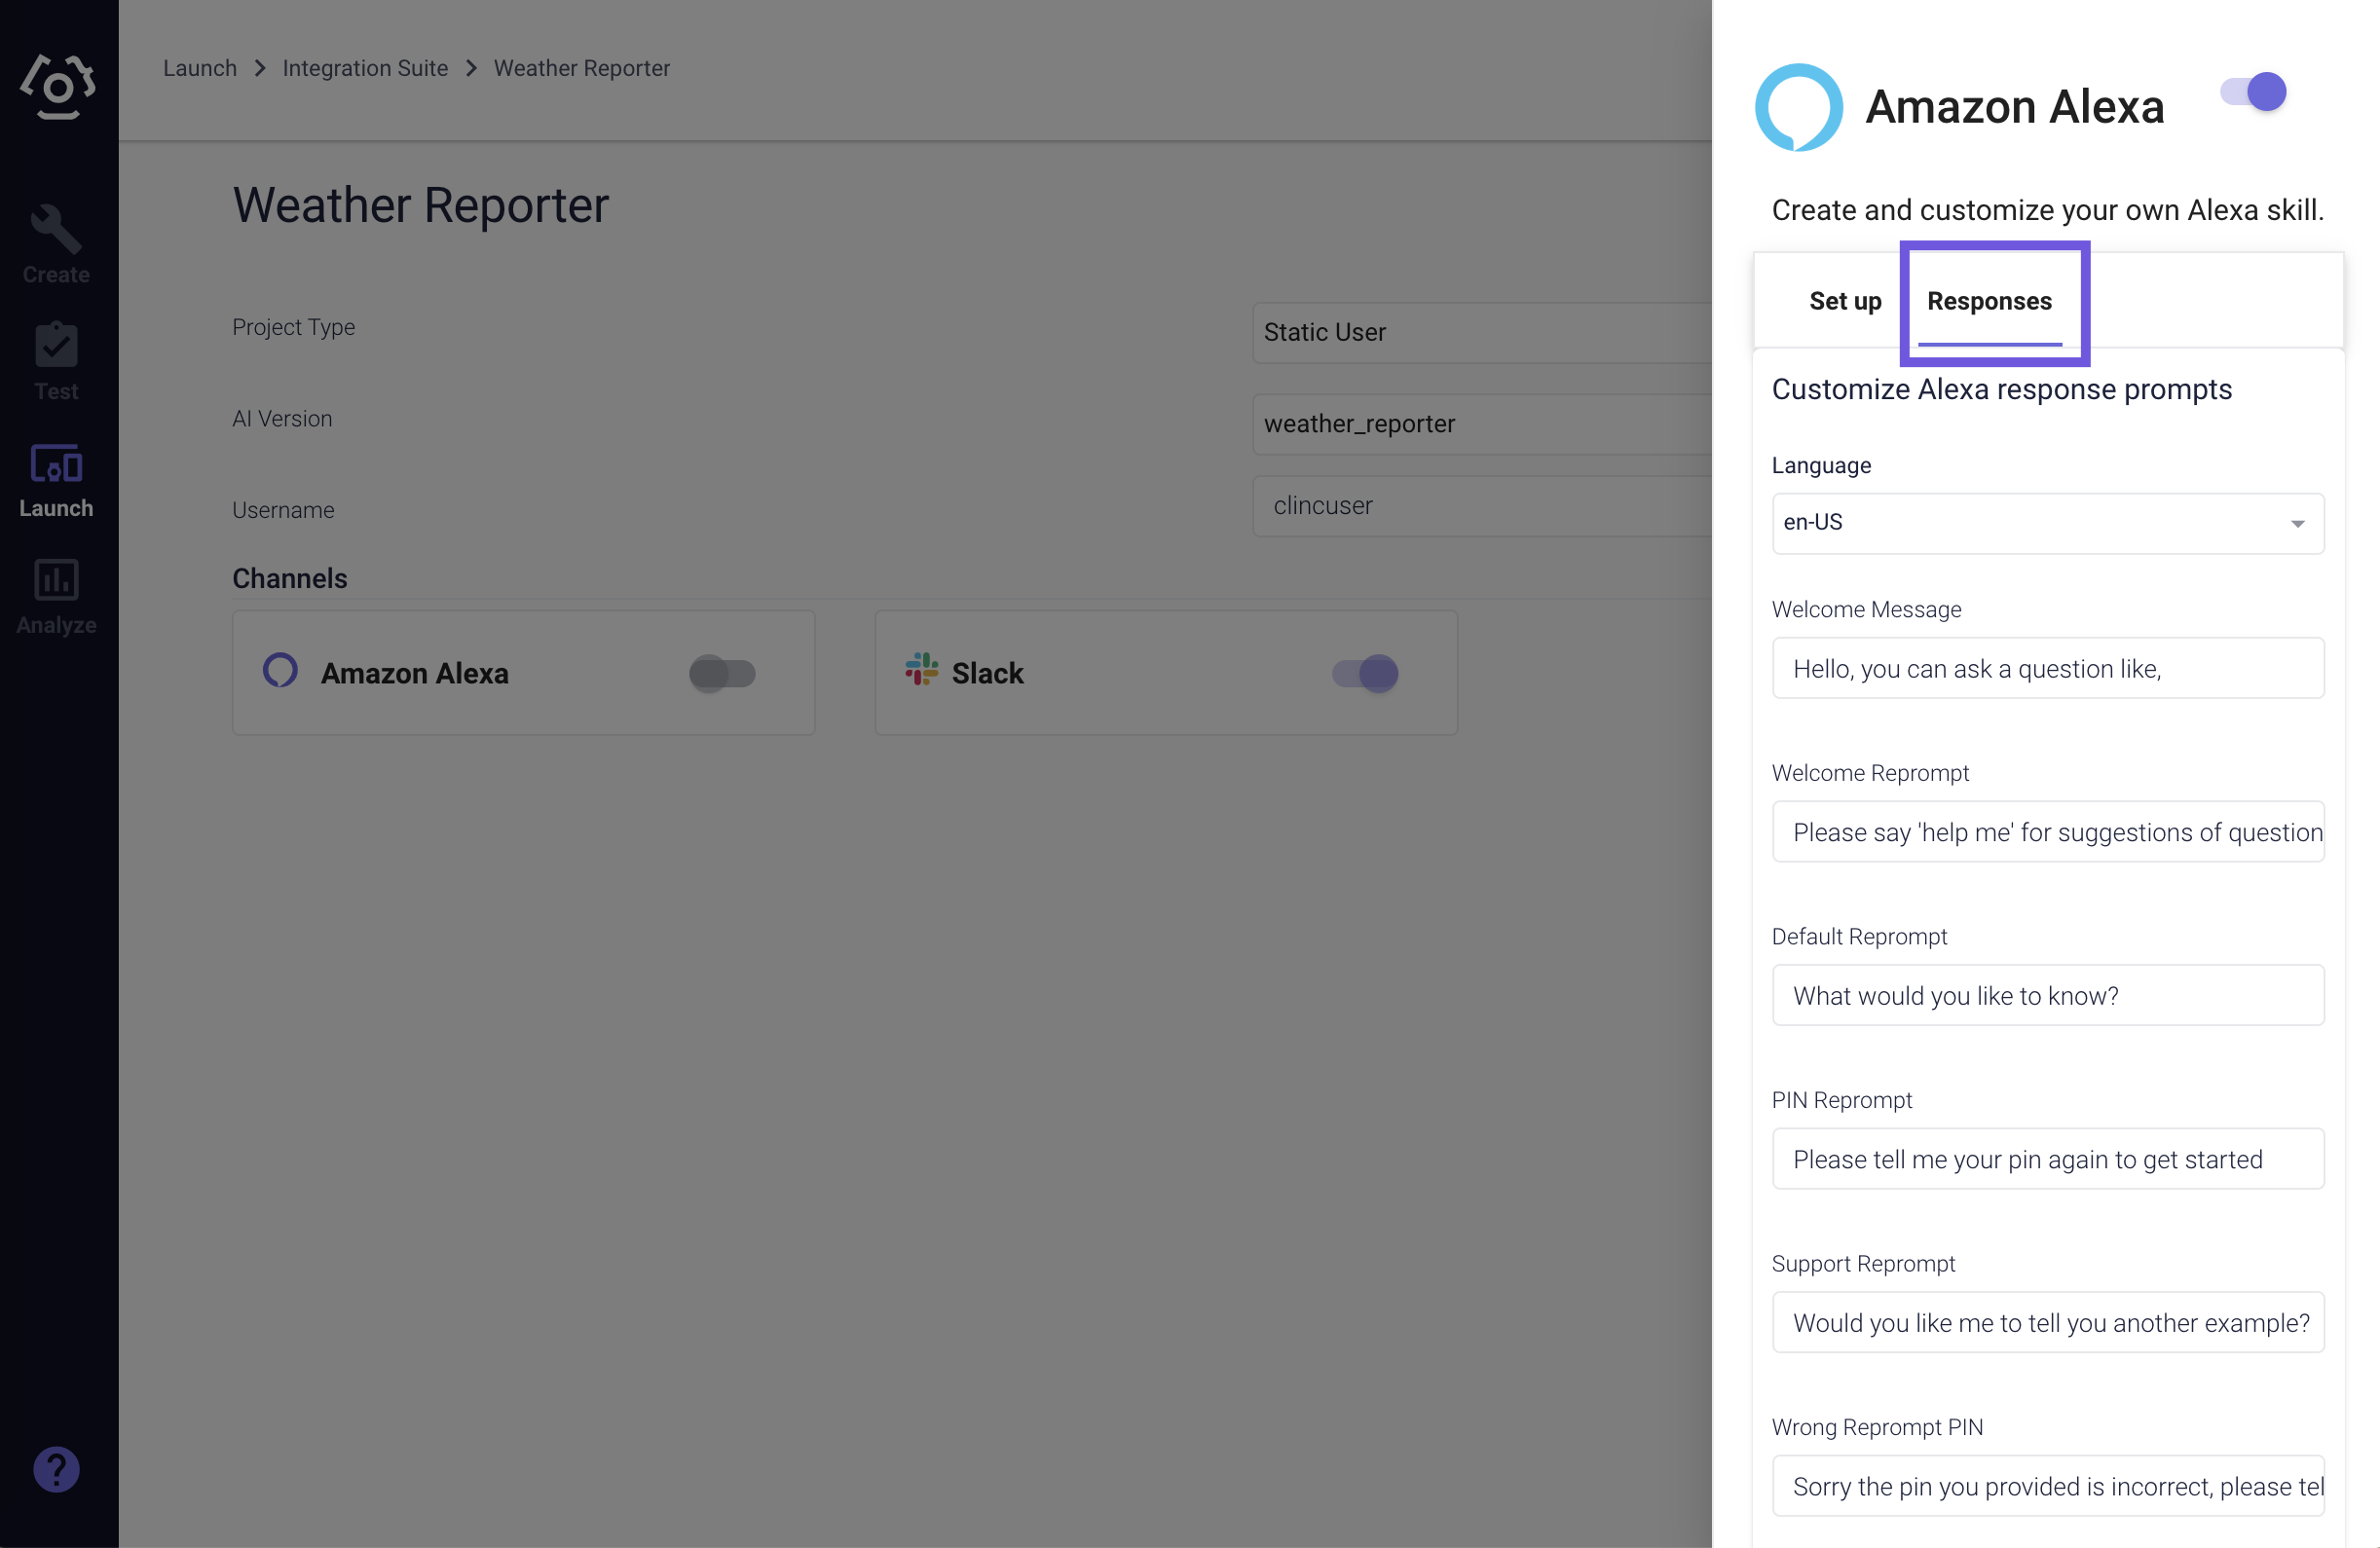
- You can configure Alexa's default responses by making changes in the in the Responses Tab.
At the bottom of the integration sidebar, click Save.
Under the Channels section, click on Amazon Alexa to reopen the integration sidebar.
Copy the integration URL at the top of the sidebar.
# Finish Set Up in Alexa Developer Console
Navigate back to Alexa Developer Console (opens new window)
Select your skill from the list of skills.
Click Endpoint on the left side menu.
Under Service Endpoint Type, select
HTTPS.In the field Default Region use the integration URL copied in step 6 of Creating Alexa Integration under Clinc Platform Setup. In the dropdown below select
My development endpoint has a certificate from a trusted certificate authority.
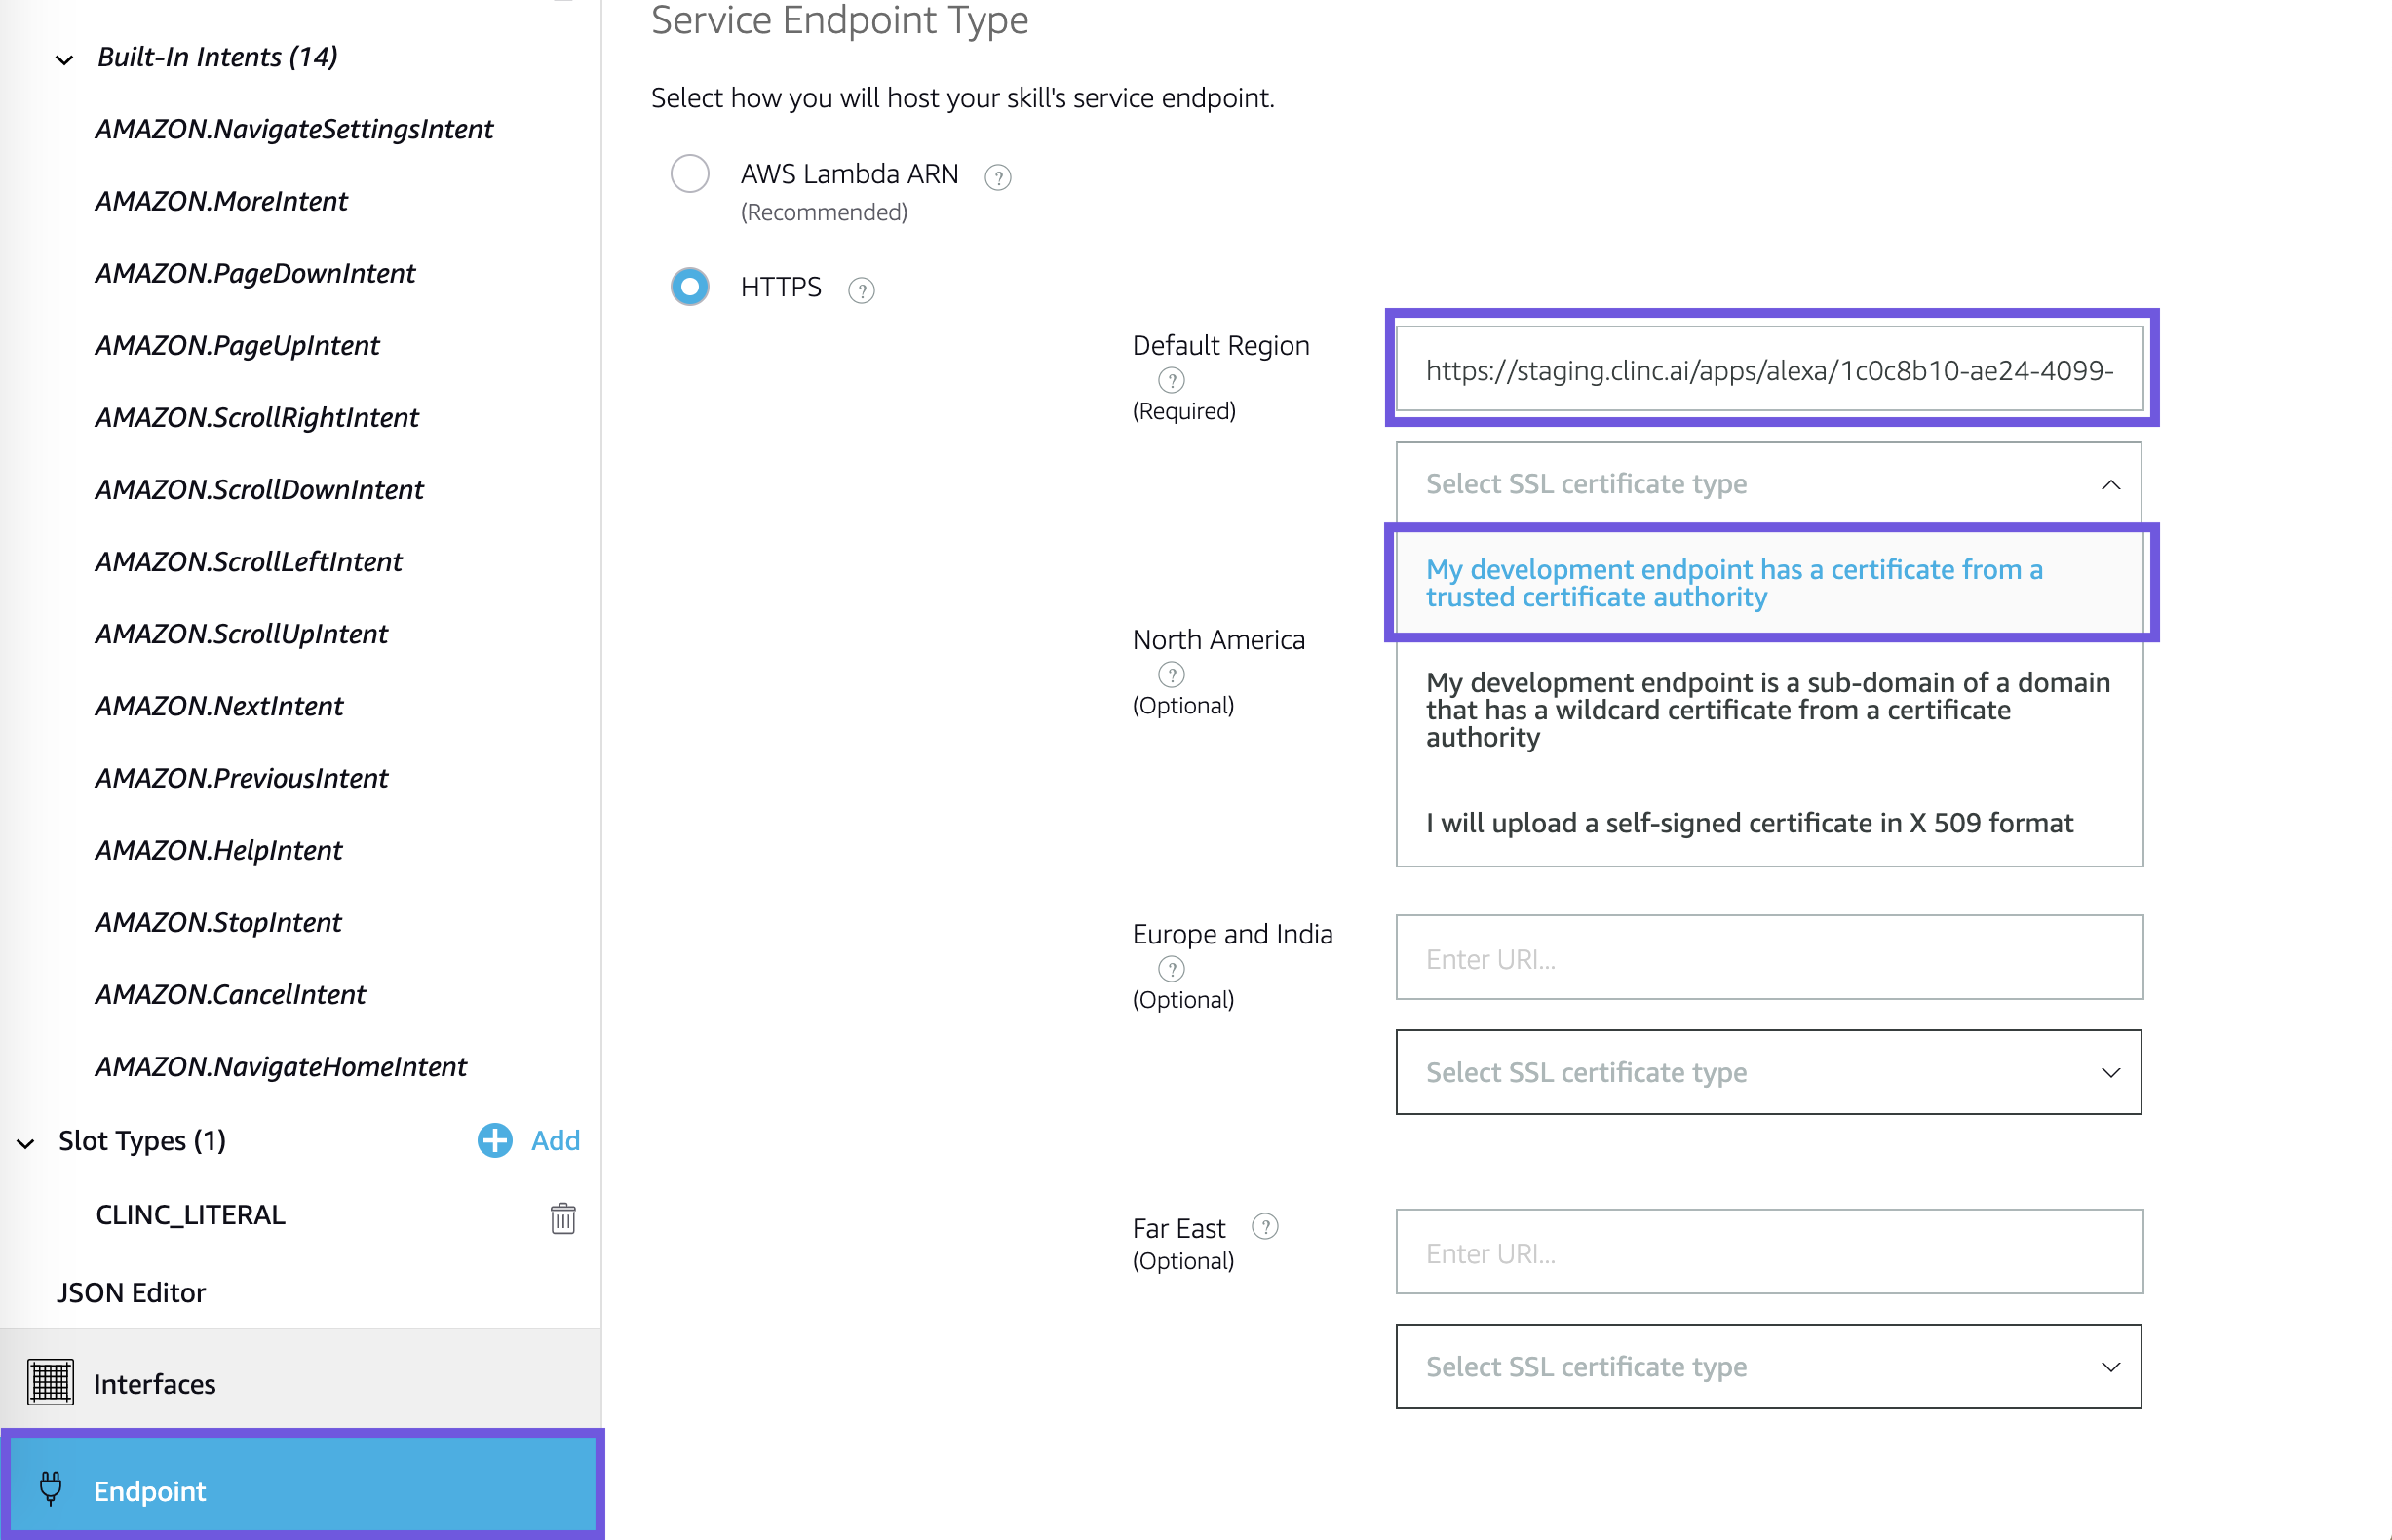
- Click Save Endpoints at the top of the page after adding the URL.
# Adding Account Linking (Optional)
The purpose of linking account to Alexa is so that the responses can be tailored to an individual user's transactional data especially for personal financial management projects that make use of the ability to associate accounts and transactions with a user account.
Head to Amazon Developer Console (opens new window), login if not already and click Edit next to the Alexa skill name.
Click Account Linking on the left side menu.
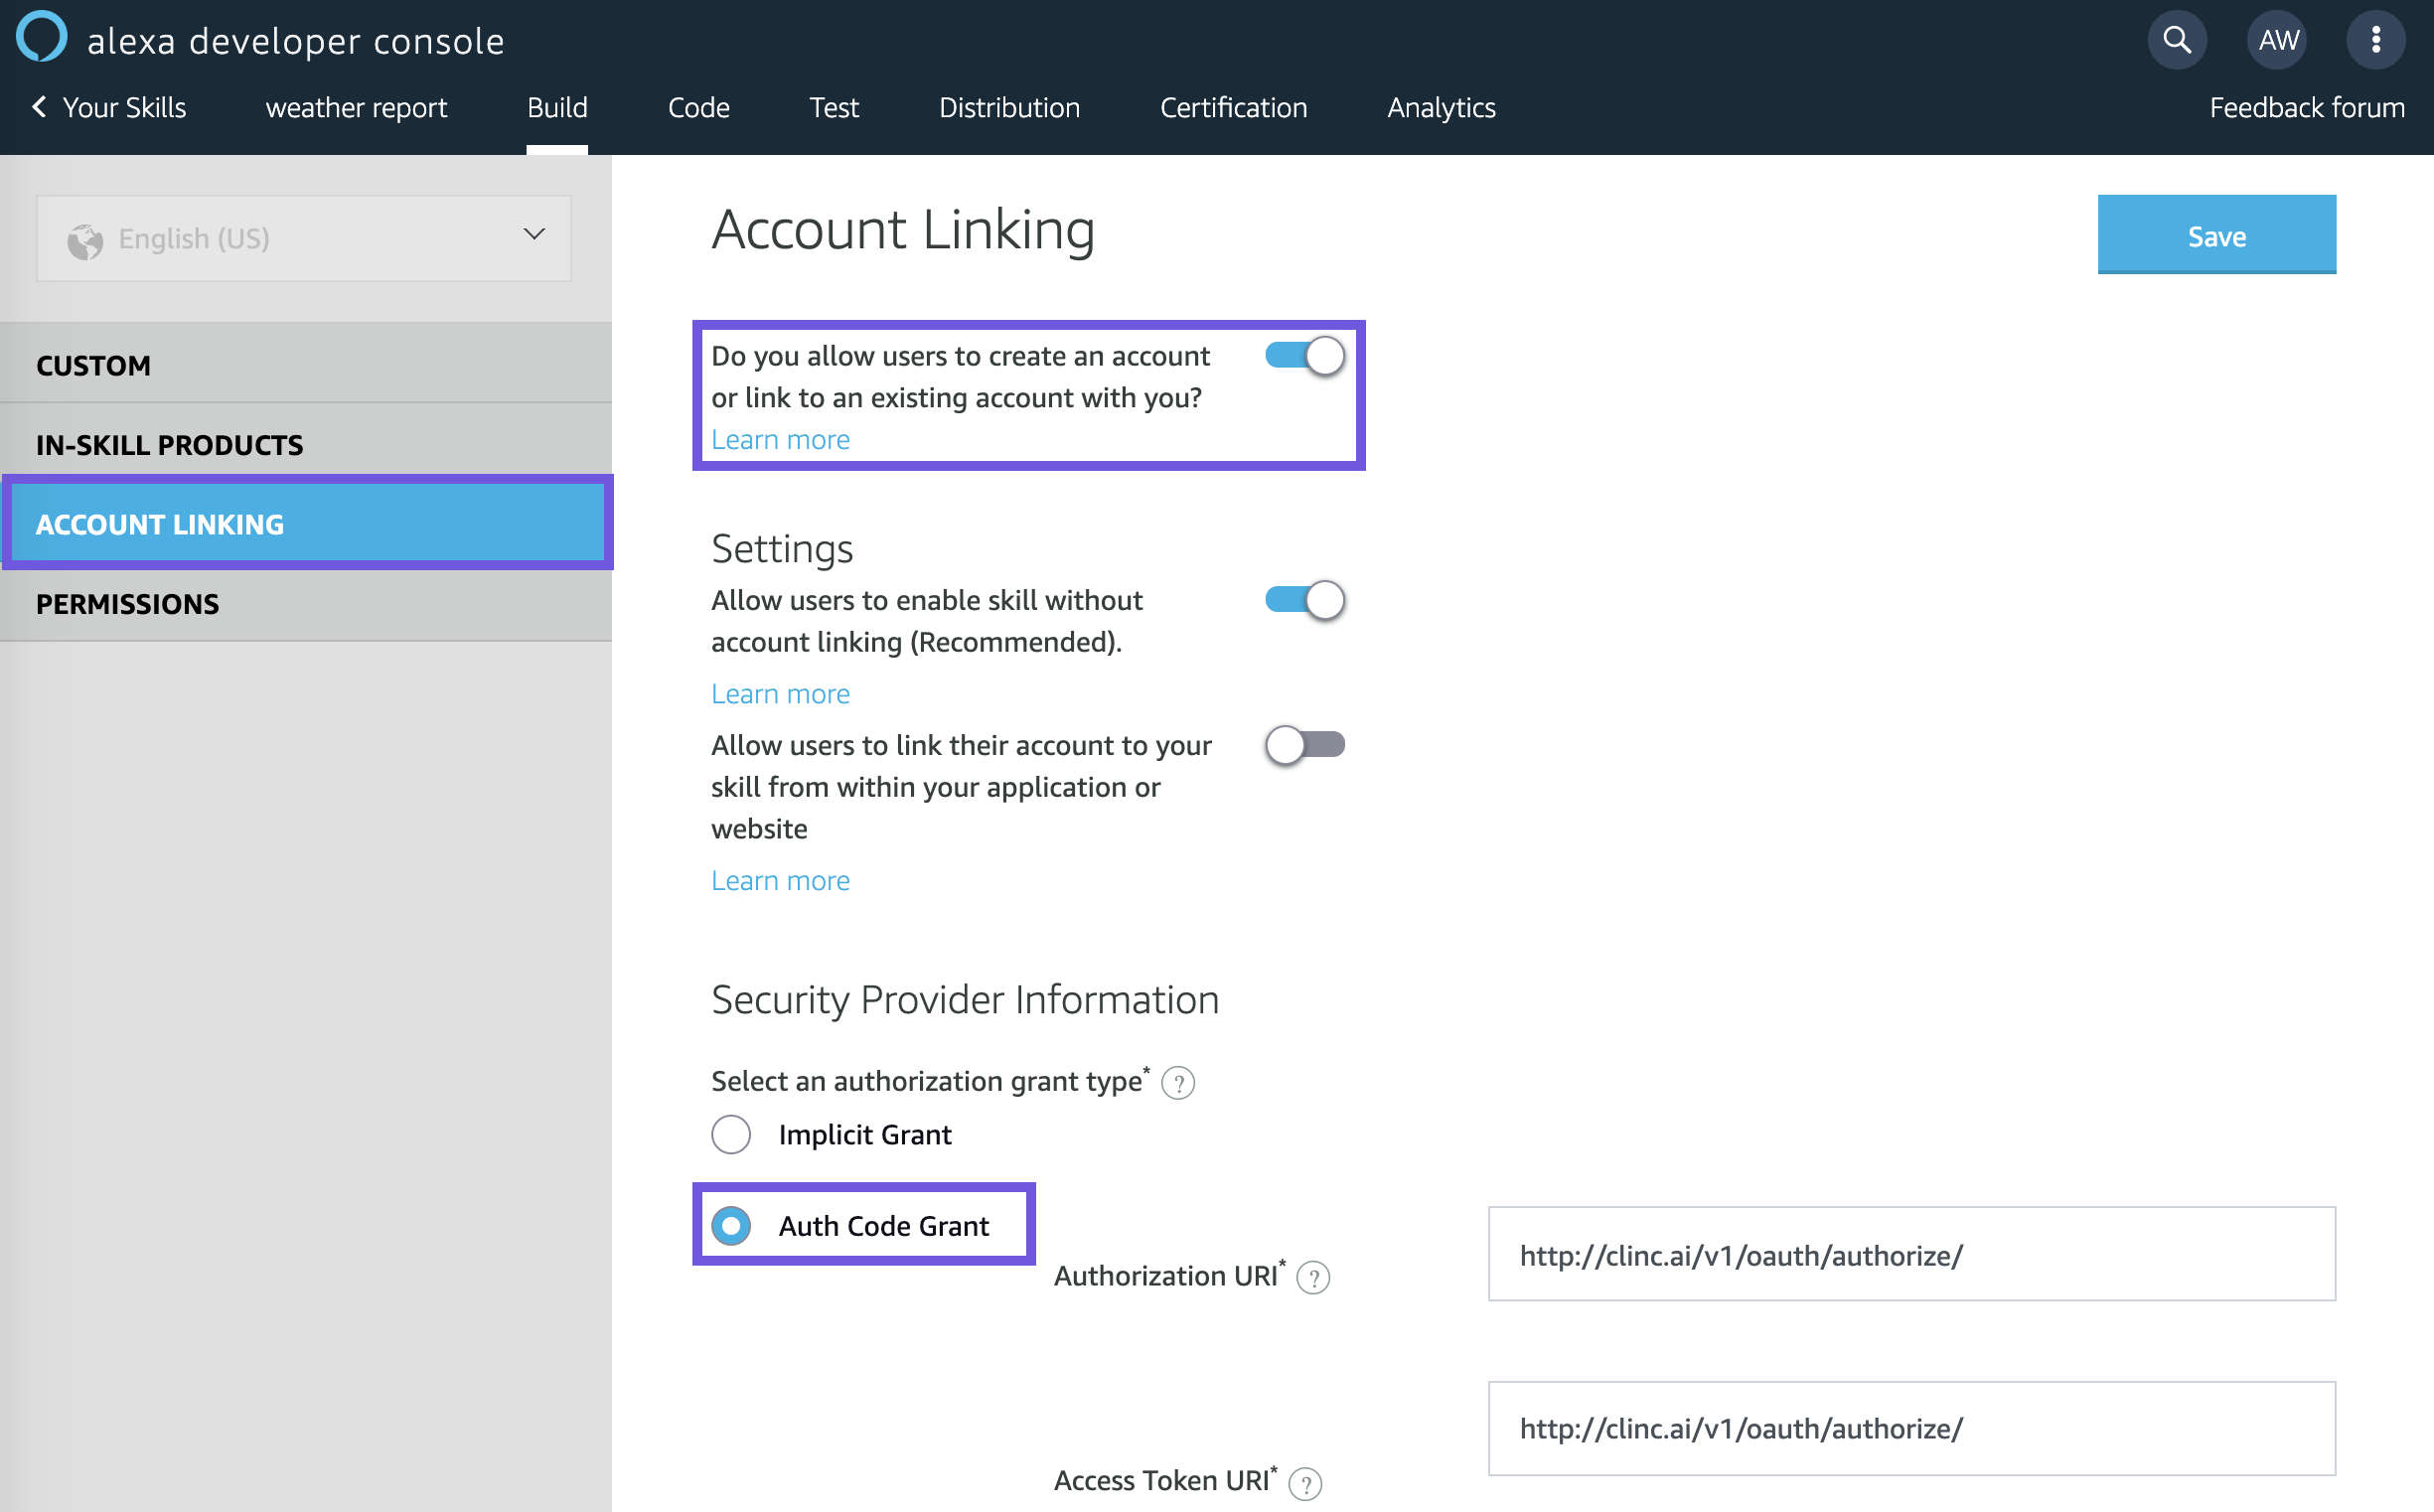
Make sure Auth Code Grant is selected. Fill in http://clinc.com/v1/oauth/authorize/ for Authorization URI and http://clinc.com/v1/oauth/authorize/ for Access Token URI.
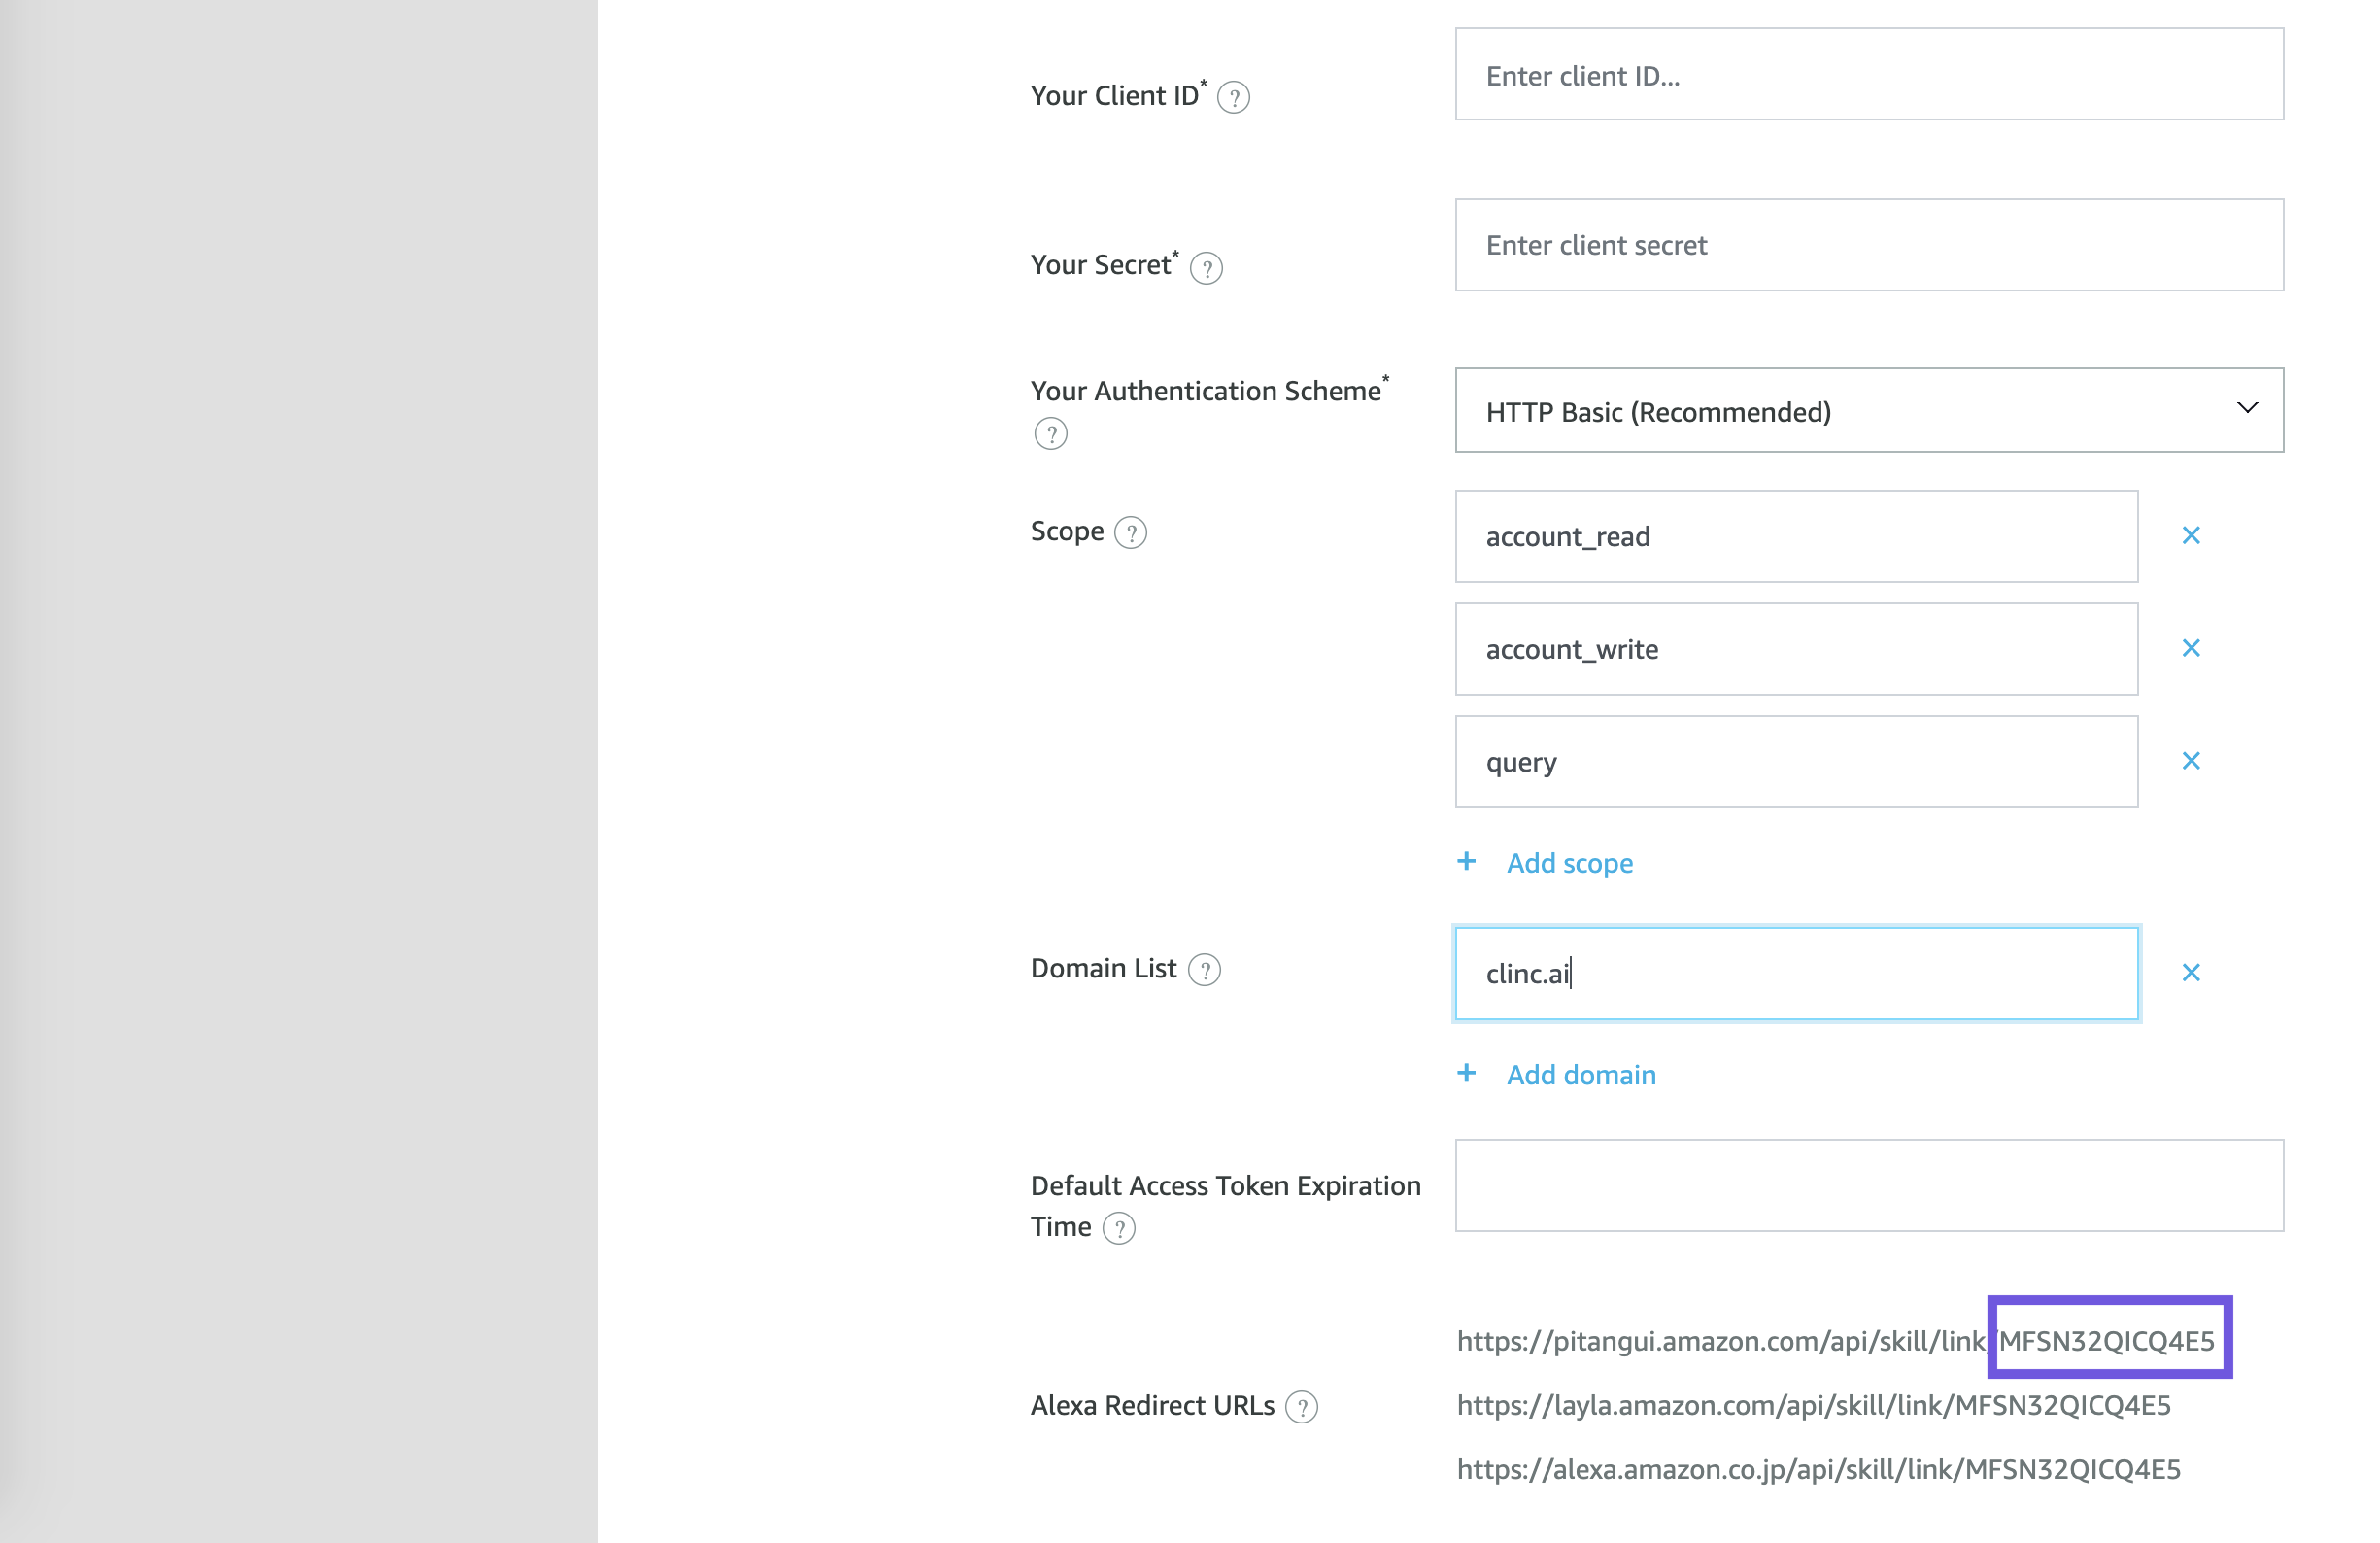
Fill in your Institution's client_id and client_secret.
Your Authentication Scheme can be set up to HTTP Basic.
Also in Scope, fill in
account_read,account_write, andquery.Finally in Domain List section click to add a domain and add
clinc.com.Click Save after page is completed. At the bottom of the page is a section titled Redirect URLs. There is a list of urls in the format "https://unique.redirect.url/api/skill/link/VENDOR_ID (opens new window). Take note of the
<VENDOR_ID>, as it will be referenced in Alexa Project Setup.
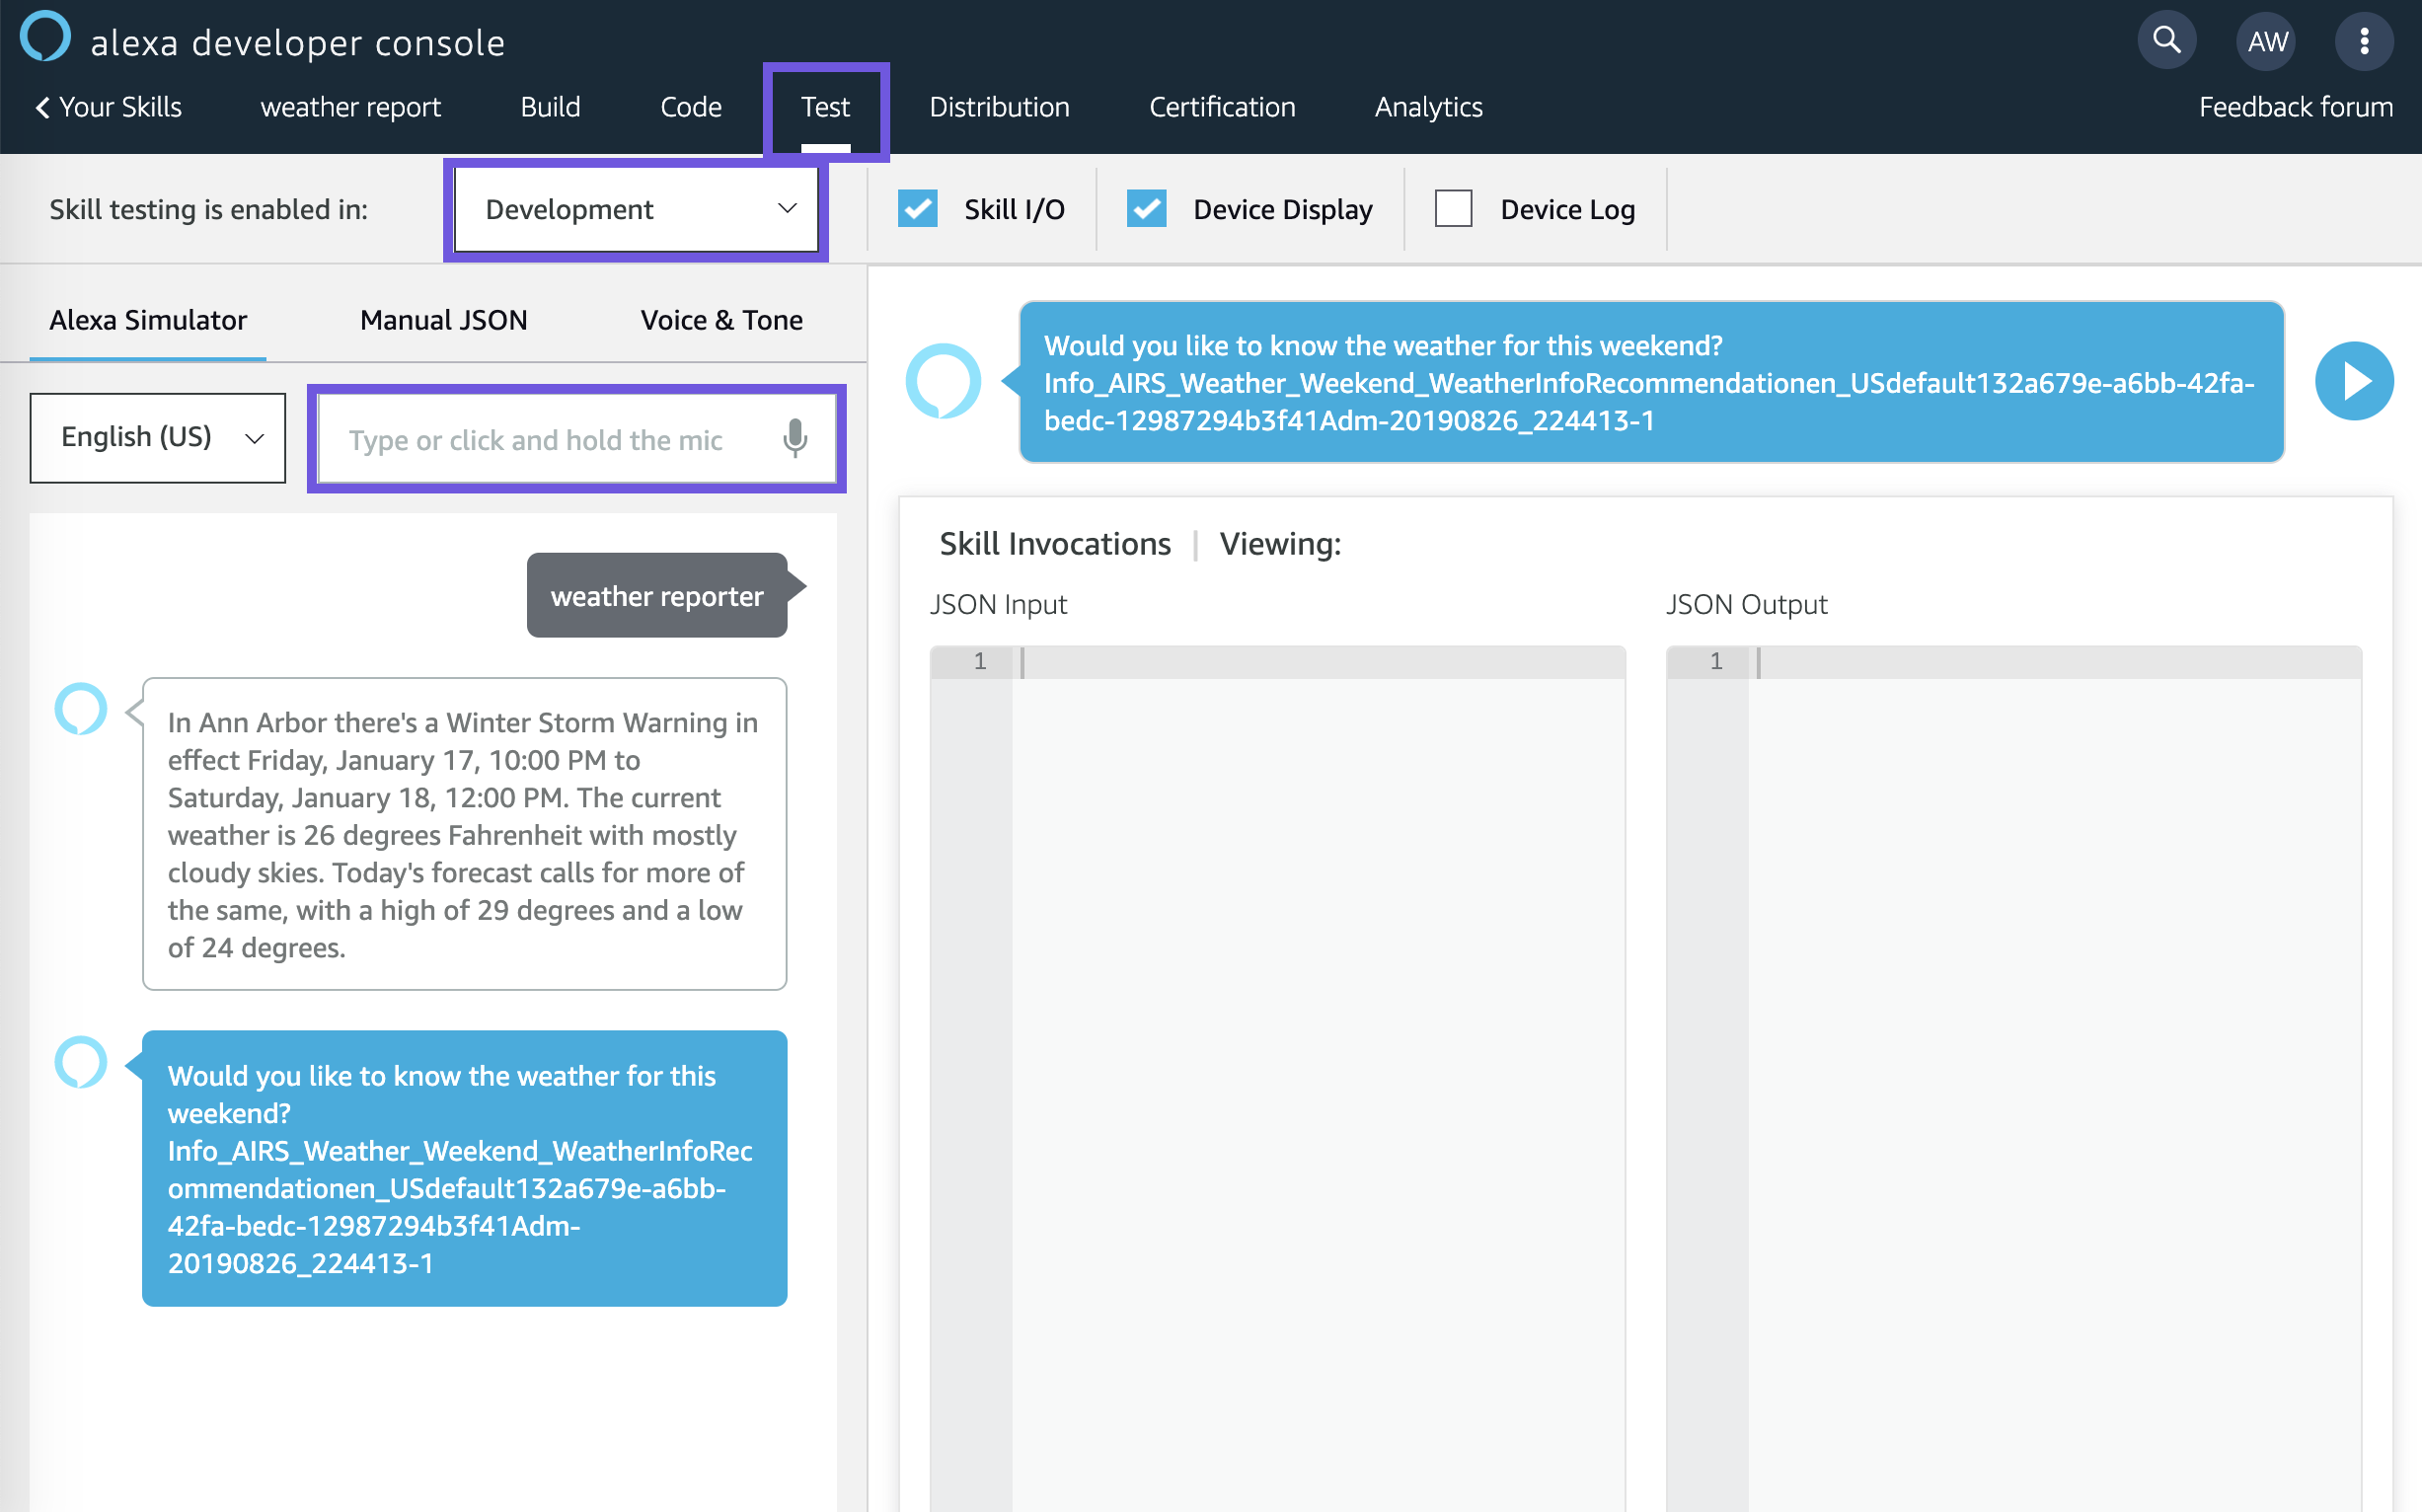
# Test Out Your Alexa Integration
You can test out your Alexa integration by using <INVOCATION_NAME> on an Alexa Device that is registered under the same email as your Amazon Developer Account.
You can also test in the [Alexa Developer Console](https://developer.amazon.com/alexa/console/ask.
Select your skill from the list
At the top menu bar click the Test tab.
Use the dropdown located on the top left to set Skill testing is enabled in: from
OfftoDevelopmentIn the text input on the top left, under the dropdown, type
<INVOCATION_NAME>.
Last updated: 01/20/2020