# Slack Integration
In January 2020, Slack released major changes to their API that will affect integrations made both before and after the release. We have included documentation below on:
- Creating a new integration post-February 1st, 2020
- Upgrading an integration that was created pre-February 1st, 2020
# Creating a new integration (post-February 1st, 2020)
# Slack Setup
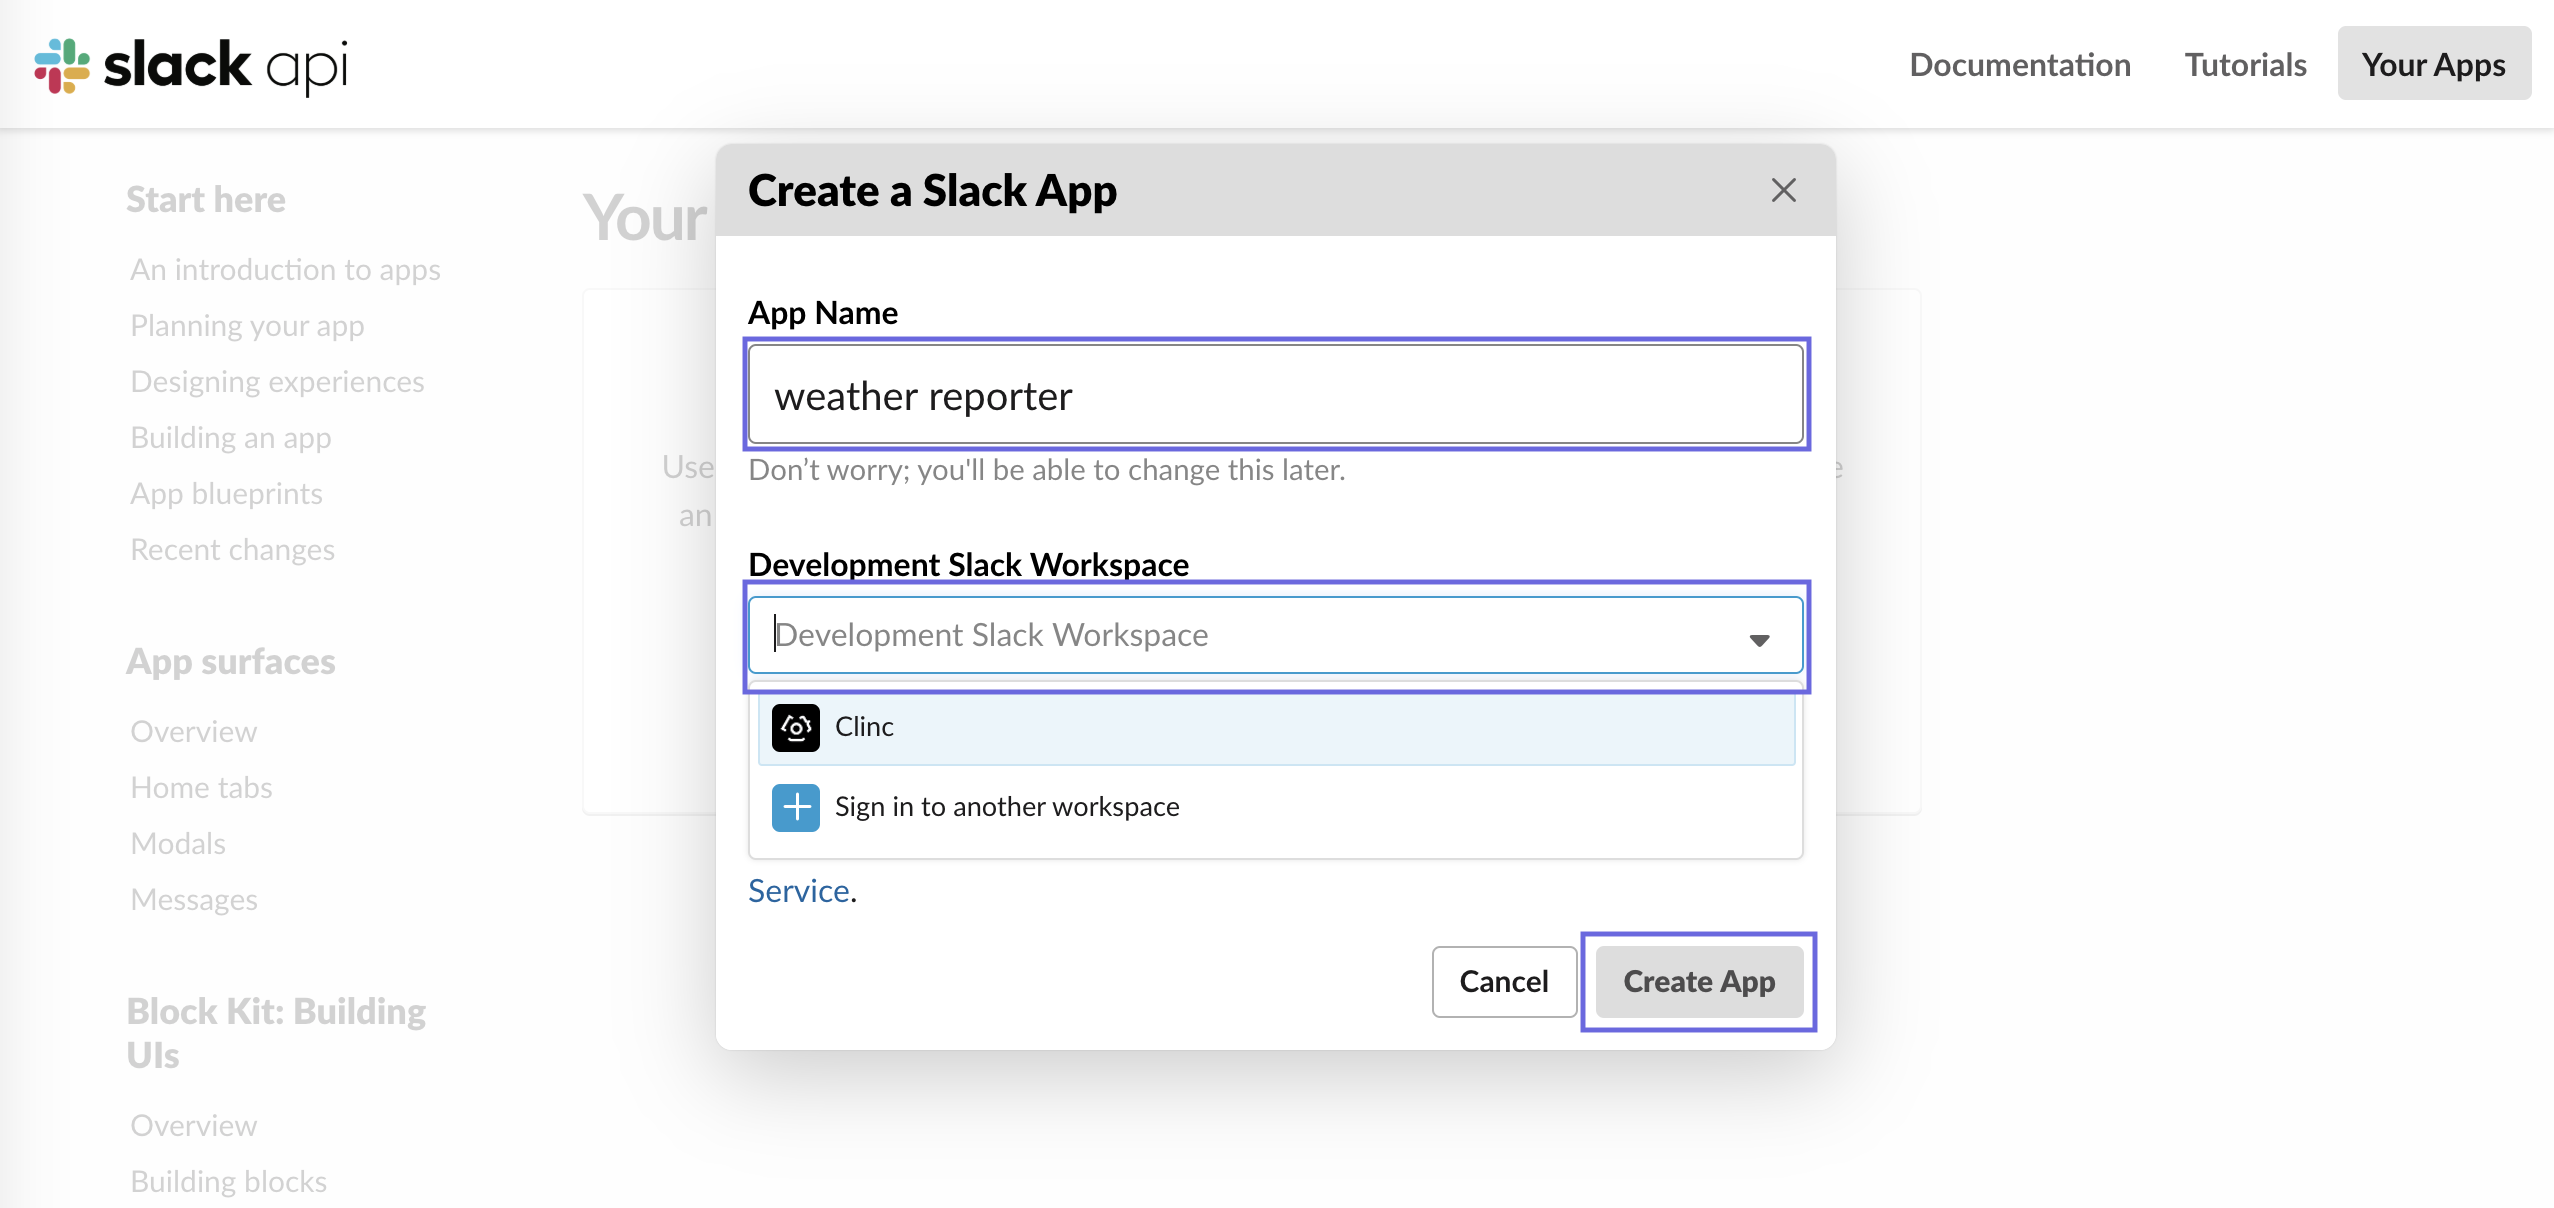
Head to https://api.slack.com/ (opens new window) and click Start Building.
- Name your app and choose a Development Slack Workspace to house your Slack integration.
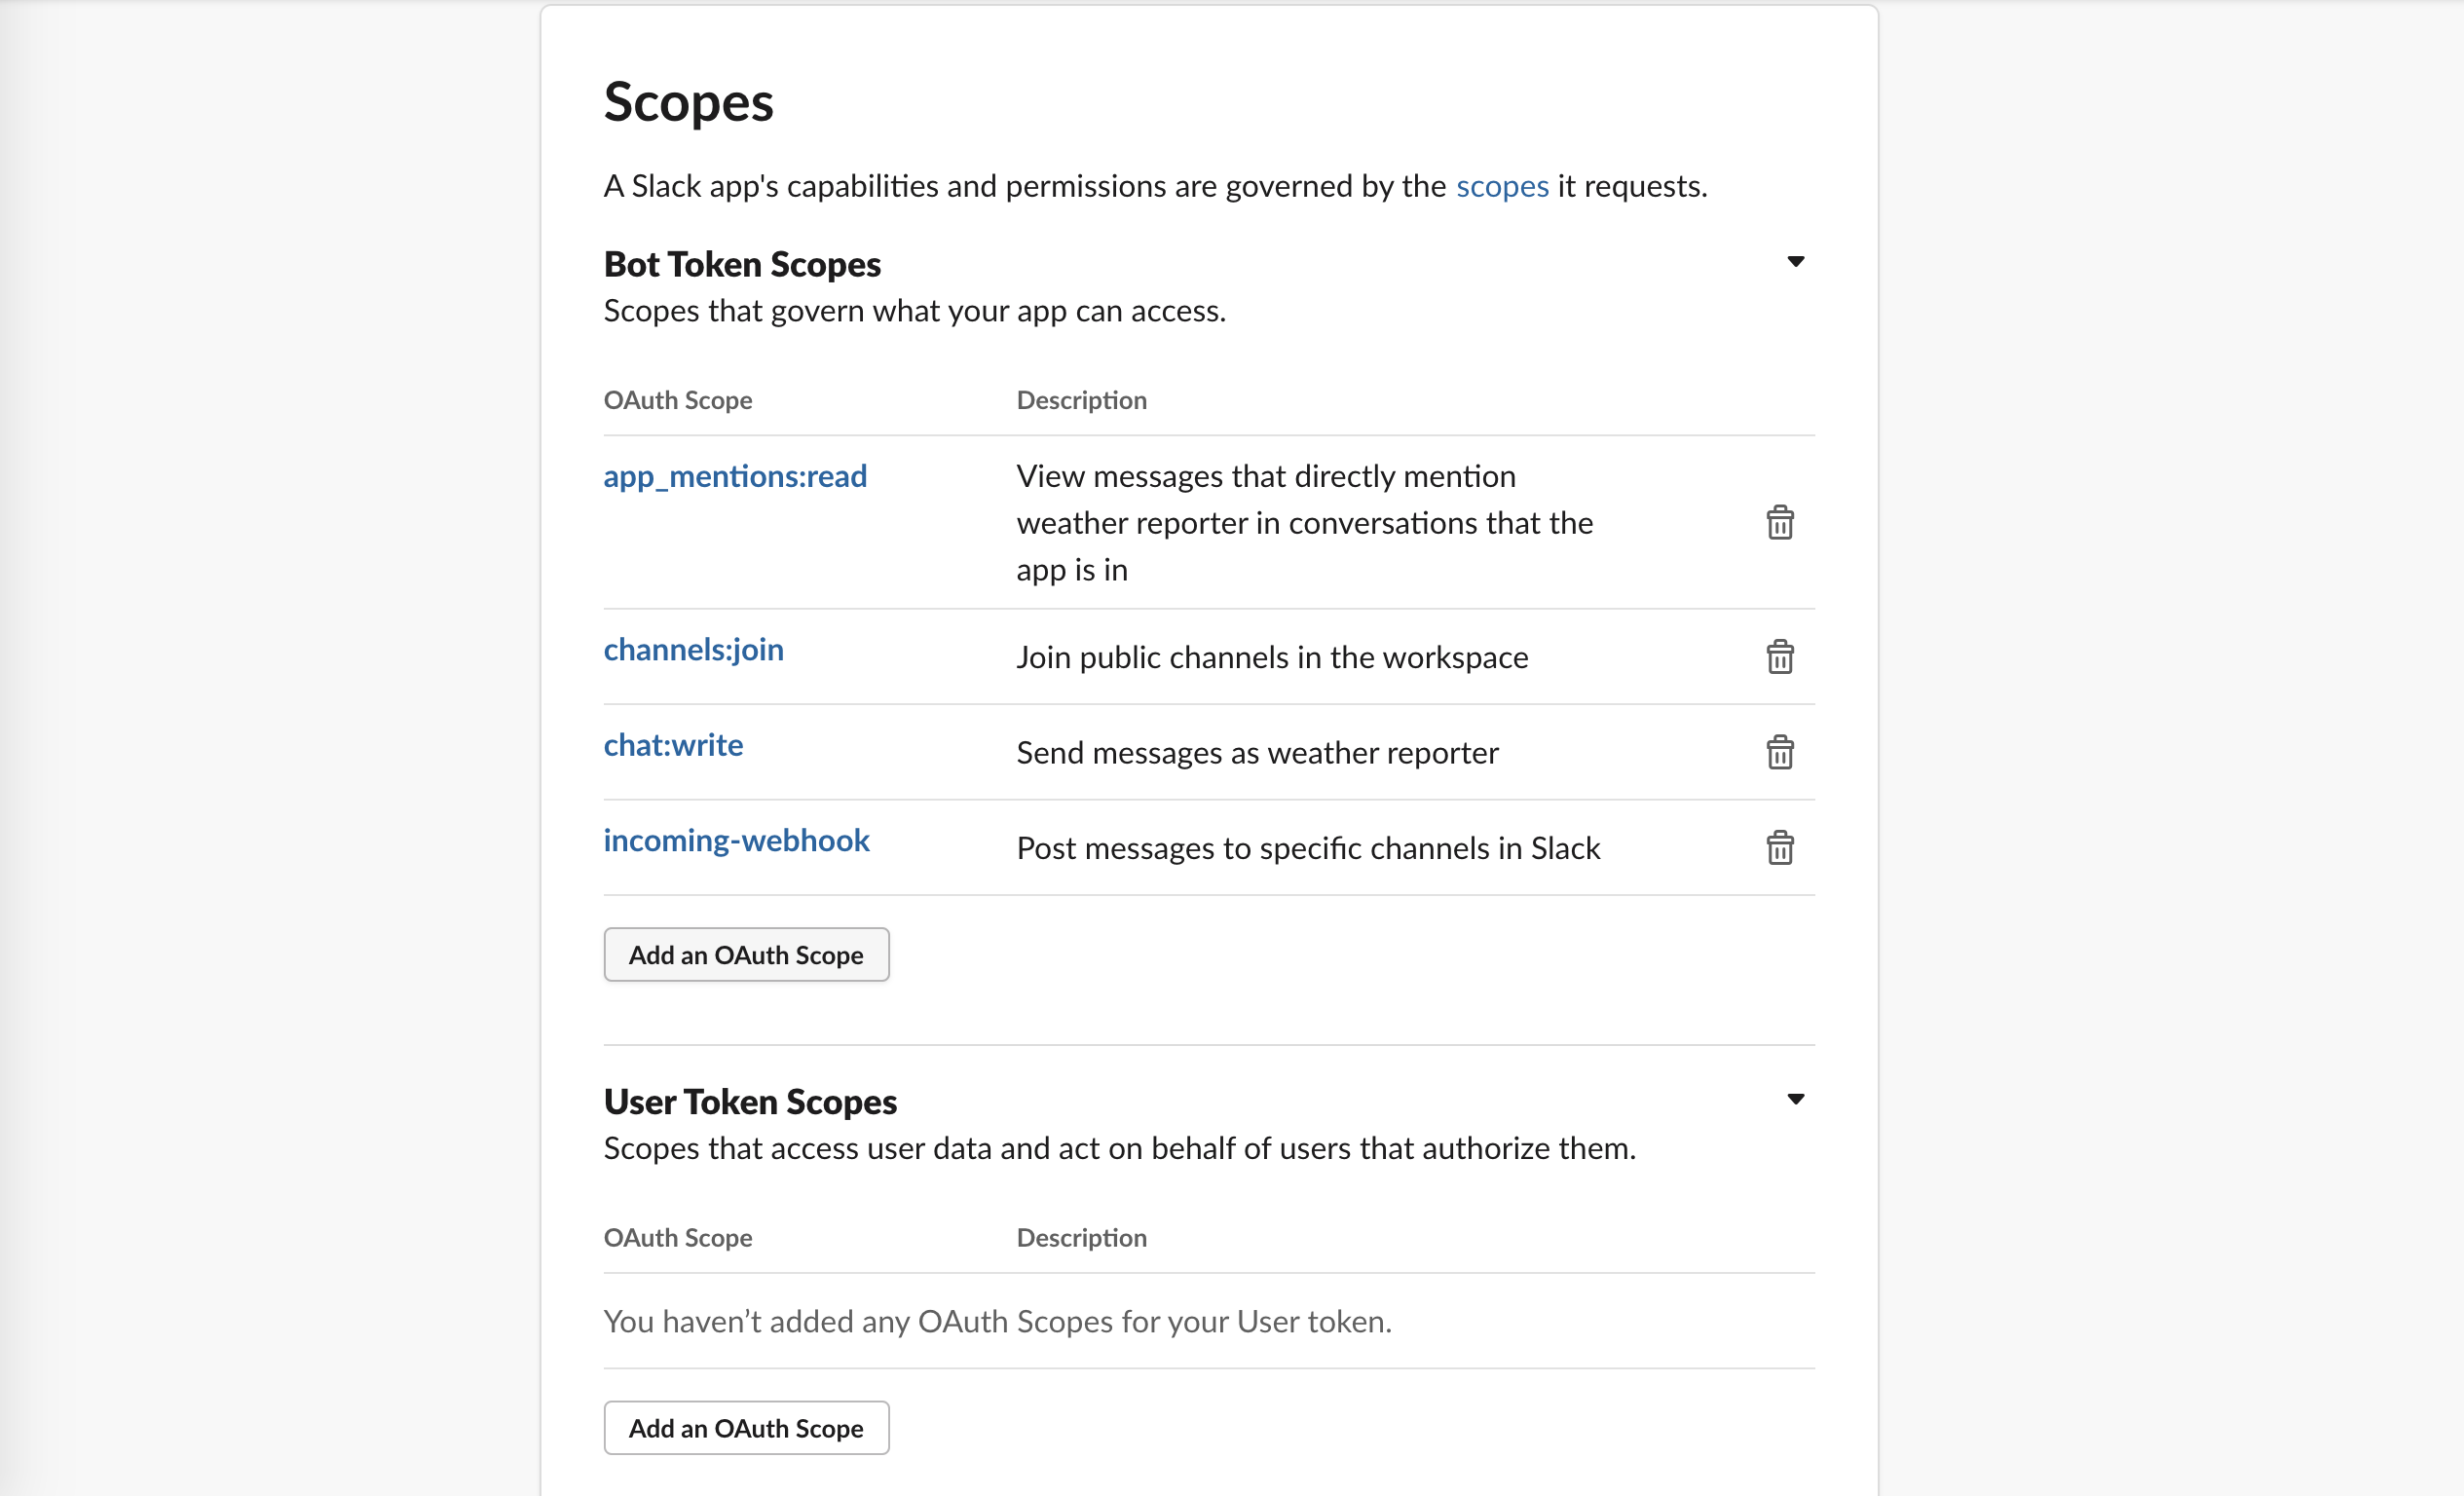
Go to the OAuth & Permissions page under Features in navigation on the left side of the page. If you don't see it, select your newly-created app from https://api.slack.com/apps (opens new window).
Add the required
app_mentions:read,channels:join,chat:write, andincoming-webhookBot Token Scopes.
Once you’ve added the required scopes, at the top of the OAuth & Permissions page, install your app to your workspace and select a default channel to which you wish to install your bot.
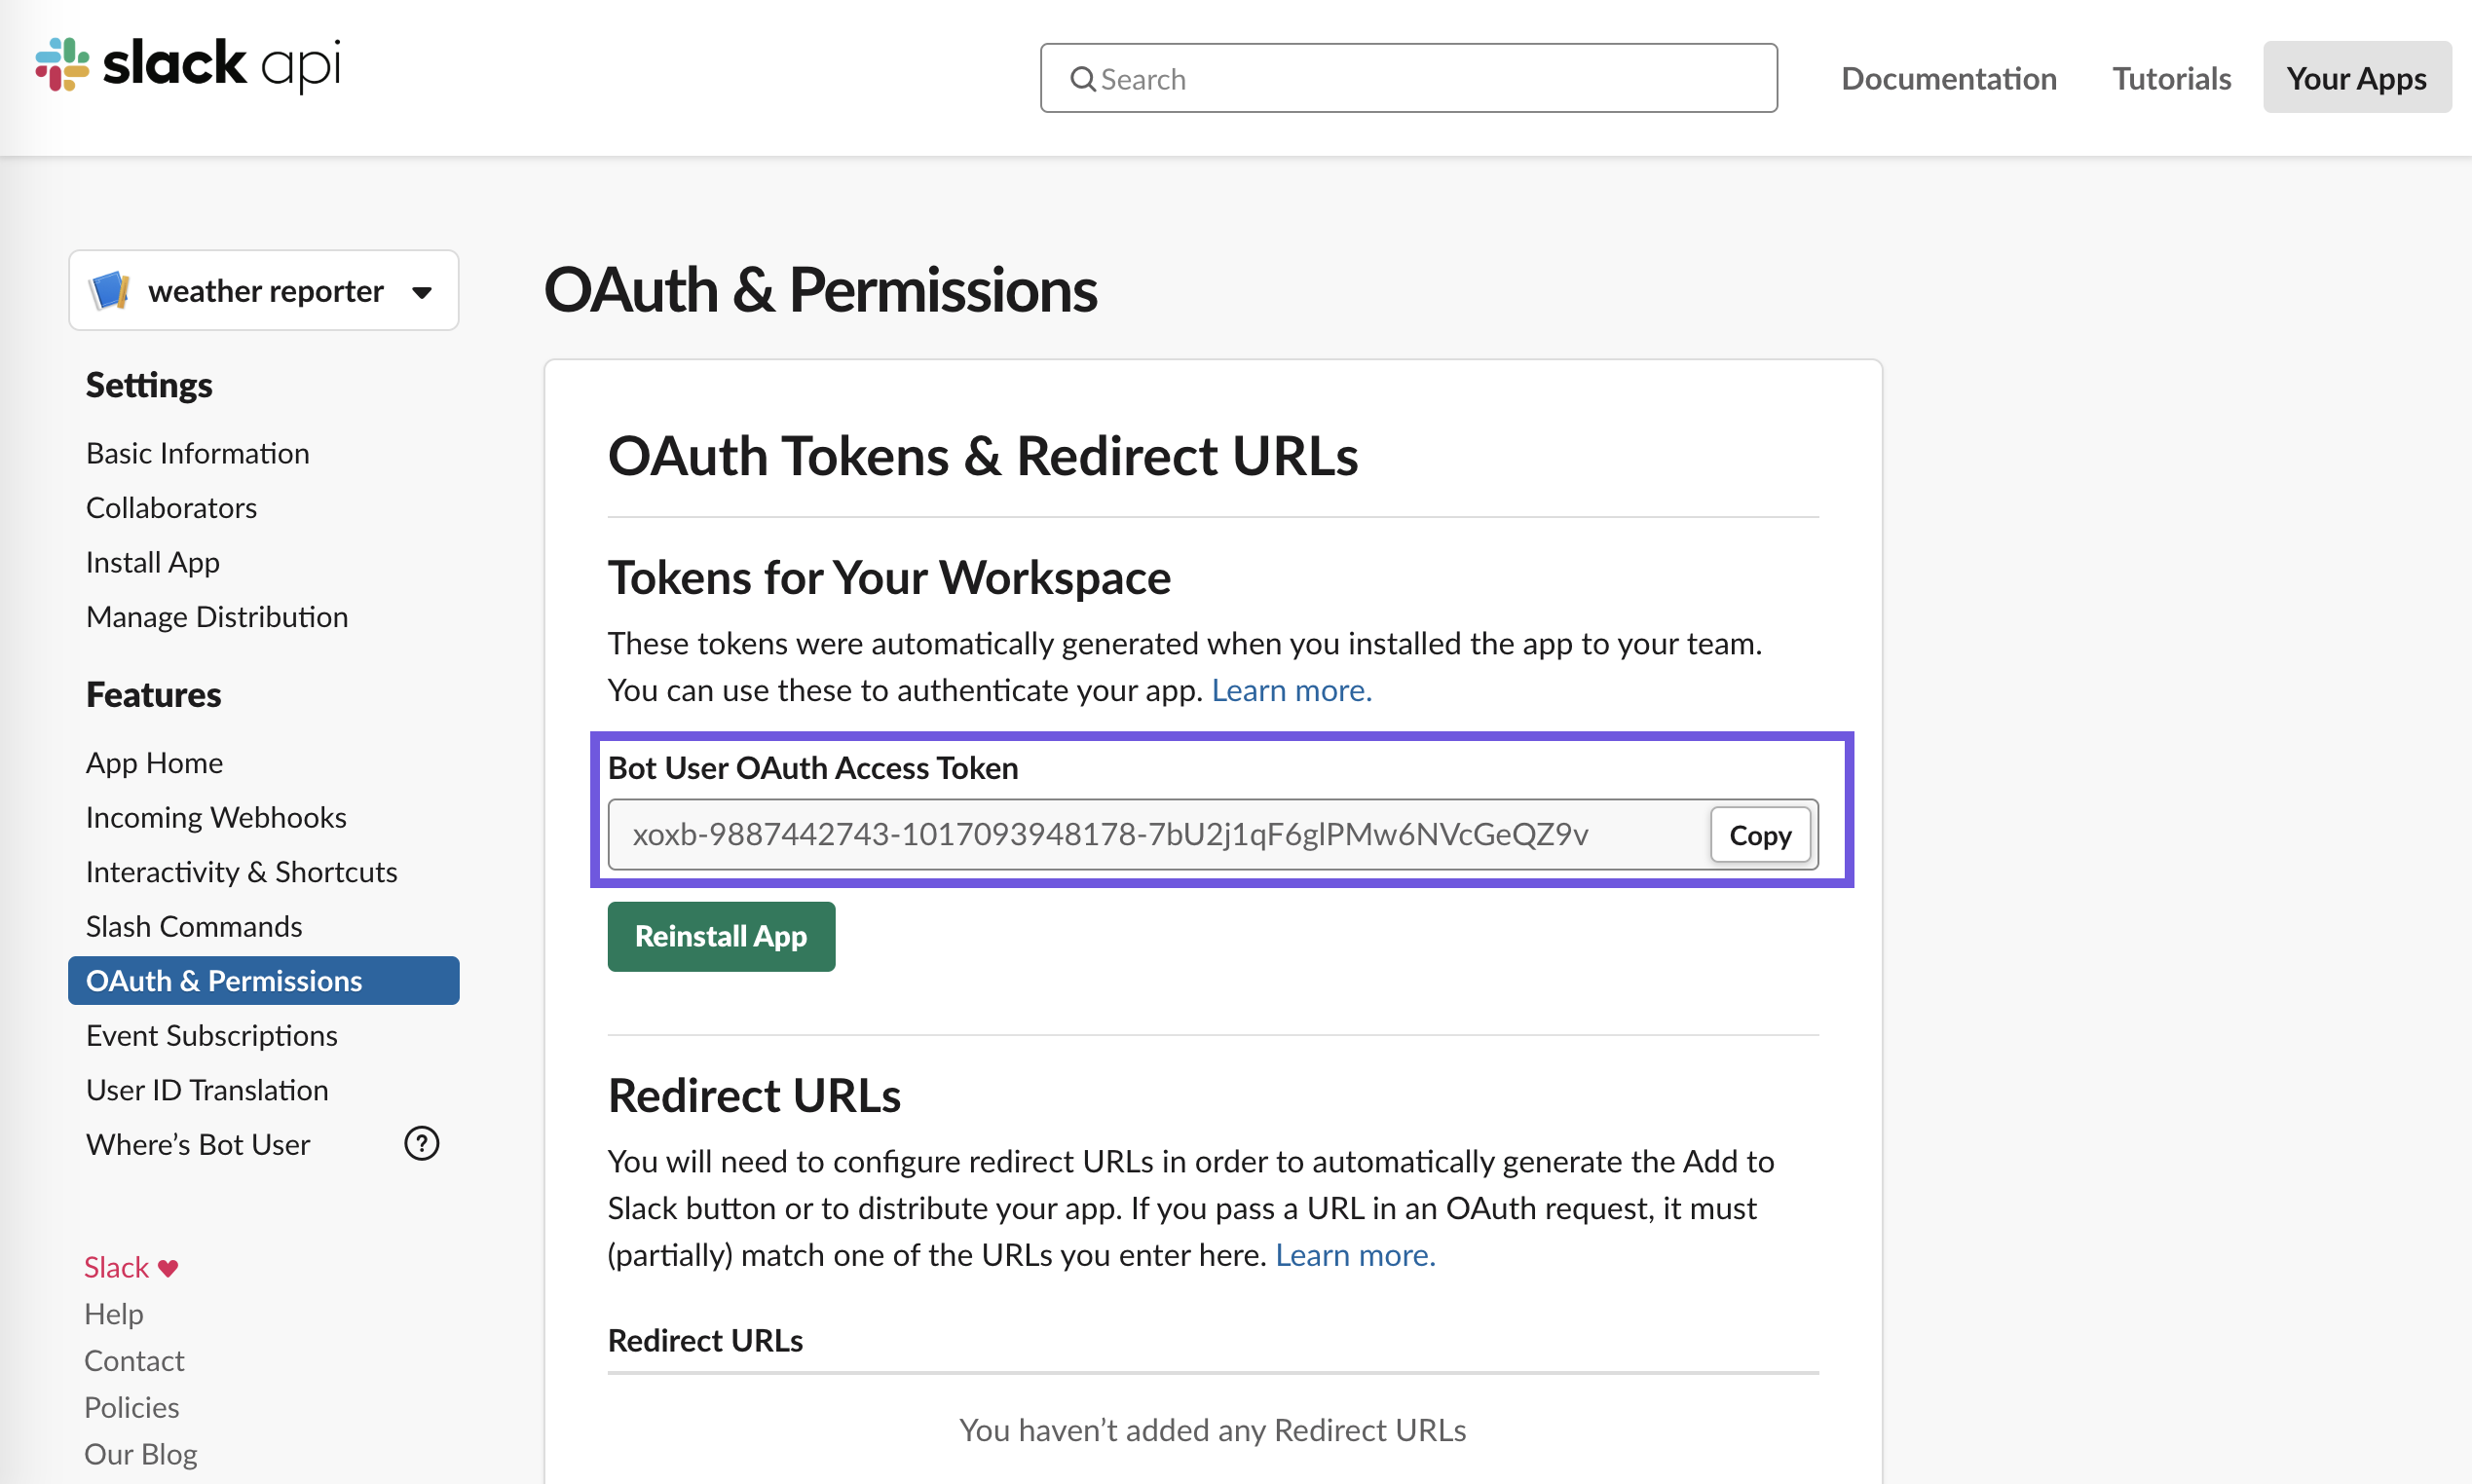
After installing your app, head back to the OAuth & Permissions page and copy your Bot User OAuth Access Token (should begin with
xoxb).
# Clinc Setup
- On the Integrations page of the platform, create a New Integration or select an existing one. Reference How to create an integration for explanation of each field.
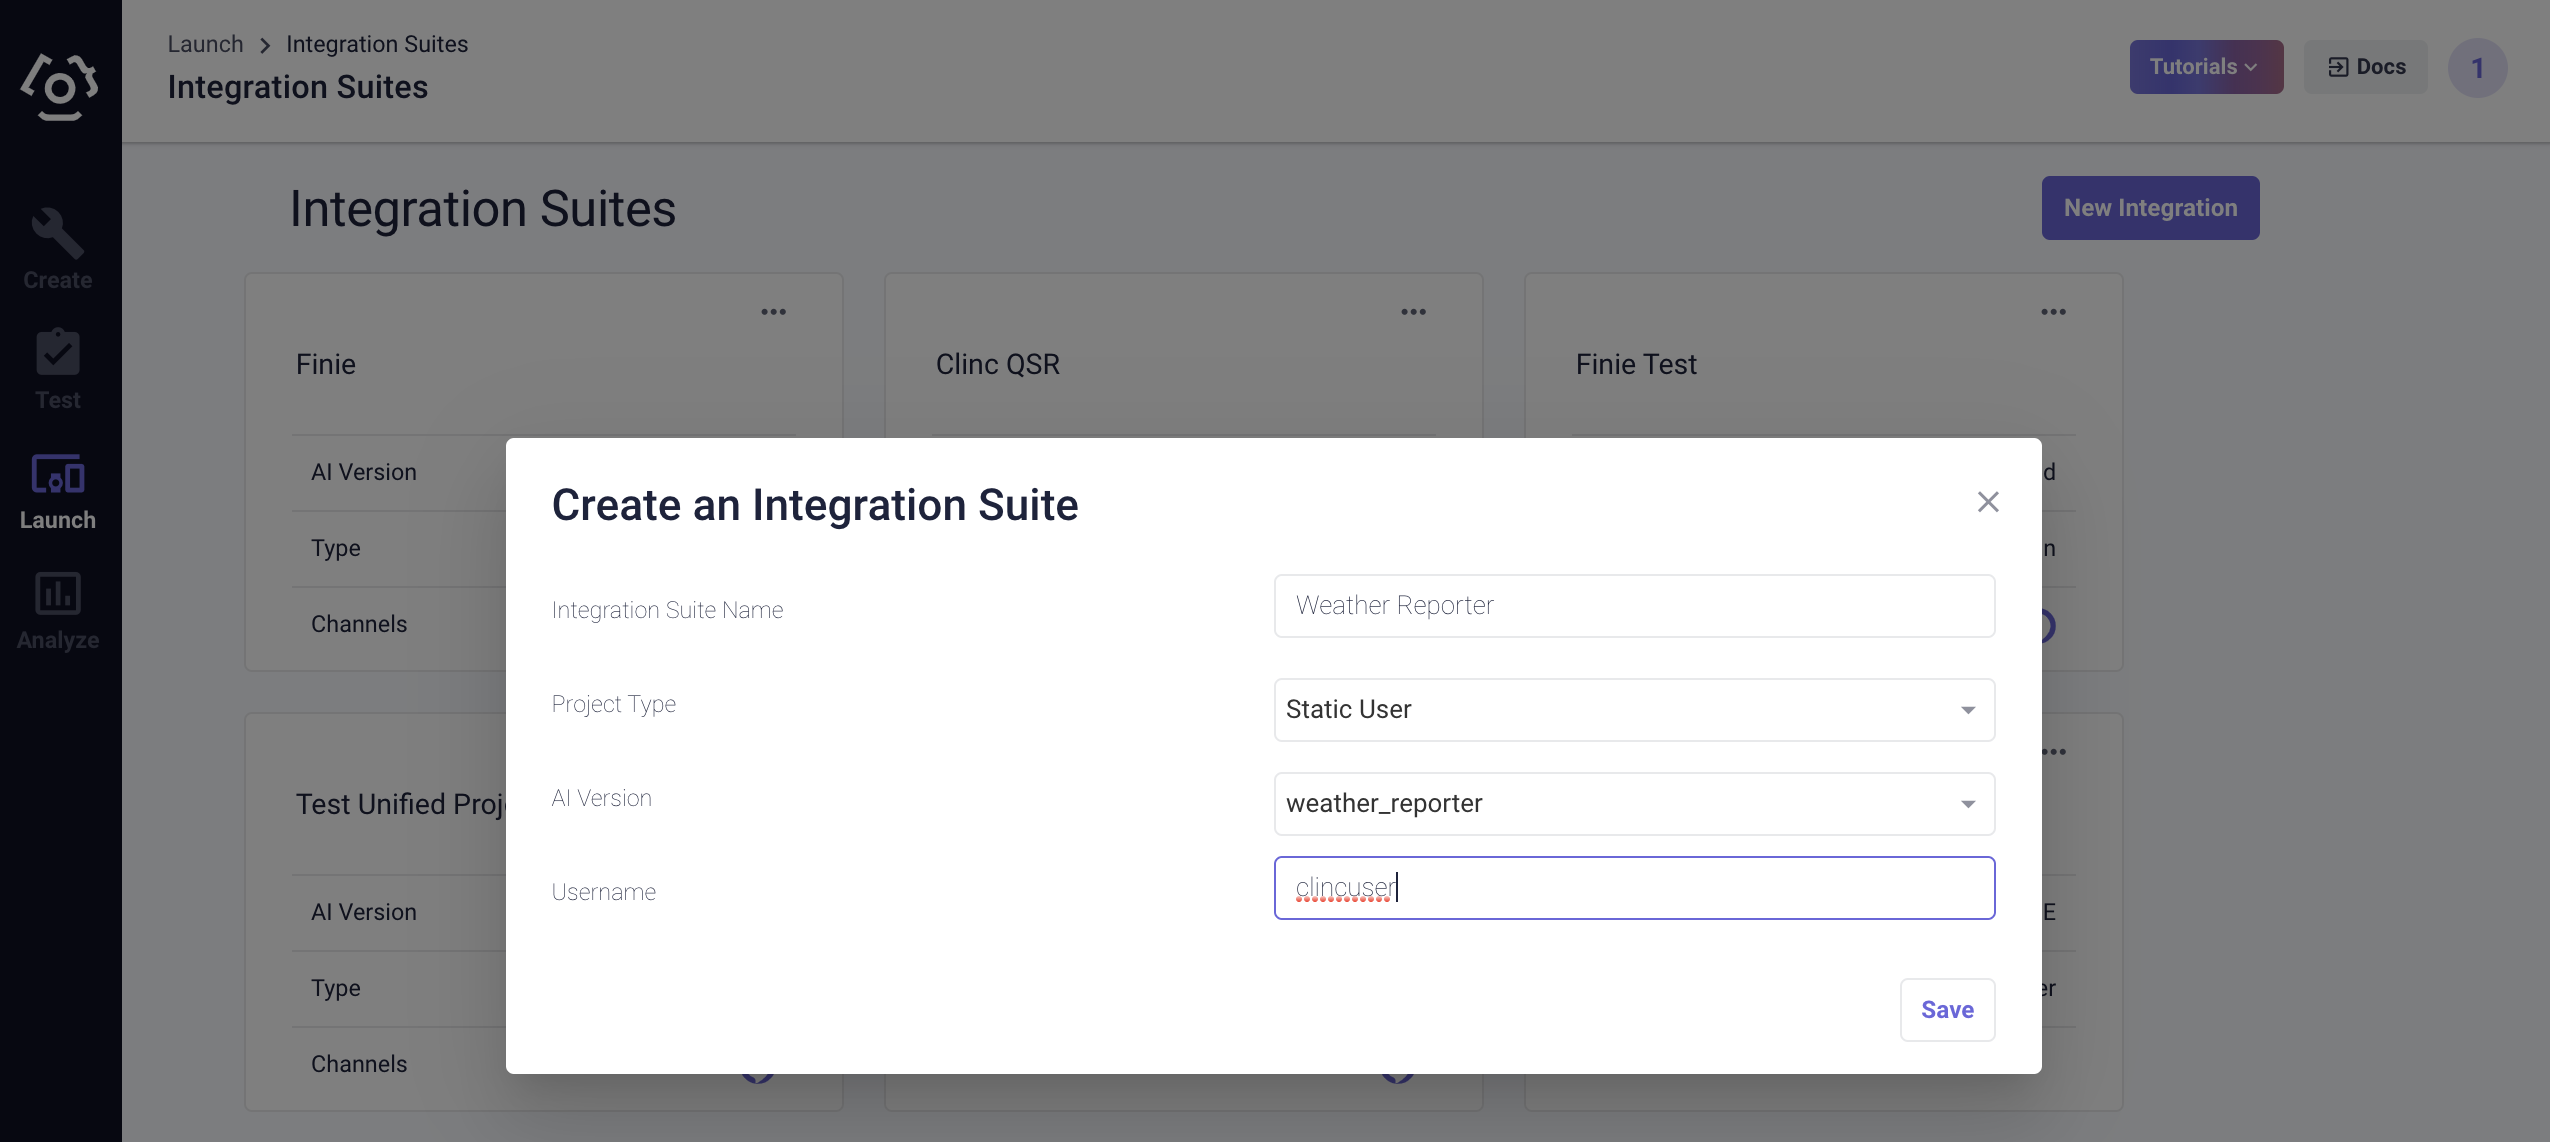
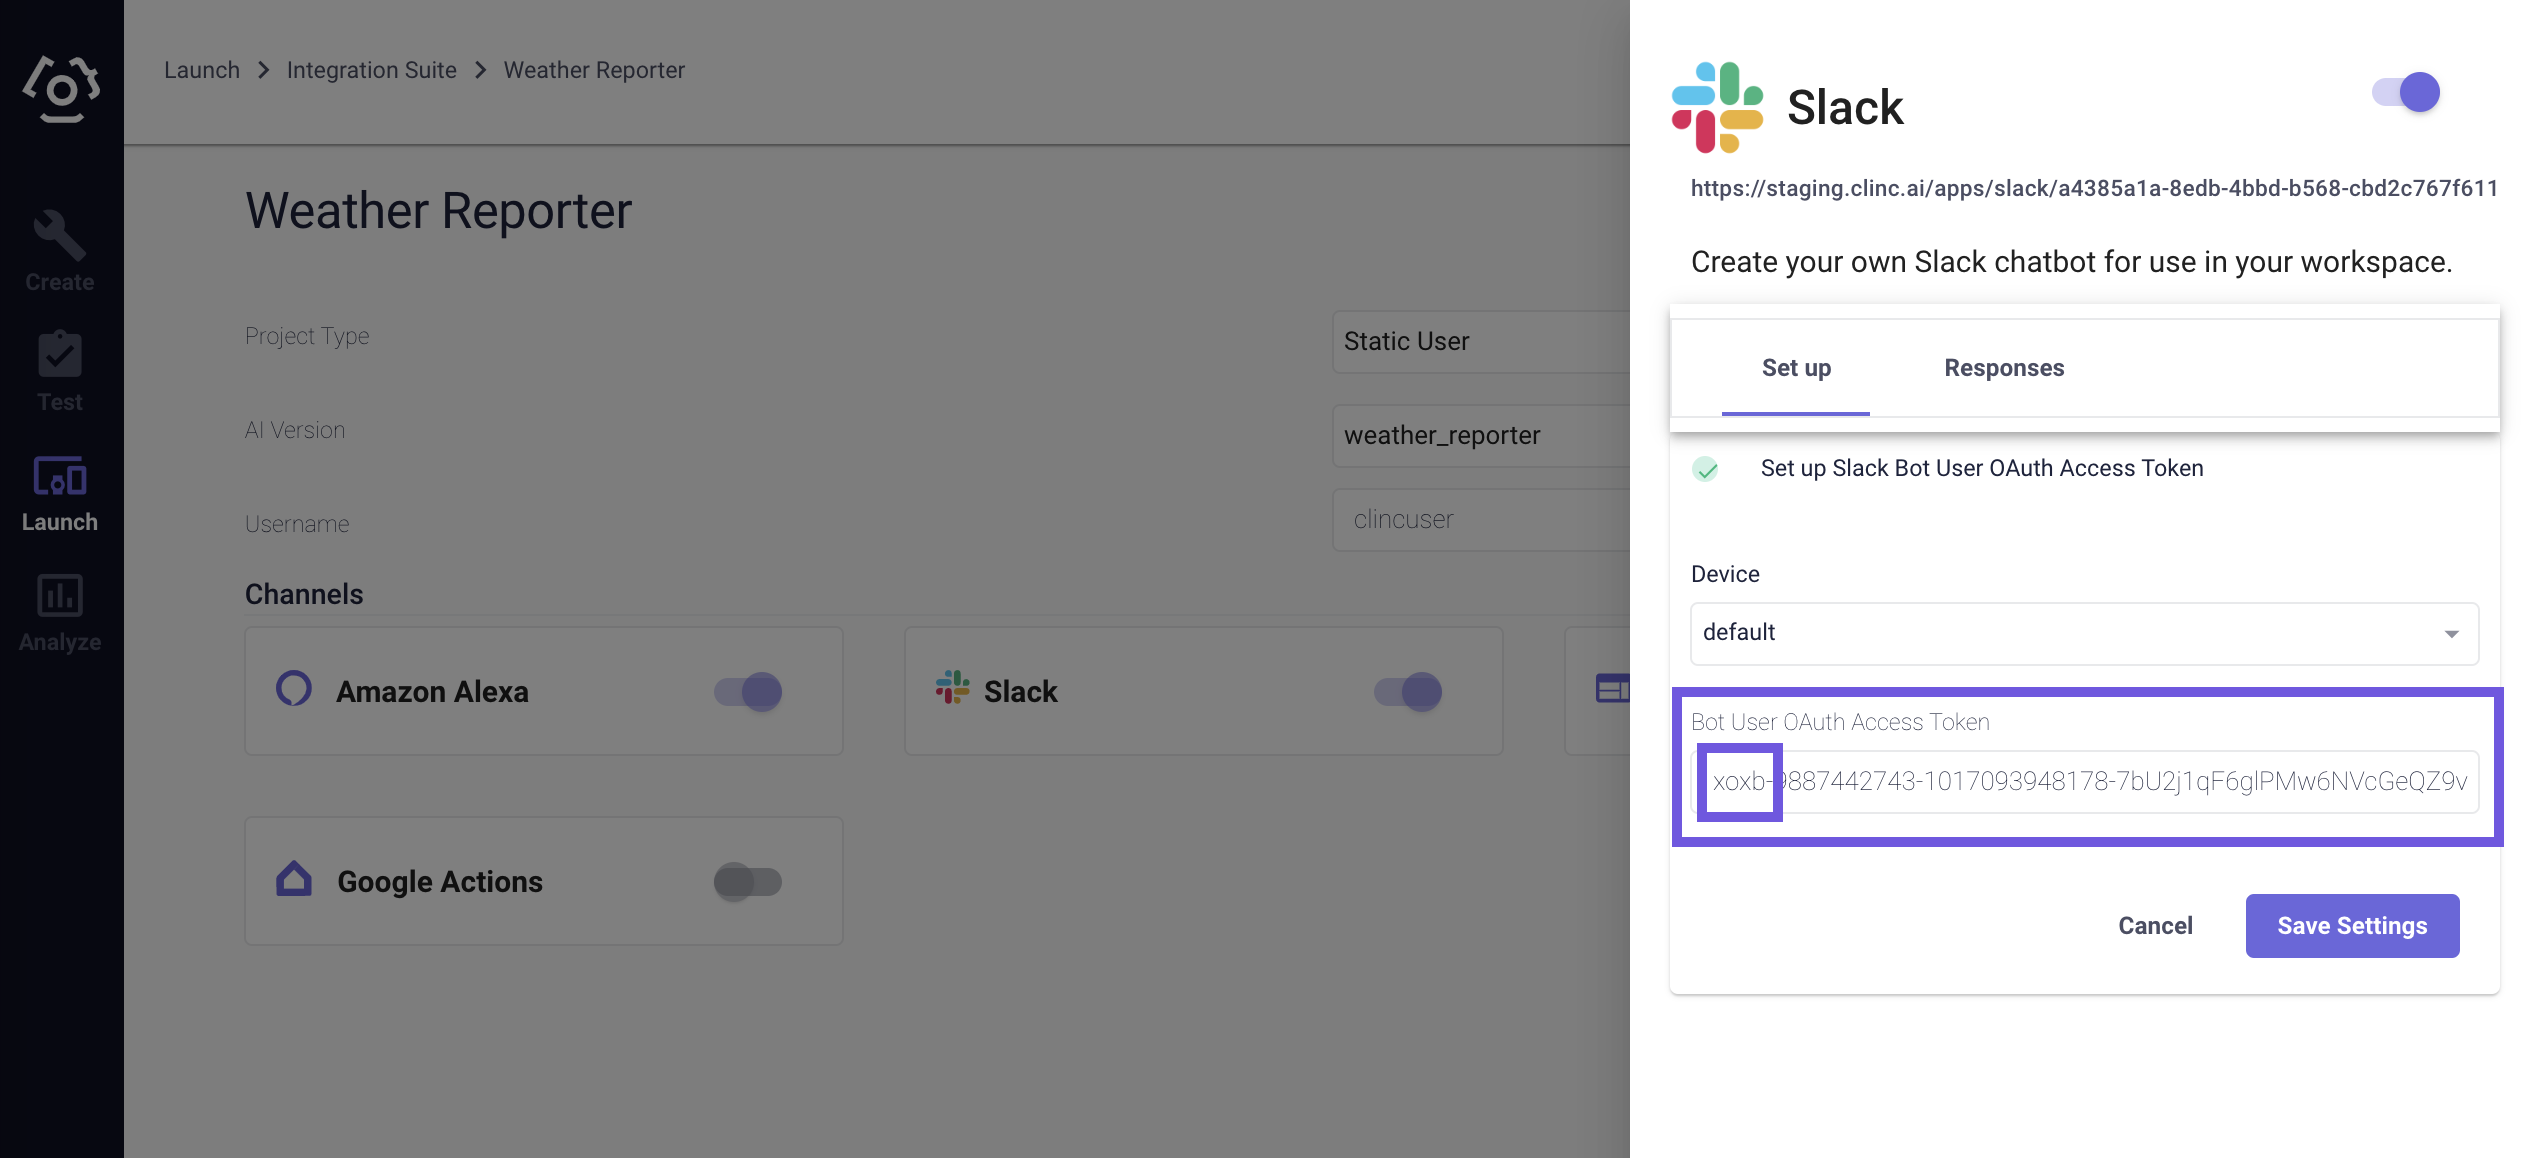
Select the Slack card under Channels.
Select a personality under device and enter your app’s Bot User OAuth Access Token (must begin with
xoxb), and click Save Settings.
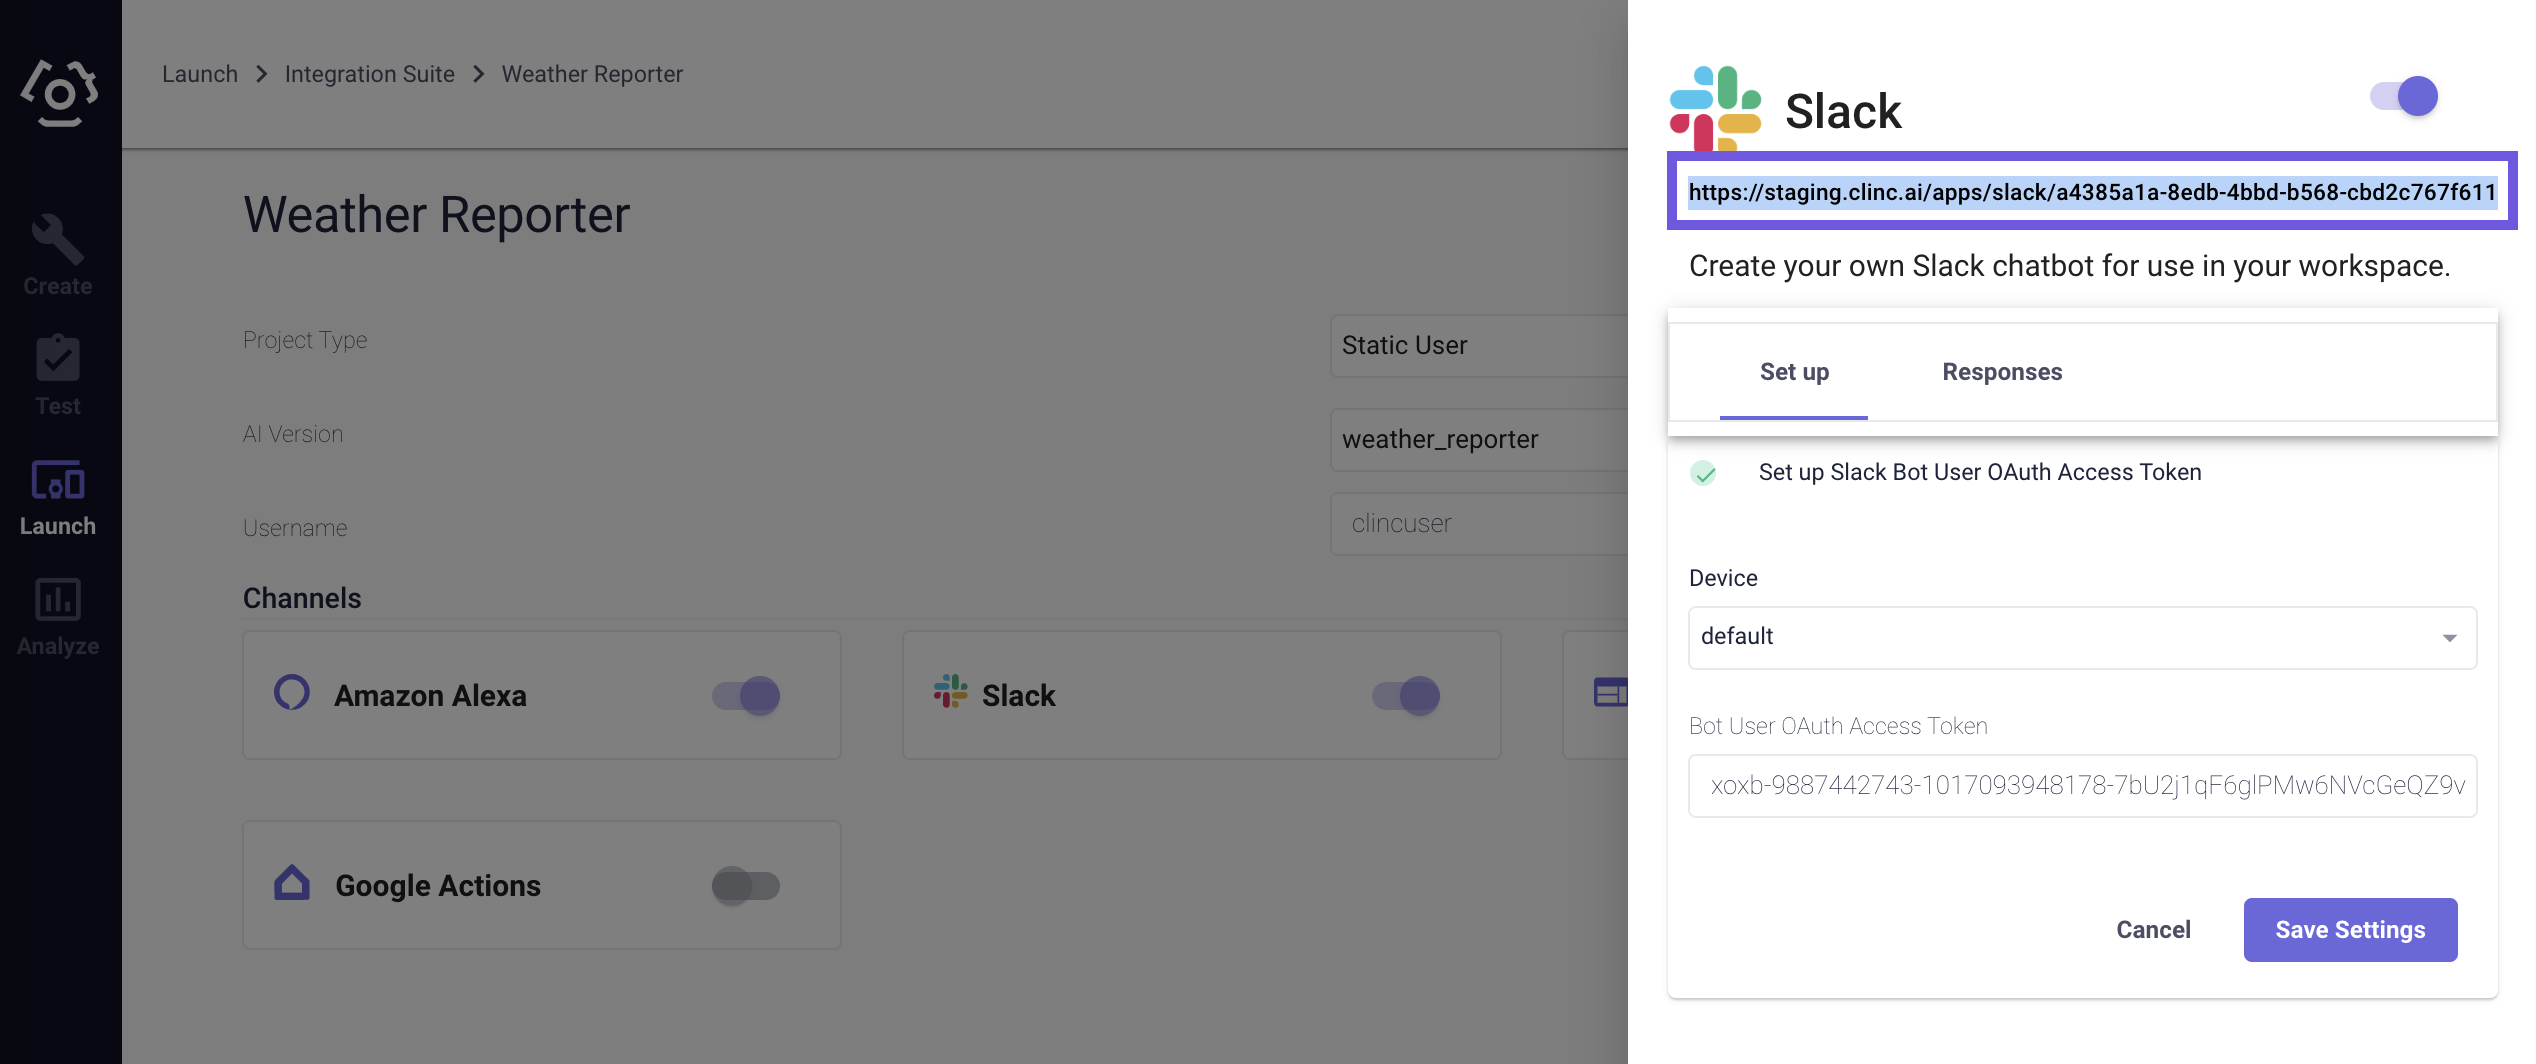
- Click on your newly saved Slack integration under Channels and copy the entire integration link url at the top of the sidebar.
# Final Steps
Head back to the Slack API website and select your app from https://api.slack.com/apps (opens new window).
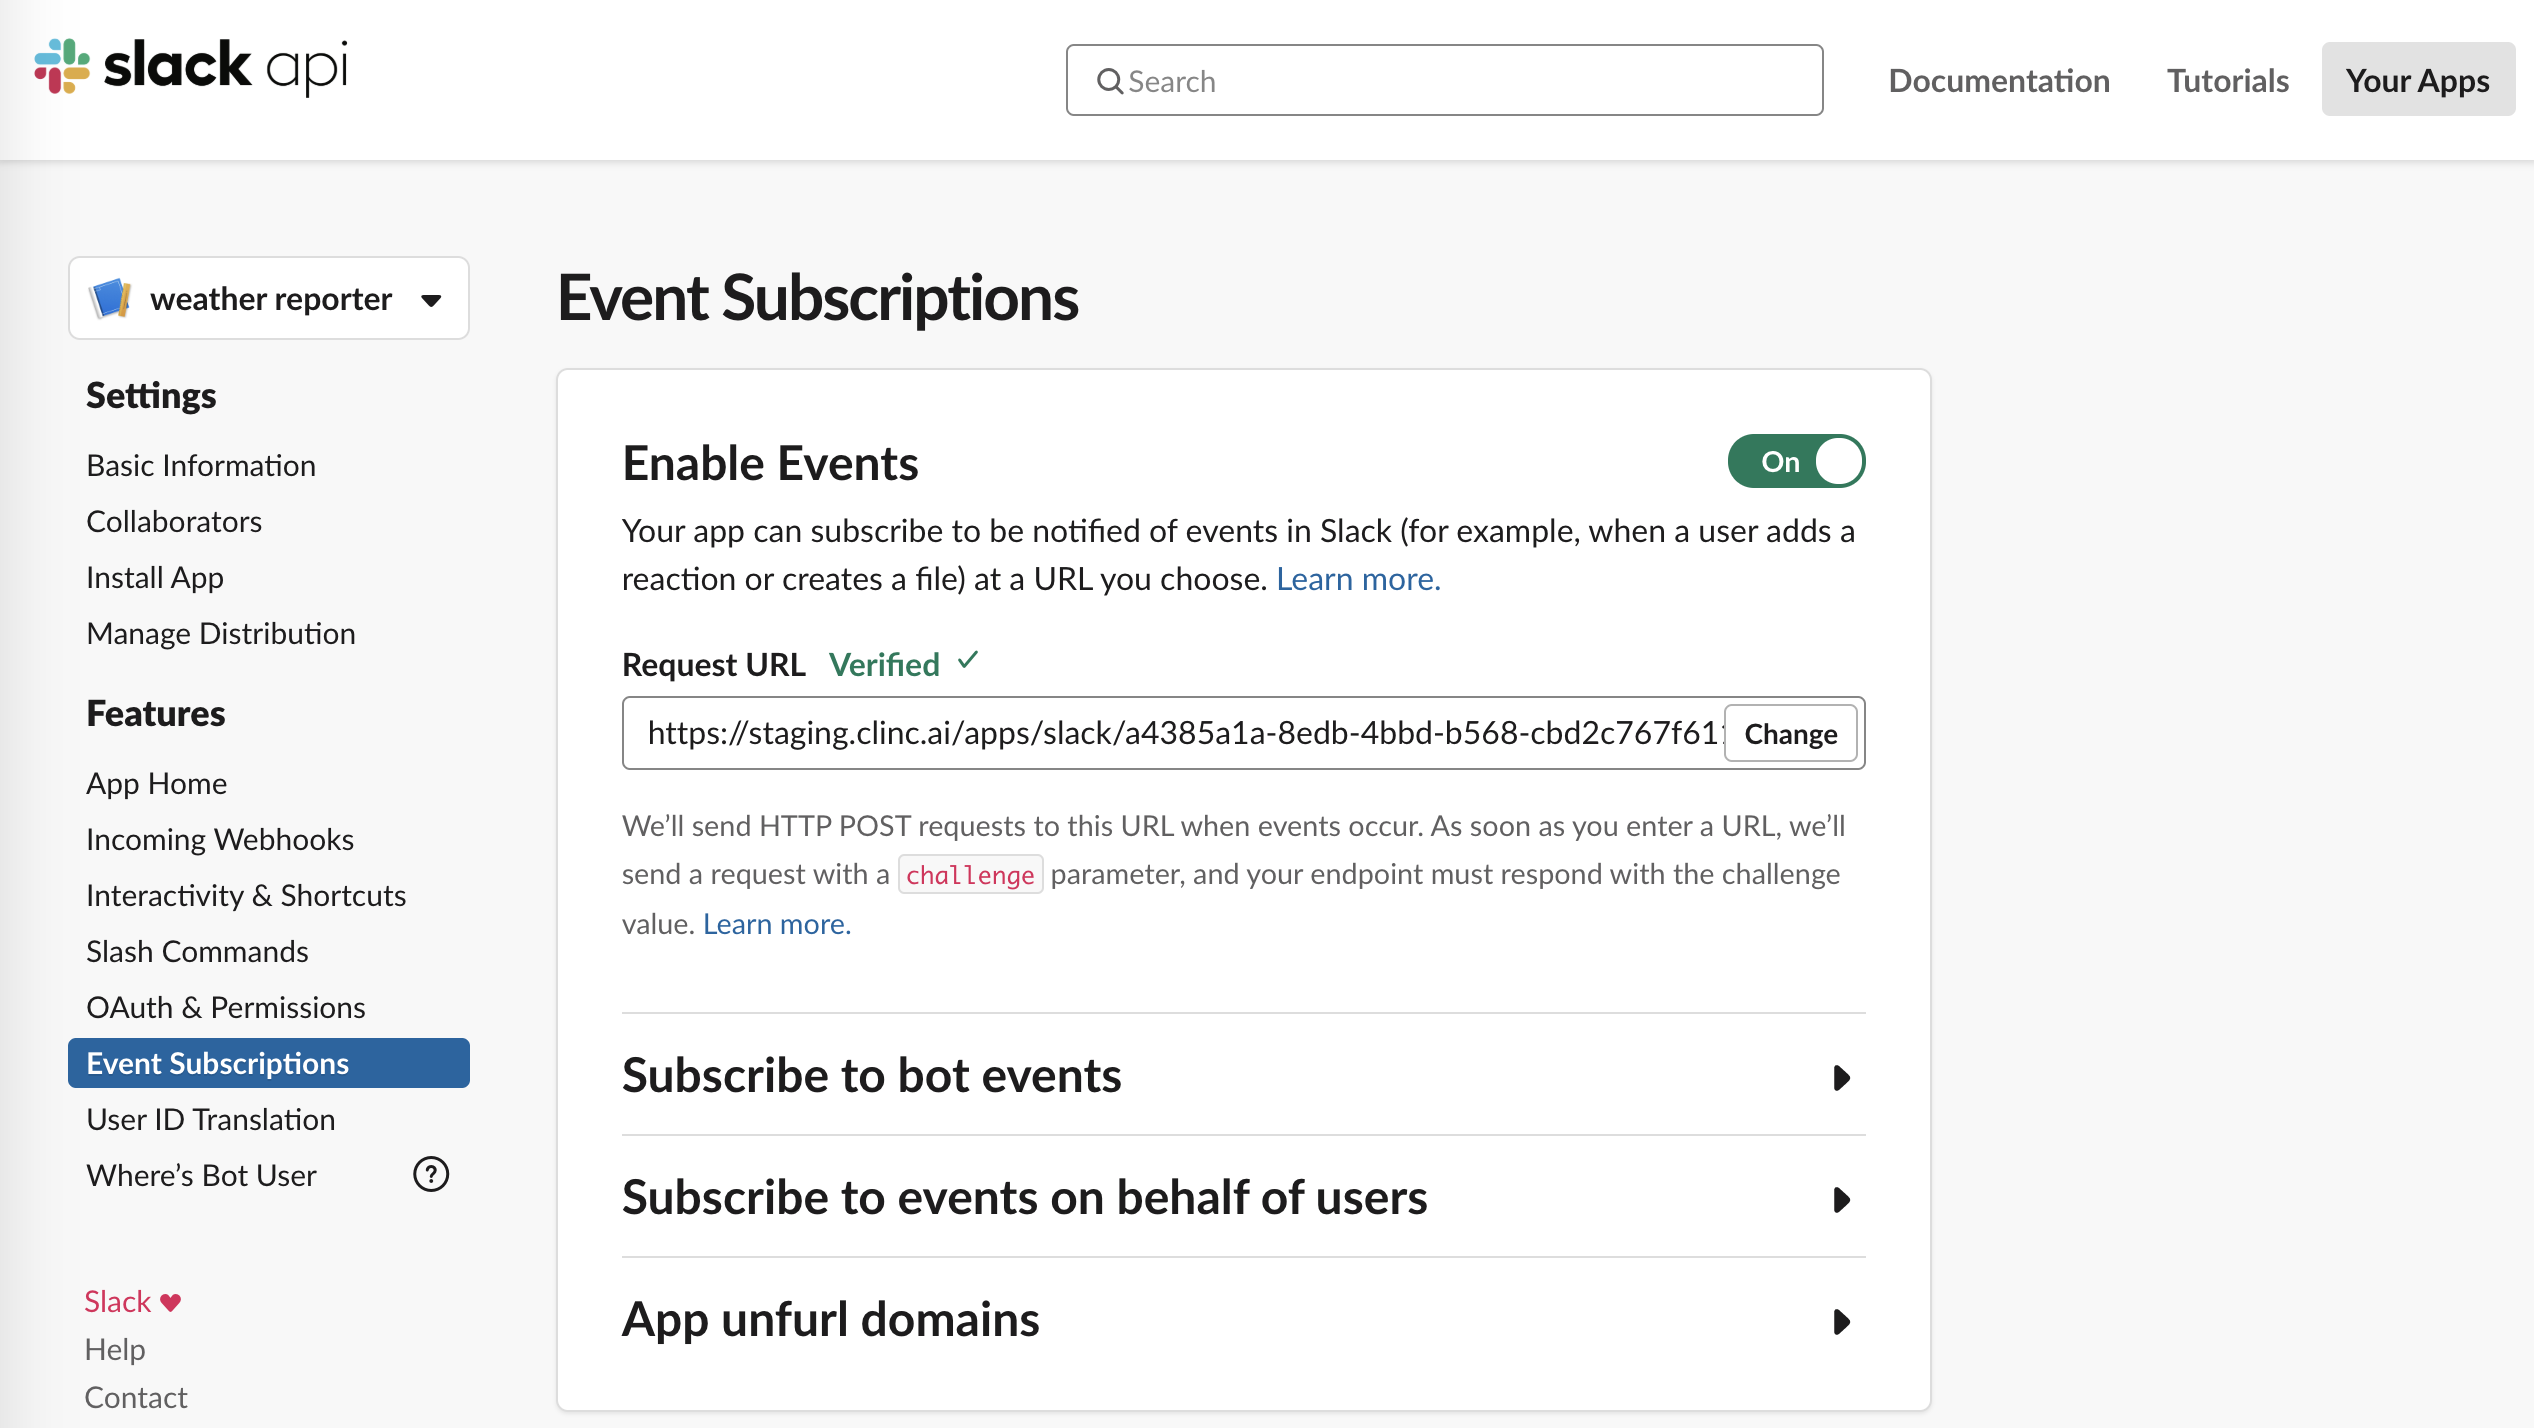
Go to the Event Subscriptions page under Features and enable events via the
Ontoggle.Input your Slack integration link url as the
Request URLand confirm that the URL is verified by Slack.
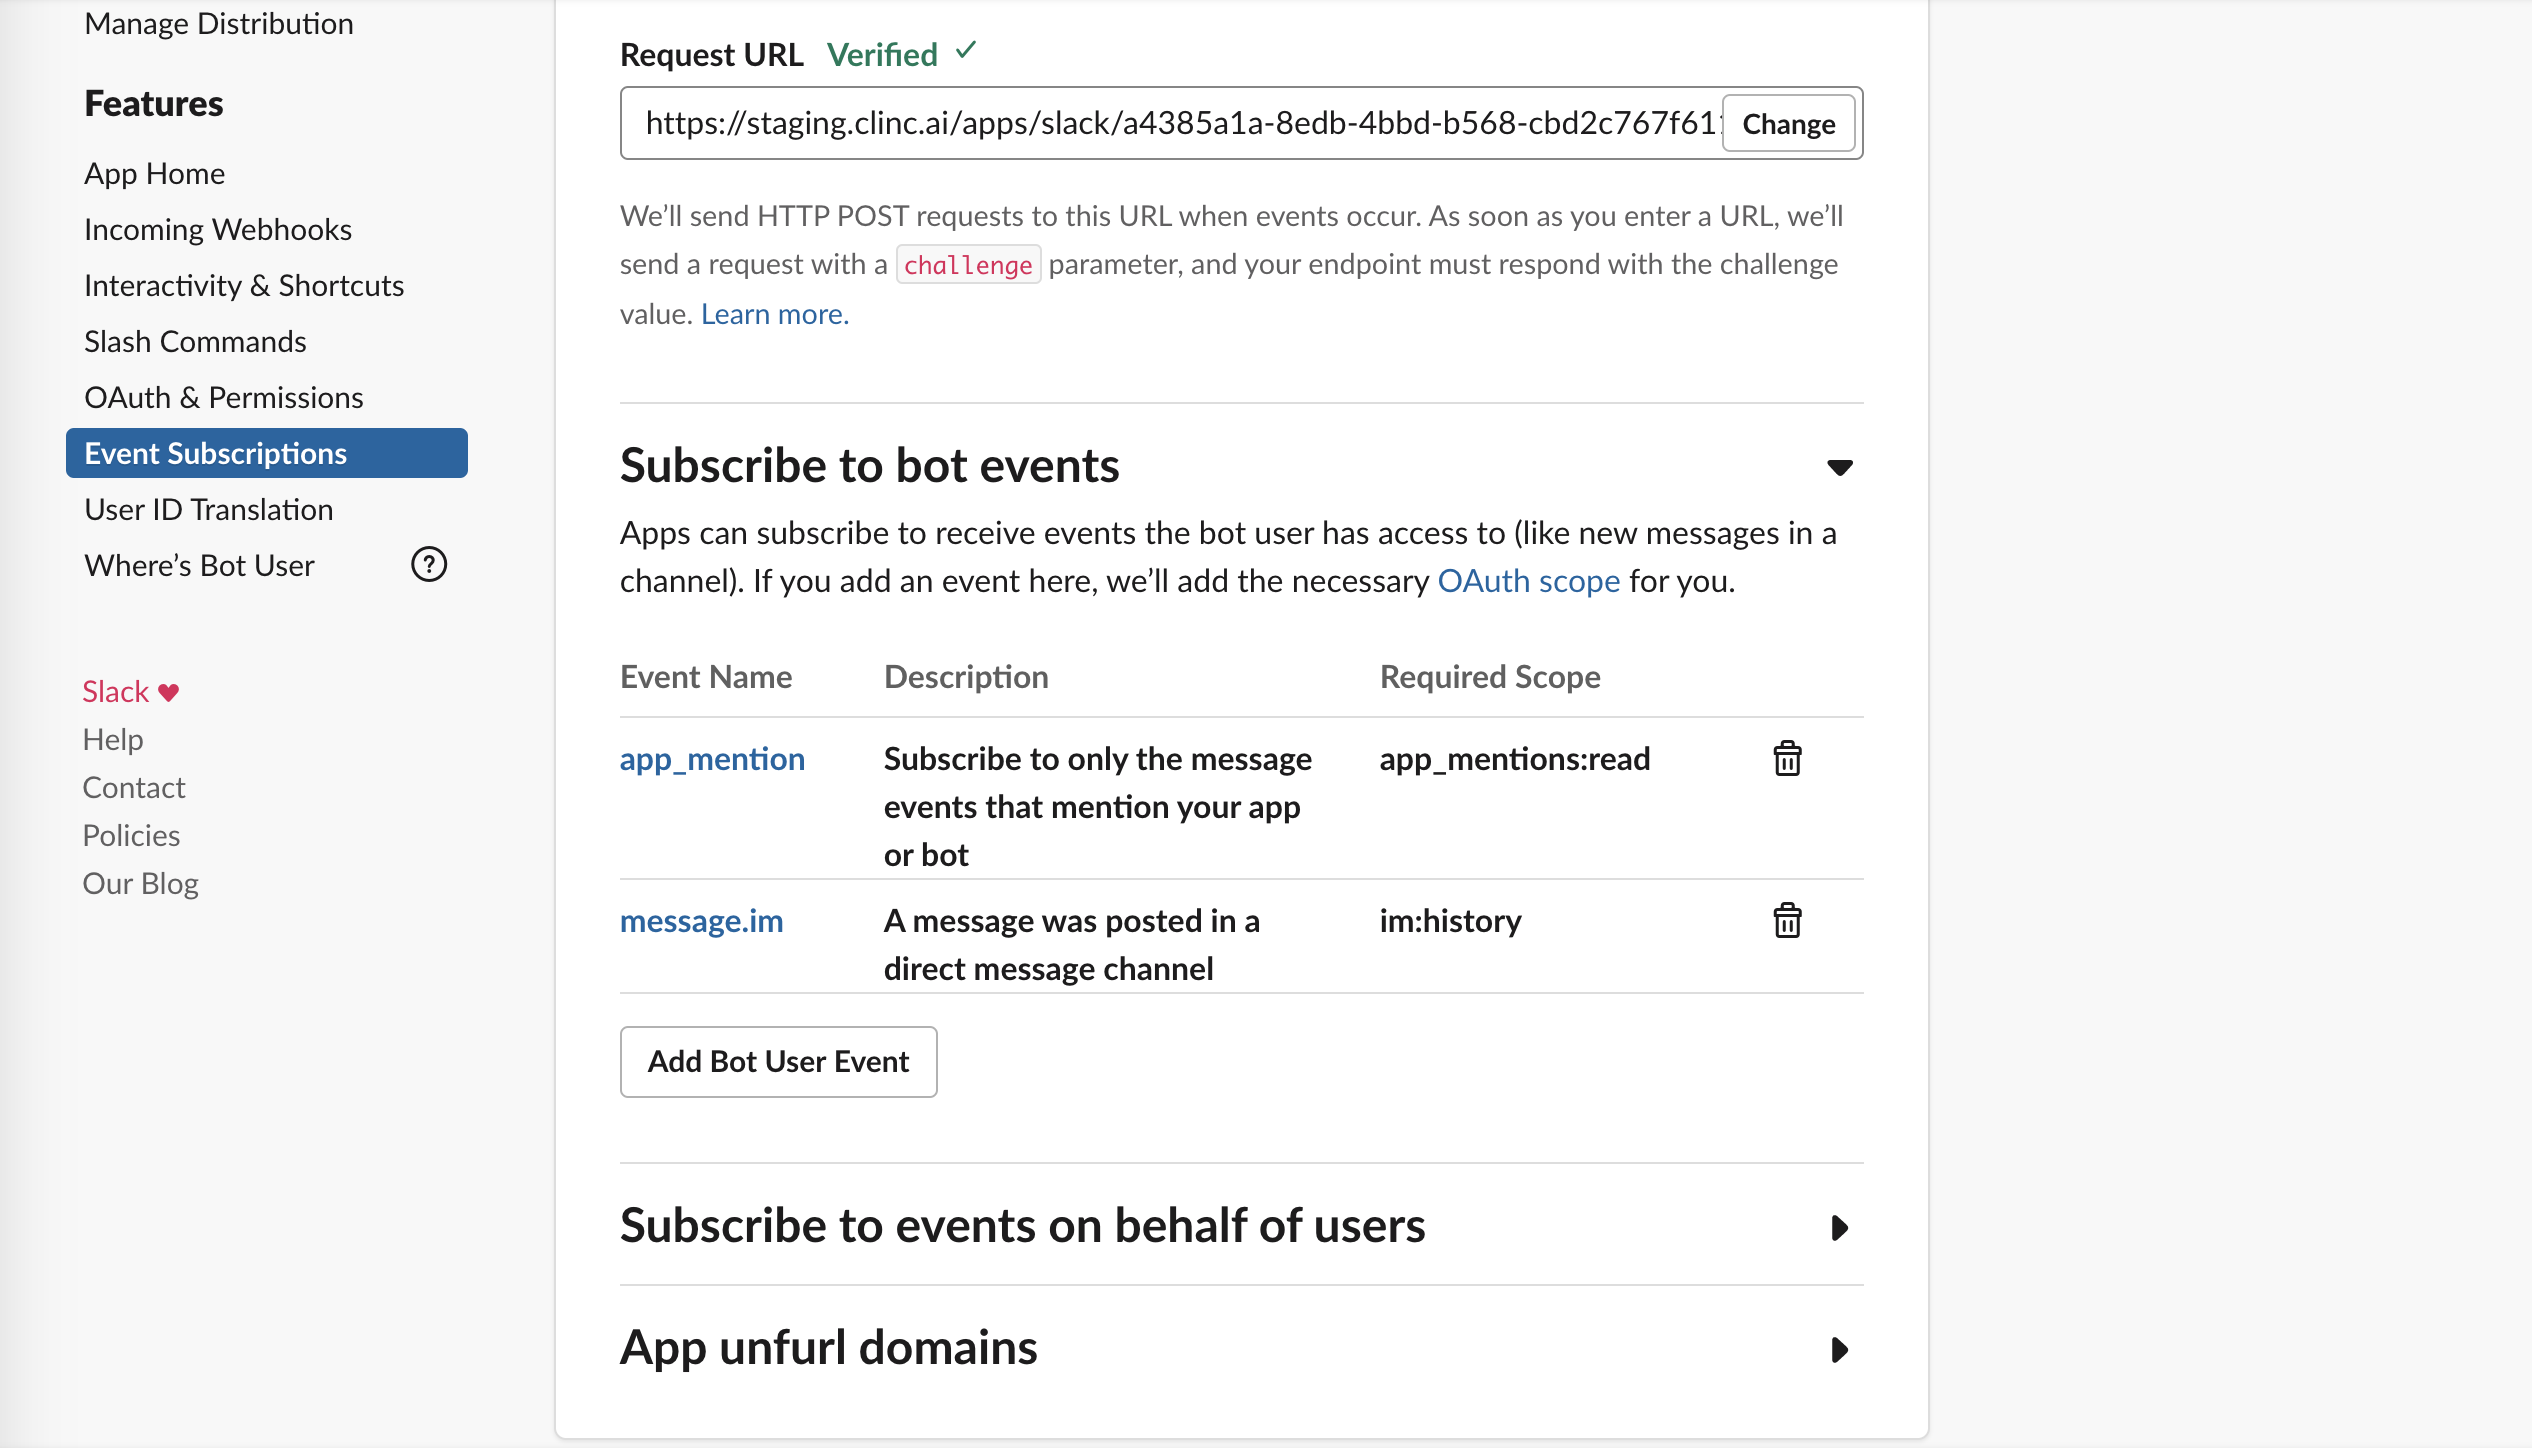
Under Subscribe to bot events, click
Add Bot User Event.Add the following required
Bot User Events:app_mentionandmessage.im.
Click Save Changes at the bottom of the page.
Go back to the OAuth & Permissions page under Features and click
Reinstall App.In the channel to which you added the app, invoke the bot by
@botname, then you can start to query it.
# Updating an existing Slack integration (pre-February 1st, 2020)
# Getting Started
Go to your app management page (opens new window) and select your bot that you need to update (created pre-February 1st, 2020).
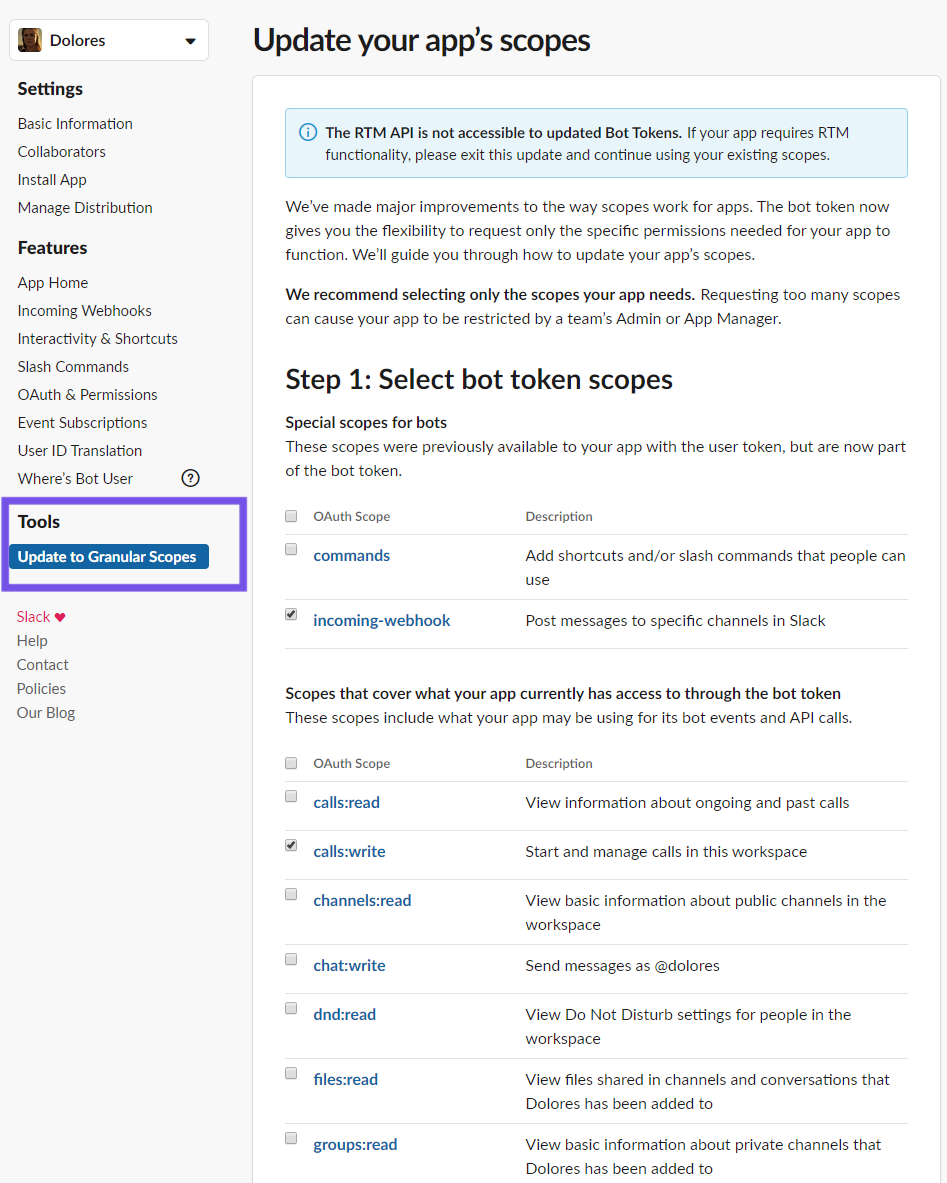
Click on the Update to Granular Scopes button under the Tools section to begin the necessary steps.
# Updating Scopes
- For Step 1 of the migration process.
- Under Special scopes for bots, check the required
incoming-webhookscope. - Under Scopes that cover what your app currently has access to through the bot token, make sure all scopes are unchecked other than the required
chat:writescope. - Under New scopes that are now available for bots, check the required
app_mentions:readandchannels:joinscopes.
Skip through Step 2 of the process.
For Step 3 of the process, verify that you have only the 4 required bot token scopes:
incoming-webhook,chat:write,app_mentions:readandchannels:join, and clickYes, migrate my app.For Step 4, click I've updated my app.
Go to the OAuth & Permissions page under Features and click
Reinstall your app.On the OAuth & Permissions page under Features, copy your
Bot User OAuth Access Token.
# Final Step
Go to the Integrations tab of the Clinc platform and select the integration that has the relevant Slack integration.
Click on your Slack integration under Channels and replace the eI xisting access token with your bot's
Bot User OAuth Access Token(which must start withxoxb), replacing the deprecatedOauth Access Token(which started withxoxp).
# Test Out Your Slack Integration
You can test out your integration in your workspace by referencing your bot user's name with the @ key in a channel or direct messaging your bot user.
Last updated: 03/31/2020