# Genesys IVR Integration
# Clinc Platform Setup
If you don't already have an integration, please reference How to create an integration.
# Creating Genesys Integration
- In the integration, select the Genesys IVR card under the Channels section to open the integration sidebar.
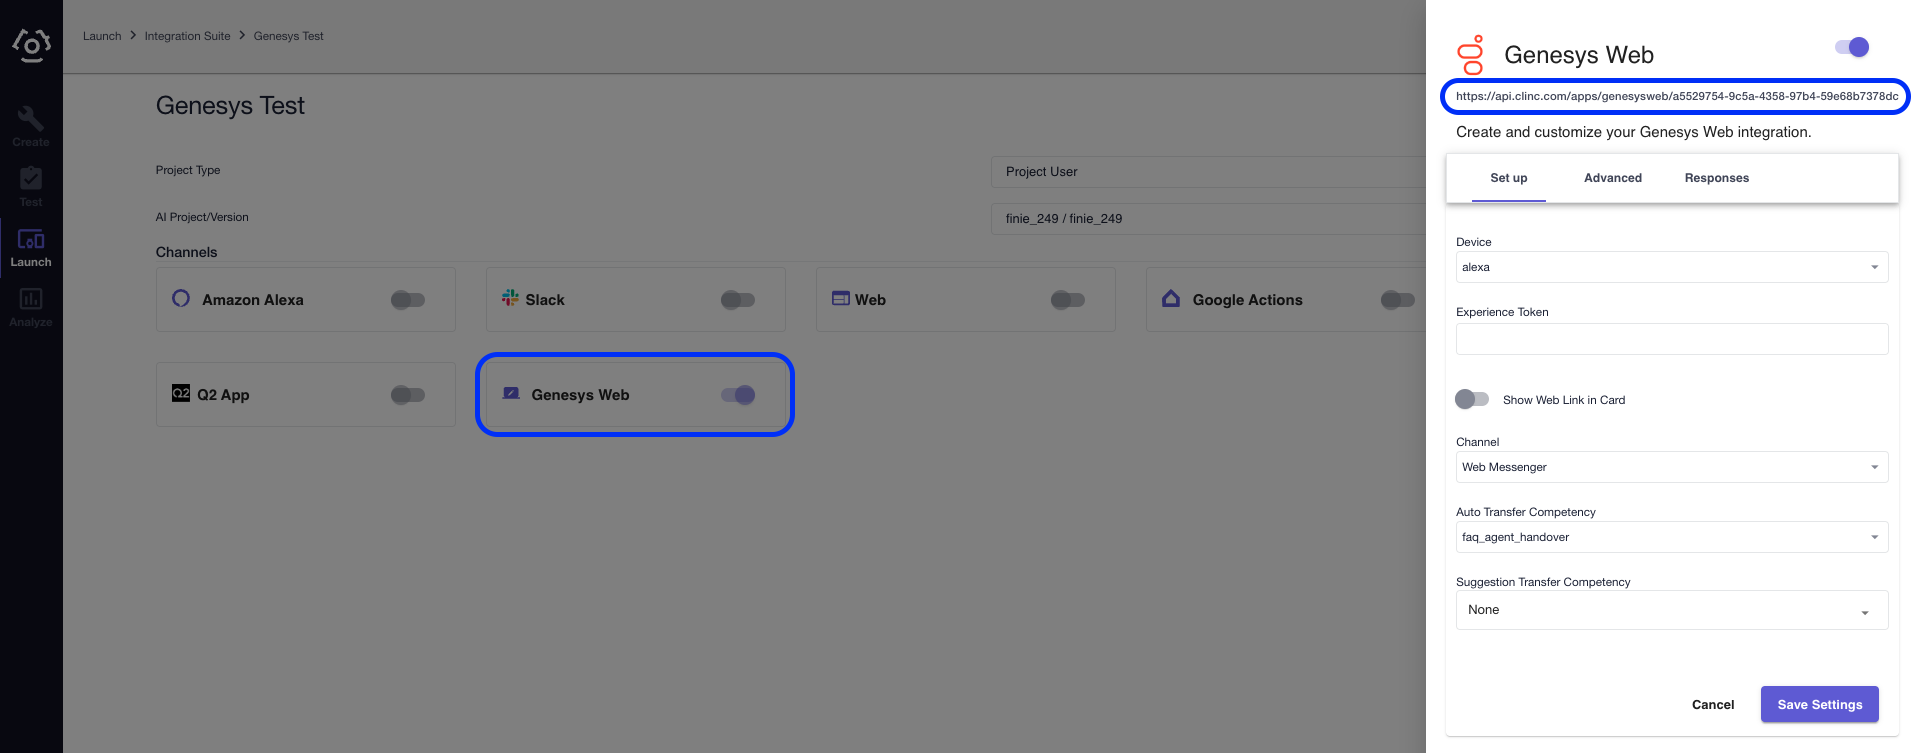
Configuration
Field Description Configuration Tab Device Select the device for the associated Clinc Personality Set up Experience Token Personality selection for supported AI Set up Language ISO 639-1 Code. Currently only "en-US" is supported. Responses At the bottom of the integration sidebar, click Save Settings.
Under the Channels section, click on Genesys IVR to reopen the integration sidebar.
Copy the ID at the end of the URL at the top of the sidebar. This will be used later in the documentation.
# Configuring Genesys SIP Trunk (BYOC Cloud)
Navigate to the Genesys Telephony/Trunks/ExternalTrunks configuration at https://apps.usw2.pure.cloud/directory/#/engage/telephonyAdmin/trunks. The URL may be different if you are in a different region.
Click Create New
Set values according to the table below.
- Values of “Any” are generic identifiers that need to be used later in the setup process, but the exact values can be anything.
- Fields not listed are assumed blank, disabled or default.
- Values of “Clinc Provided” should be referenced from the documentation provided by Clinc during UAT and/or Production releases.
- The following sections can be ignored in “External Trunk Configuration” (Transport, Identity, Custom, Diagnostics)
| Section | Field | Value |
|---|---|---|
| Base | External Trunk Name | Any |
| Base | Type | BYOC PBX / Generic BYOC PBX |
| Base | Protocol | UDP |
| Inbound / Termination | Inbound SIP Termination Identifier | Any |
| Outbound | Outbound SIP DNIS | 7002 |
| SIP Servers or Proxies | Hostname | Clinc Provided |
| SIP Servers or Proxies | Port | 5060 |
| Digest Authentication | Digest Authentication | Enabled |
| Digest Authentication | Realm | clinc |
| Digest Authentication | User Name | clinc_user |
| Digest Authentication | Password | Clinc Provided |
| SIP Access Control | Allow the Following Addresses | Clinc Provided |
| General | Max Concurrent Calls | Clinc Provided |
| General | Max Dial Timeout | 10 |
| General | Max Call Rate | 40/5s |
| General | Max Calls Reason Code | 603 |
| Media | Media Site | Any |
| Media | Preferred Codec List | G722 |
| Media | SRTP Cipher Suite List | AES_CM_128_HMAC_SHA1_80 |
| Media | Ringback | Enabled |
| Media | Disconnect on Idle RTP | Enabled |
| Media | DTMF Payload | 101 |
| Media | DTMF Method | RTP Events |
| Protocol / Header | Conversation Headers | Enabled |
| Protocol / (UUI). | UUI Passthrough | Enabled |
| Protocol / (UUI) | Header/Type | User-to-User |
| Protocol / (UUI) | Header / Encoding Format | Hex |
| * / Take Back and Transfer | Enable Take Back and Transfer | Enabled |
| Protocol / Outbound | Custom SIP Headers | See "Custom SIP headers" |
| Protocol / Outbound | Custom SIP Headers | See "Custom SIP headers" |

# Setup Genesys Number Plan and Outbound Route
- Nativate to https://apps.usw2.pure.cloud/directory/#/engage/telephonyAdmin/sites. The URL may be different if you are in a region other than usw2.
- Select the site you will be using with the previously created trunk.
- Navigate to the "Number Plans" tab and then clinc "+ New Number Plan".
- Give the new plan a name, and then select either "E.164 Number List" or "Number List".
- Based on your type selection add a desired and unused long or short number to the list. Remember this number for use in the following section.
- Create a unique classification that you will be using later and then click "Save Number Plans".
- Navigate to the "Outbound Routes" tab and then click "+ New Outbound Route".
- Give the new route a name and select the classification you created in step 6.
- From the dropdown list of Select External Trunks select the trunk created in "Configure Sip Trunk" section and then click "Save Outbound Routes".
# Setup Genesys Architect Inbound Callflow
Navigate to https://apps.usw2.pure.cloud/architect/#/inboundcall/flows. The URL may be different if you are in a region other than usw2.
Select the desired call flow which will initiate the transfer to the previous setup trunk.
Two separate actions should be added to the existing flow at the point the transfer should take place (this is usually a task or a menu option). These options are listed below.
- (Set UUI Data) This action can be found in the Toolbox → Data → Set UUI Data.
- Data that is set should be in the form "key=value;" This allows as much UUI Data to be set as needed by delimiting on the character ";".
- (Transfer to Number) This action can be found in Toolbox → Transfer → Transfer to Number
- The number used is the number created in the Configure Number Plan and Outbound Route section.
# Parse/Set UUI Data
# Outbound UUI Data
All outbound UUI Data formats will be provided by Clinc as needed.
# Inbound UUI Data
- The key "clinc_transfer_reason" is an enum with possible values (auth, agent, error). A value of "auth" in dicates the caller requires authentication to proceed further in the call flow. A value of "agent" inticates the caller desires to speak to a support agent. A value of "error" indicates that there was an unrecoverable error in the IVR process and has transferred back to the callflow.
- The key "clinc_transfer_call_history" is a List[String] containing a list of competencies the caller inquired about before transfer.
# Example Expressions
The following expression can be used to fetch the data of "key" that is being passed
GetJsonObjectProperty(JsonParse(Call.UUIData), "key")
The following expression can be used in a Genesys Architect Inbound Callflow to switch on the Enum "clinc_transfer_reason"
AreEqual(ToString(GetJsonObjectProperty(JsonParse(Call.UUIData), "clinc_transfer_reason")), "agent")